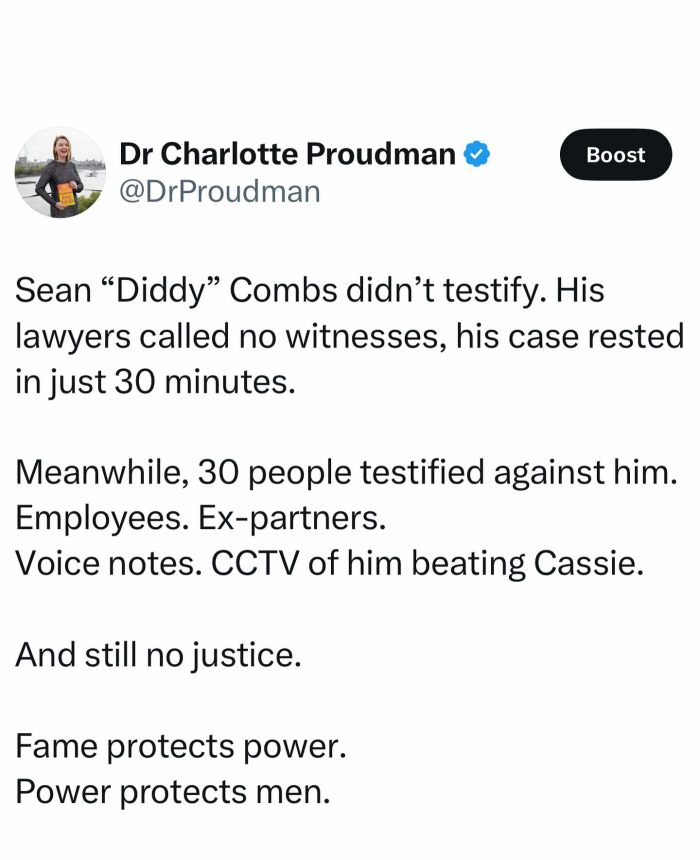
This is more evidence of the disconnect so many people have in how criminal trials work. If the defense does nothing in the trial and the person is still acquitted, that means only that the prosecutors didn’t meet their burden of proof.
If the defense doesn’t present a counter-case to the prosecution and the defendant is acquitted, that means the prosecutors presented a very bad case that was easily countered by cross-examination and redirect.
If the defendant is acquitted without presenting a counter-case, blame the prosecutors, not the “system”. Since they filed charges they ultimately couldn’t prove beyond reasonable doubt. They overplayed their hand. Something we’ve seen time and again when celebrities face criminal charges.
The Protection of Lawful Commerce in Arms Act provides for a lot of protections for gun manufacturers. The most broad protection being that gun makers largely cannot be sued when their products – pistols, etc. – are used in the commission of violent crimes. And there’s been a major push by the Democrat Party to rescind that protection and open up gun makers – e.g., Glock, Smith & Wesson, etc., – to liability for every instance of a violent crime wherein one of their firearms was used.
With the obvious intent of that push being to flood gun manufacturers with lawsuits and force them out of business.
Absent that rescission, there’s been a push for another legal theory: gun makers are instead accessories to the crimes in which their firearms are used. And stepping up to the plate on that idea was… Mexico.
Mexico sued all the major firearms manufacturers in the United States under the Protection of Lawful Commerce in Arms Act. In trying to weasel their way into one of the exceptions declared by that statute, Mexico alleged that those firearms manufacturers “aided and abetted unlawful gun sales that routed firearms to Mexican drug cartels” by failing to exercise “reasonable care” to see to it their products did not end up in the hands of people who would use them to commit crimes.
This is akin to car manufacturers being held responsible for drunk driving deaths for failing to take “reasonable care” to ensure their cars weren’t driven by drunk people.
But Mexico goes further in their allegations. Saying that the firearm manufacturers are “willful accessories” to unlawful gun sales by the FFLs who ultimately sold those firearms to the Mexican cartels – whether knowingly or not. Which is akin to car manufacturers being held responsible when a dealer sells one of their vehicles to someone with a history of DUIs.
And in trying to declare that the firearm manufacturers are “willful accessories”, Mexico claims the firearm manufacturers:
supply firearms to FFLs they know are making illegal sales of those firearms,
aren’t exercising control over any distribution networks to ensure firearms aren’t being provided to FFLs known to make illegal sales, and
make “design and marketing decisions” intended to stimulate demand for their products by people barred by law from having them.
Again, all of these allegations can be made against car manufacturers as well. Yet they aren’t.
And in a unanimous decision by the Supreme Court of the United States in an opinion written by Justice Elena Kagan – who isn’t known to be friendly to gun rights – the idea of holding gun manufacturers liable for crimes committed by people using their products is… largely dead in the water.
Now this still leaves open the possibility that Congress can rescind the protections Federal law affords firearm manufacturers, but that isn’t happening any time soon.
Back in… 2019, Proctor & Gamble made a bit of a marketing blunder with their Gillette brand with what became colloquially known as their “toxic masculinity” campaign. Now in the time since, Gillette has obviously not folded – despite all the chants from the “go woke, go broke” crowd – but they also haven’t repeated that mistake from what I’ve personally seen.
And for some fucking reason, a lot of people online are acting like Plex is now one of the worst companies in the world and Plex is one of the worst products around and are now saying “Switch to Jellyfin!” or something else.
And to that I say: calm the fuck down!
It’s been over 9 years now since I first built Nasira. And since first building it, I’ve been using Plex as a media server. First running it through the FreeNAS plugin, which worked… horribly, then running it through a separate virtual machine, and now as a Docker container on a larger virtualization server. For much of that time, I’ve had the Plex Pass – paying the $5 monthly, even though I could’ve easily bought the lifetime pass. And the reason I’ve had it is… largely threefold:
to have access to it through mobile – it would only allow you to preview media otherwise
sharing the library with my wife on her own Plex account, and
supporting the company
So let’s go over the recently announced changes. Starting with the price increase.
There’s been this trend recently where people act like no company should be allowed to raise prices at all. But it’s like… companies have costs as well. And that Plex has been able to put off raising their Plex Pass price for this long is commendable. It’s the first price increase in 10 years. And I’m sure it was a decision they didn’t want to make but largely saw no choice in making for the sake of their bottom line.
So let’s talk about remote playback, since this appears to have everyone’s panties in a bind. Again, Plex has underlying costs. And to enable Remote Playback, you need a proxy server of some kind to stream through. Plex is, obviously, providing that proxy server, meaning they need to operate and maintain it. Which isn’t free!
I’ve personally never used the remote playback feature because I have a self-hosted VPN – specifically Wireguard running on my router – so to Plex’s mobile app, it looks like I’m on the same network as the Plex server. I’m fully aware not everyone has that option. But the mobile app is what prompted me to get the Plex Pass in the first place, since the app wouldn’t play anything more than a preview even when on the same network.
Which is one of the limitations they’re removing. A limitation they never should’ve had at all, in my opinion, but it’s a limitation that got me on the Plex Pass to begin with – and probably the same for plenty of other users. (You always had the option of streaming through the browser.) And I personally don’t mind supporting Plex financially. I’m not someone who is always saying “If it’s not free, I’m not using it” or who denigrates a person or company wanting money for something that takes a lot of effort to produce.
Here’s the thing: you always needed a Plex Pass for remote playback. I don’t think that has ever not been the case, since, as mentioned above, that’s a service Plex is providing through servers Plex owns and operates. So if you could not set up a self-hosted VPN (e.g., restrictive ISP) and wanted to play your personal media on the road, such as while staying at a hotel, then you needed a Plex Pass. Same to download media locally.
What appears to be changing is remote playback… for other users. Now this is a change that won’t affect me because I’m grandfathered in. My wife has her own Plex account without a Plex pass. My Plex account with the Plex Pass is what controls on the server. My wife can stream media from the server to her desktop on her personal Plex account without issue. That isn’t changing.
And if she had ever wanted to, she could use Remote Playback as well without needing a Plex Pass because her account has had access to my server since before the most recent changes. (I don’t have Remote Playback turned on in the server configuration and never have, though.) But that is what Plex cut off when the service changes went active at the end of April.
With those new changes, in short, every user authorized to access a Plex server remotely through the Remote Playback service must have their own Plex Pass or Remote Watch Pass. The Plex Pass grants access to additional features, while the Remote Watch Pass is for streaming content only.
So what’s the problem? No, in all seriousness, what’s the issue here? The fact they decided to start charging for something previously offered for free? Get over yourself! If you’re seriously going to up and switch out your entire media streaming experience because Plex decided they needed to start charging for something, then you’re one of the small-minded people I alluded to in my Gillette article.
So why am I not switching away? First, none of the announced changes affect me except for the monthly price increase. And I have no problem paying monthly over buying the one-time Lifetime Plex Pass, since the monthly and annual passes give them a steady stream of revenue. I’m not even going to bother with buying the annual pass since that’ll only save me… $1.15 a month.
Plus, Plex… just works. Their mobile app… just works. Their desktop app… just works. (Provided you’re not trying to use the Linux version on Wayland with NVIDIA’s official drivers.) Aside from trying to use the FreeNAS Plex plugin at the beginning, I’ve literally never had issues. And the same with the Plex HTPC they briefly offered (and wish they’d bring back) that I ran off a Raspberry Pi to my television.
The only recent change I’m not fond of is requiring the separate PlexAmp app to play music on a mobile device. That was a little bit of a shock on my Memorial Day road trip, but pretty quick to get sorted once I had a moment to do so. Plus the PlexAmp app is slimmer anyway, being dedicated to just music.
So in the end… yeah, if Plex still work for you, stick with it. And buy the Plex Pass even if you aren’t using the features that require it just to give them money so they can keep paying developers to keep it rolling. I’ve stuck with it for so long and continue to financially support them because, again, it’s just worked. I would’ve switched it out long ago if that stopped being the case.
And to everyone else who is screaming about Plex’s recent changes and demanding everyone abandon it… calm down, go outside, and touch some grass and don’t go back online until you’ve regained the ability to think rationally…
Police officers have a bit more leniency under the law when it comes to use of force. And they do need it. In part to deter civilians from becoming vigilantes and acting like they can just decide the police aren’t doing their job and so will do it for them. But the more critical reason for that is, of course, in part of their role to protect the public at large.
No one individual is entitled to individual police protection. Instead society at large is entitled to the protection of the police in general by way of their role to enforce the laws and apprehend those breaking them.
But officers absolutely can and have gone too far. One such case is that of Roberto Felix, a police officer accused of doing just that when he shot and killed Ashtian Barnes.
On April 28, 2016, Felix pulled over Barnes on suspected highway toll violations. During the stop, Felix ordered Barnes out of the vehicle. Which an officer can at any time during a stop lawfully order a person to exit their vehicle, and they don’t need to articulate a reason to do it. And the person being ordered out of the vehicle must comply.
Instead of complying, though, Barnes attempted to take off. In response, Felix grabbed onto the window sill of the vehicle, drew his service weapon, and fired. Two shots hit Barnes, killing him.
Now in that additional leeway granted to law enforcement officers, including in the use of deadly force, they still have to justify their actions. They can’t just shoot someone without reason. So the question in this instance is, obviously, why? What caused Felix to fire on Barnes?
Unfortunately, though, the United States District Court and Court of Appeals for the Fifth Circuit foreclosed any inquiry into that with the Fifth Circuit’s “moment of threat” rule. In short that requires addressing just one question: was the officer “in danger at the moment of the threat that resulted in his use of deadly force”? Any event before that doesn’t matter. Only the moment of the shooting matters.
Yeah… no.
There is absolutely no way a civilian would be able to make that kind of defense, so it absolutely should be unavailable to law enforcement. And today, the Supreme Court of the United States made that the case. Unanimously.
The key issue with relying on the “moment of threat” rule is it forecloses any inquiry into any preceding events. Meaning… context is thrown out the window. The “totality of the circumstances” that comes into play in a civilian case where someone is claiming self defense. And now the “totality of the circumstances” will apply to all law enforcement officers.
This is both good and bad for law enforcement. For one, it’ll hold law enforcement to much the same standard as civilians when it comes to deadly force. They do still have more leniency under the law, since they are charged with defending the public as part of their duty to enforce the law and apprehend those breaking it. But in vacating the “moment of threat” standard at the Fifth Circuit for the greater “totality of the circumstances” standard that likely… everyone else presumed was the standard for reviewing law enforcement actions, it means the totality of their actions come into play, not just the few seconds before “shots fired”.
For Felix, this means he now has to fully explain why he shot and killed Barnes.
I’ve written before that law enforcement officers treat each traffic stop as if it could be their last. And this is not without reason. The number of individuals who hostily engage law enforcement – and, let’s be honest, a disproportionate number of those individuals are black – is very unreasonably high. That said, that alone does not give law enforcement officers clearance to use any force they want. Instead they still must act reasonably.
While their next traffic stop easily could be their last, they can’t go into that traffic stop with the presumption it will be. If a law enforcement officer fires on a civilian, they must be able to justify their actions, must be able to articulate what gave them reason to believe the individual they shot – whether or not the individual died as a result – was a threat of great harm or death to themselves or the public at large.
Doing this requires examining the “totality of the circumstances”, which the Supreme Court of the United States also emphasized as “no time limit”.
The case today was Barnes v. Felix, No. 23-1239, 605 US ___ (2025).
So about a month and a half after Epstein’s suicide. (And yes, I still firmly believe Epstein did kill himself.) Yet, as we see in the above screenshot, like with Epstein, many are basically saying that suicide is impossible with Virginia Giuffre.
Anyone familiar with the psychological dynamics of suicidality – on which I have… first-hand experience – will say that someone who says they aren’t suicidal can become suicidal in a shockingly short amount of time – even as short as a few months depending on life events and environment simply because… the human brain is very, very strange. That’s the whole “driving someone to suicide” thing, on which people have been successfully prosecuted – though such prosecutions are difficult.
And if you’re going to change your tune and say “Okay, she committed suicide, but [insert person you wish to accuse] drove her to it!” you’d better have plenty of evidence at the ready that isn’t just speculation or circumstantial.
Even someone who is suicidal or going through suicidal ideation can lie and say they aren’t suicidal. Suicide doesn’t play out how it’s portrayed in media. Someone who is suicidal can look surprisingly calm and collected, even “normal”. It’s one of the reasons the survivors of someone who committed suicide often have a hard time accepting the death is suicide – with “They didn’t seem suicidal” or “I didn’t realize they were suicidal” reactions not being uncommon – even when all the evidence points to it.
Like with Epstein, many so desperately want this to be a homicide. That her death cannot possibly be suicide, as if God himself is somehow making it impossible for her to kill herself… but that requires the kind of mental gymnastics that are characteristic of… leftists. Showing they’re little different from them in how they think, only different in what thoughts they hold.
Correction, the LAN card was upgraded to the ConnectX-3, but everything else has stayed the same.
Why not OPNsense (or pfSense)?
The router’s first incarnation was at the tail end of 2022, built using leftover AMD FM2+ parts, after I got frustrated both with Google Fiber’s router interface and MikroTik’s RouterOS… non-performance.
And in the 2+ years since, it’s become very apparent that… for a home router, OPNsense (and pfSense) is overkill. Very, very much so. And I don’t need… the vast majority of what OPNsense provides. I almost never log into the OPNsense front-end except for package upgrades.
But updates can end up looking like… this:
This was the proverbial straw in this instance. os-wireguard is the OPNsense Wireguard plugin. And it appears to have been replaced by something else. Meaning to upgrade OPNsense, I would need to back up my Wireguard configurations, remove everything Wireguard-related, upgrade, add the new Wireguard plugin, then add back my configurations, provided I could actually do that cleanly… Really?
Does FreeBSD not allow packages to be declared as replacements for something else? Good thing I haven’t needed to restore my router from a configuration backup… Anyway…
Routers are typically one-and-done like most servers. Once you have it set up and configured to your liking, there isn’t much need to pay it any mind except for periodic software updates. The virtual machine that serves this website, for example, is like that. Once I have everything on it that needs installed, there’s nothing more for me to do except keep the software up to date.
And those software updates shouldn’t require removing anything to upgrade them. Anyway…
Why Arch?
OPNsense, pfSense, and other similar distributions are built with general purpose in mind along with providing a clean, hopefully intuitive UI for configuration. (Though minus the “clean, hopefully intuitive UI” for VyOS.) They try to anticipate what you’re going to use based on feedback from their audience. This is, by the way, why Windows and a lot of Linux distributions (most distros anymore, it seems) don’t give you any option on what to install, pushing a pre-determined set of software.
Which is why I looked to Arch.
Arch provides two significant benefits: it’s lean, and it’s a rolling release. The latter means I don’t have to worry about a distro going end-of-life, like what’s happening with Ubuntu 20.04 LTS in April 2025. Meaning I don’t have to worry about replacing an entire distribution to keep everything up-to-date, with the downtime that comes with that.
Which is a consideration for OPNsense and pfSense, since both ride on FreeBSD, which are definitely not rolling-release operating systems. And while OPNsense’s upgrade is typically pretty smooth, it isn’t perfect – see the above screenshot. In all seriousness, though, if OPNsense migrated everything to sit on top of Arch – similar to how TrueNAS created SCALE, which rides on top of Debian – I think they’d be much better positioned given the far superior hardware support the Linux kernel offers. Along with not needing to create a magic file to enable the Mellanox driver.
Then there’s how lean you can make an Arch installation.
The base installation instructions on the Arch Wiki start you with only three packages: base, linux, and linux-firmware (plus their dependencies, obviously). You add whatever you need on top of that – and you’ll definitely need more than just that. But it’ll probably surprise you how little you need for a router.
The final install footprint for this project is… under 3GB. Tempting, then, to run this off a USB drive but, for the sake of stability and performance, especially reboot performance… definitely don’t do that. There’s a reason even TrueNAS doesn’t recommend doing that anymore. And I initially ran it that way until switching to an SSD when the USB drive started showing issues.
Though if you really wanted to take things to the edge (pun intended), you could rebuild the kernel with it stripped down to the essentials and nothing more.
But that tiny install footprint also means… updates are wicked fast. You can update the packages and reboot in a few minutes. OPNsense was never that quick.
Who is this NOT for?
I need to stress that this is NOT a project for the inexperienced. At minimum you need to be comfortable with Linux.
And reasonably comfortable with Arch. The install steps aren’t written with the expectation you’re daily driving it, you should be familiar with Arch’s concepts and how they differ from the other root distributions like RedHat and Debian so you can, at the least, keep it up to date. If you’ve never installed Arch to even a virtual machine to create a simple web host or even a desktop for limited purpose, get comfortable doing that first.
And you absolutely need to be familiar with IP networking concepts – e.g., IPv4, DHCP, DNS, subnets, etc.
Setting it up
All the scripts and configurations I created to set this up are over on Github, along with the instructions for setting this up for yourself.
For Dynamic DNS updating, there are a few options available. OPNsense relied on ddclient, so that’s what I kept. And I migrated my previous Wireguard configuration as well – thankfully it wasn’t difficult to do by hand. Though without a UI, adding another Wireguard configuration will be a little more involved, but not substantially difficult.
Which, in the end, OPNsense is really just a UI on top of existing services.
I’ll preface this by saying that I’m no longer using OpenMandriva. I switched to openSUSE Tumbleweed after dealing with some rather interesting instabilities over the couple weeks I used it. But a few of the tings I discovered are likely not specific to OpenMandriva.
I already said in my previous article that photography is one of the reasons I’m keeping Windows 11. And it seems I might have another to add to that list:
VC1 support
I have a DJI Osmo Action 4. Great little action camera that I use as a body camera with a modified chest harness. And I have the camera configured to record video at 4K 60fps in HEVC and 10-bit color. The Osmo Action 4 uses VC1 to encode its video when in HEVC mode – which it requires when recording in 10-bit.
I can review the VC1 footage without issue in VLC on Windows. On Linux… it’s unplayable.
And this is a long-standing issue as there are articles and threads going back years about this. The only option is… converting it to H.264 or H.265 first. 4K UHD Blu-Rays are encoded in H.265. But some HD-DVDs used VC1, so I may have a few movies to my NAS to convert.
The Osmo also records an LRF – low-resolution file – that does play in VLC without issue, so those can be used for footage review and skipping through to find where to make cuts.
Clipboard and Printing
Turning OFF clipboard history in Plasma solved most of my clipboard problems. There are still a few periodic quirks, but for the most part it’s now cooperating. And I think those annoyances are more caused by the X11/Wayland boundary.
I didn’t bother trying to figure out the printer.
Brave on Wayland
I mentioned in my previous article that I chose OpenMandriva’s Plasma6 on Wayland installation. And… Brave had some interesting issues on Wayland. Easily the most frustrating was the window rendering being… off, wherein the tab bar at the top would fail to render properly as if the entire window was shifted up. Usually minimizing and restoring the window would correct that, but it was annoying to have to do.
Another issue was positioning the mouse cursor so it was over the lowest edge of a web page, and it would auto-scroll the page down. And it would do this even if the browser window in question was not top-level.
There’s an experimental flag to enable by going to brave://flags/#ozone-platform-hint and setting that option to Auto or Wayland and restarting the browser. That eliminated most of the issues, but there is still an interesting rendering glitch where a tab will be blank when restoring a window or switching to that tab.
NVIDIA
I think I’ve got a pretty good rhythm on this now and have figured out the workflow that allows me to keep the kernel and driver in sync.
First, as mentioned in my previous article, I have the kernel packages excluded from update so I can keep everything but the kernel updated.
Also using OpenMandriva ROME in VMs allowed me to keep an eye on when kernel packages get updated so I can choose when that’s going to happen. I’m not concerned with keeping the kernel “bleeding edge”.
And because… if it can be scripted, it should, since until my two reported issues are handled (here and here), this will be the norm for installing the NVIDIA driver on OpenMandriva:
#!/bin/bash

if [ -z "$1" ]; then

    echo Did you intentionally forget the path to the NVIDIA installer?
    exit

fi

# Just to get this out of the way...

sudo true

if ! sudo true ; then
    exit
fi

# resolve_btfids is installed at /usr/bin when installing the
# kernel-source package, so link to it

sudo ln -rfs /usr/bin/resolve_btfids /usr/src/linux-`uname -r`/tools/bpf/resolve_btfids/resolve_btfids

# Create a symlink for vmlinux

cd /usr/lib/modules/`uname -r`/build/
sudo ln -fs /sys/kernel/btf/vmlinux vmlinux

# Circle back to the downloads folder and run the NVIDIA driver installer

cd ~/Downloads
sudo $1 --no-rebuild-initramfs --no-nouveau-check --skip-module-load
Note that this again requires these packages also be installed: kernel-source, kernel-desktop-devel, clang, libglvnd-devel, and pahole.
And this is the order of operations for updating the driver, whether due to a new driver or a new kernel:
Modify the grub.cfg file directly to re-enable Nouveau only for the console mode entry
Reboot to the console
Comment out the dnf.conf line to allow the kernel packages to be updated
Update the kernel packages and anything else out-of-date
Reboot back to the console, following again on step 1
Un-comment the line in dnf.conf to disable kernel package updates
Run the above script to install the NVIDIA driver
Reboot back into desktop
I’ve noticed that periodically I’ll get some video glitches as well, or one of my monitors will just completely disconnect and reconnect. No idea what’s going on there, but it’s one of two things: Wayland or OpenMandriva’s kernel being compiled with LLVM instead of gcc. Speaking of…
Gaming and my controller
I pulled Steam through Flathub to give it a go since, you know, everyone keeps saying Linux gaming is either on-par with Windows or… somehow better. That very much depends on what you’re talking about, but Windows gaming is still better and anyone who says otherwise is either delusional or grasping at any tiny data point – like FPS – they think proves their overall idea. Anyway…
Haven’t tried much in my library yet, but I did want to get my controller working.
There is a reverse-engineered driver available that unfortunately does not appear to be kept up to date anymore – the last commit was in early 2024, as of this writing, and there are several open pull requests to fix build issues with newer kernels. But one of that project’s forks is being kept up to date. So I pulled the code.
Again, OpenMandriva’s kernel is built using LLVM, not gcc, making them very much an outlier as of this writing. NVIDIA’s driver package already accounts for this… edge case. Thankfully the adjustments weren’t all that difficult to figure out once I found the Linux kernel resource about LLVM.
And after building and installing, along with confirming my controller was working with the code – testing with Steam and PCSX2 – I submitted a pull request for the build changes. If he doesn’t accept the PR, I’ll likely just fork his repo and keep it synced but for the LLVM change.
Switching distros
I ran into so many strange instabilities with OpenMandriva that I decided to jettison it for something else. I went looking at other rolling distros, even for a short bit considering Manjaro and Arch, until settling on openSUSE Tumbleweed.
The blame here lies in one of two camps, perhaps both: the LLVM kernel build in OpenMandriva, or the NVIDIA driver either not being completely stable when built using LLVM or not playing the greatest with Wayland.
So why Tumbleweed? Well, for one it’s considered the most stable rolling release Linux distro, and I wanted to stay with rolling release. I had looked at Tumbleweed initially, but had some difficulties trying it out in VirtualBox initially.
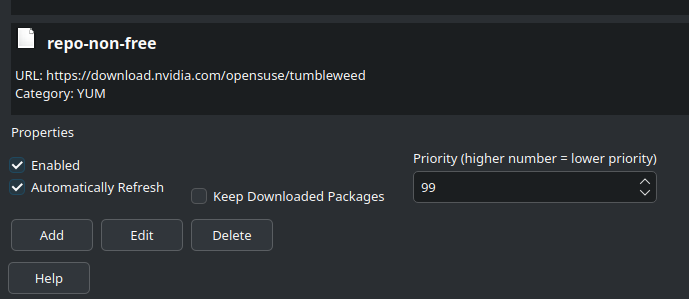
This brings my Linux experience back around nearly full-swing as well. While I started with Mandrake 6, later Caldera 2.something and RedHat 6.1, I would settle on SUSE for a while. And what brought me back was seeing this:
NVIDIA has an official repository for openSUSE Tumbleweed. No need to build the driver. No convoluted steps to keep the driver up to date. And the fact Tumbleweed’s kernel release isn’t built using LLVM meant I didn’t need to do anything special to get the xone driver built and installed.
I only wish they also had the Brave repository as a “community” repository option in YaST so I didn’t need to add the repo manually. It ships with Firefox by default. I’ve been using Brave for a couple years, long before the current drama. And I had been a regular Firefox user on Windows since it was initially called Phoenix, then Firebird, while I was in college.
Yes, kids, Firefox is that old. And the Mozilla name is older still.
The only thing about Tumbleweed on which I’m not a fan is it installs Plasma6 onto X11, not Wayland. There isn’t even the option to select Wayland for Plasma6, but they do give that option for GNOME. (Correction: it installs both X11 and Wayland, and you select which you want from the login screen.)
This is for the better, honestly. Plex Desktop (through Flathub) on Wayland with the NVIDIA proprietary driver does not work. And plenty of other applications also have issues unless you tell it specifically through a config option that you’re on Wayland. (See above about Brave on Wayland.) NVIDIA’s driver also overall seems to be more stable and better support X11 as well.
I also haven’t noticed any issues with the clipboard. So far. But what I did notice is the printer working on the first go when I installed HPLIP.
So yeah… OpenMandriva definitely has… issues. But when you’re talking about a distro with nowhere near the user base of the big players – openSUSE, Fedora, Ubuntu, etc. – it’s not all that surprising. The ones who’ve been using it the longest may not have issues, but as more and more newcomers switch over to it, any issues they do have will become a LOT more apparent. So hopefully there are plenty of people willing to contribute PRs and file bug reports. Personally I decided to just find something that works.
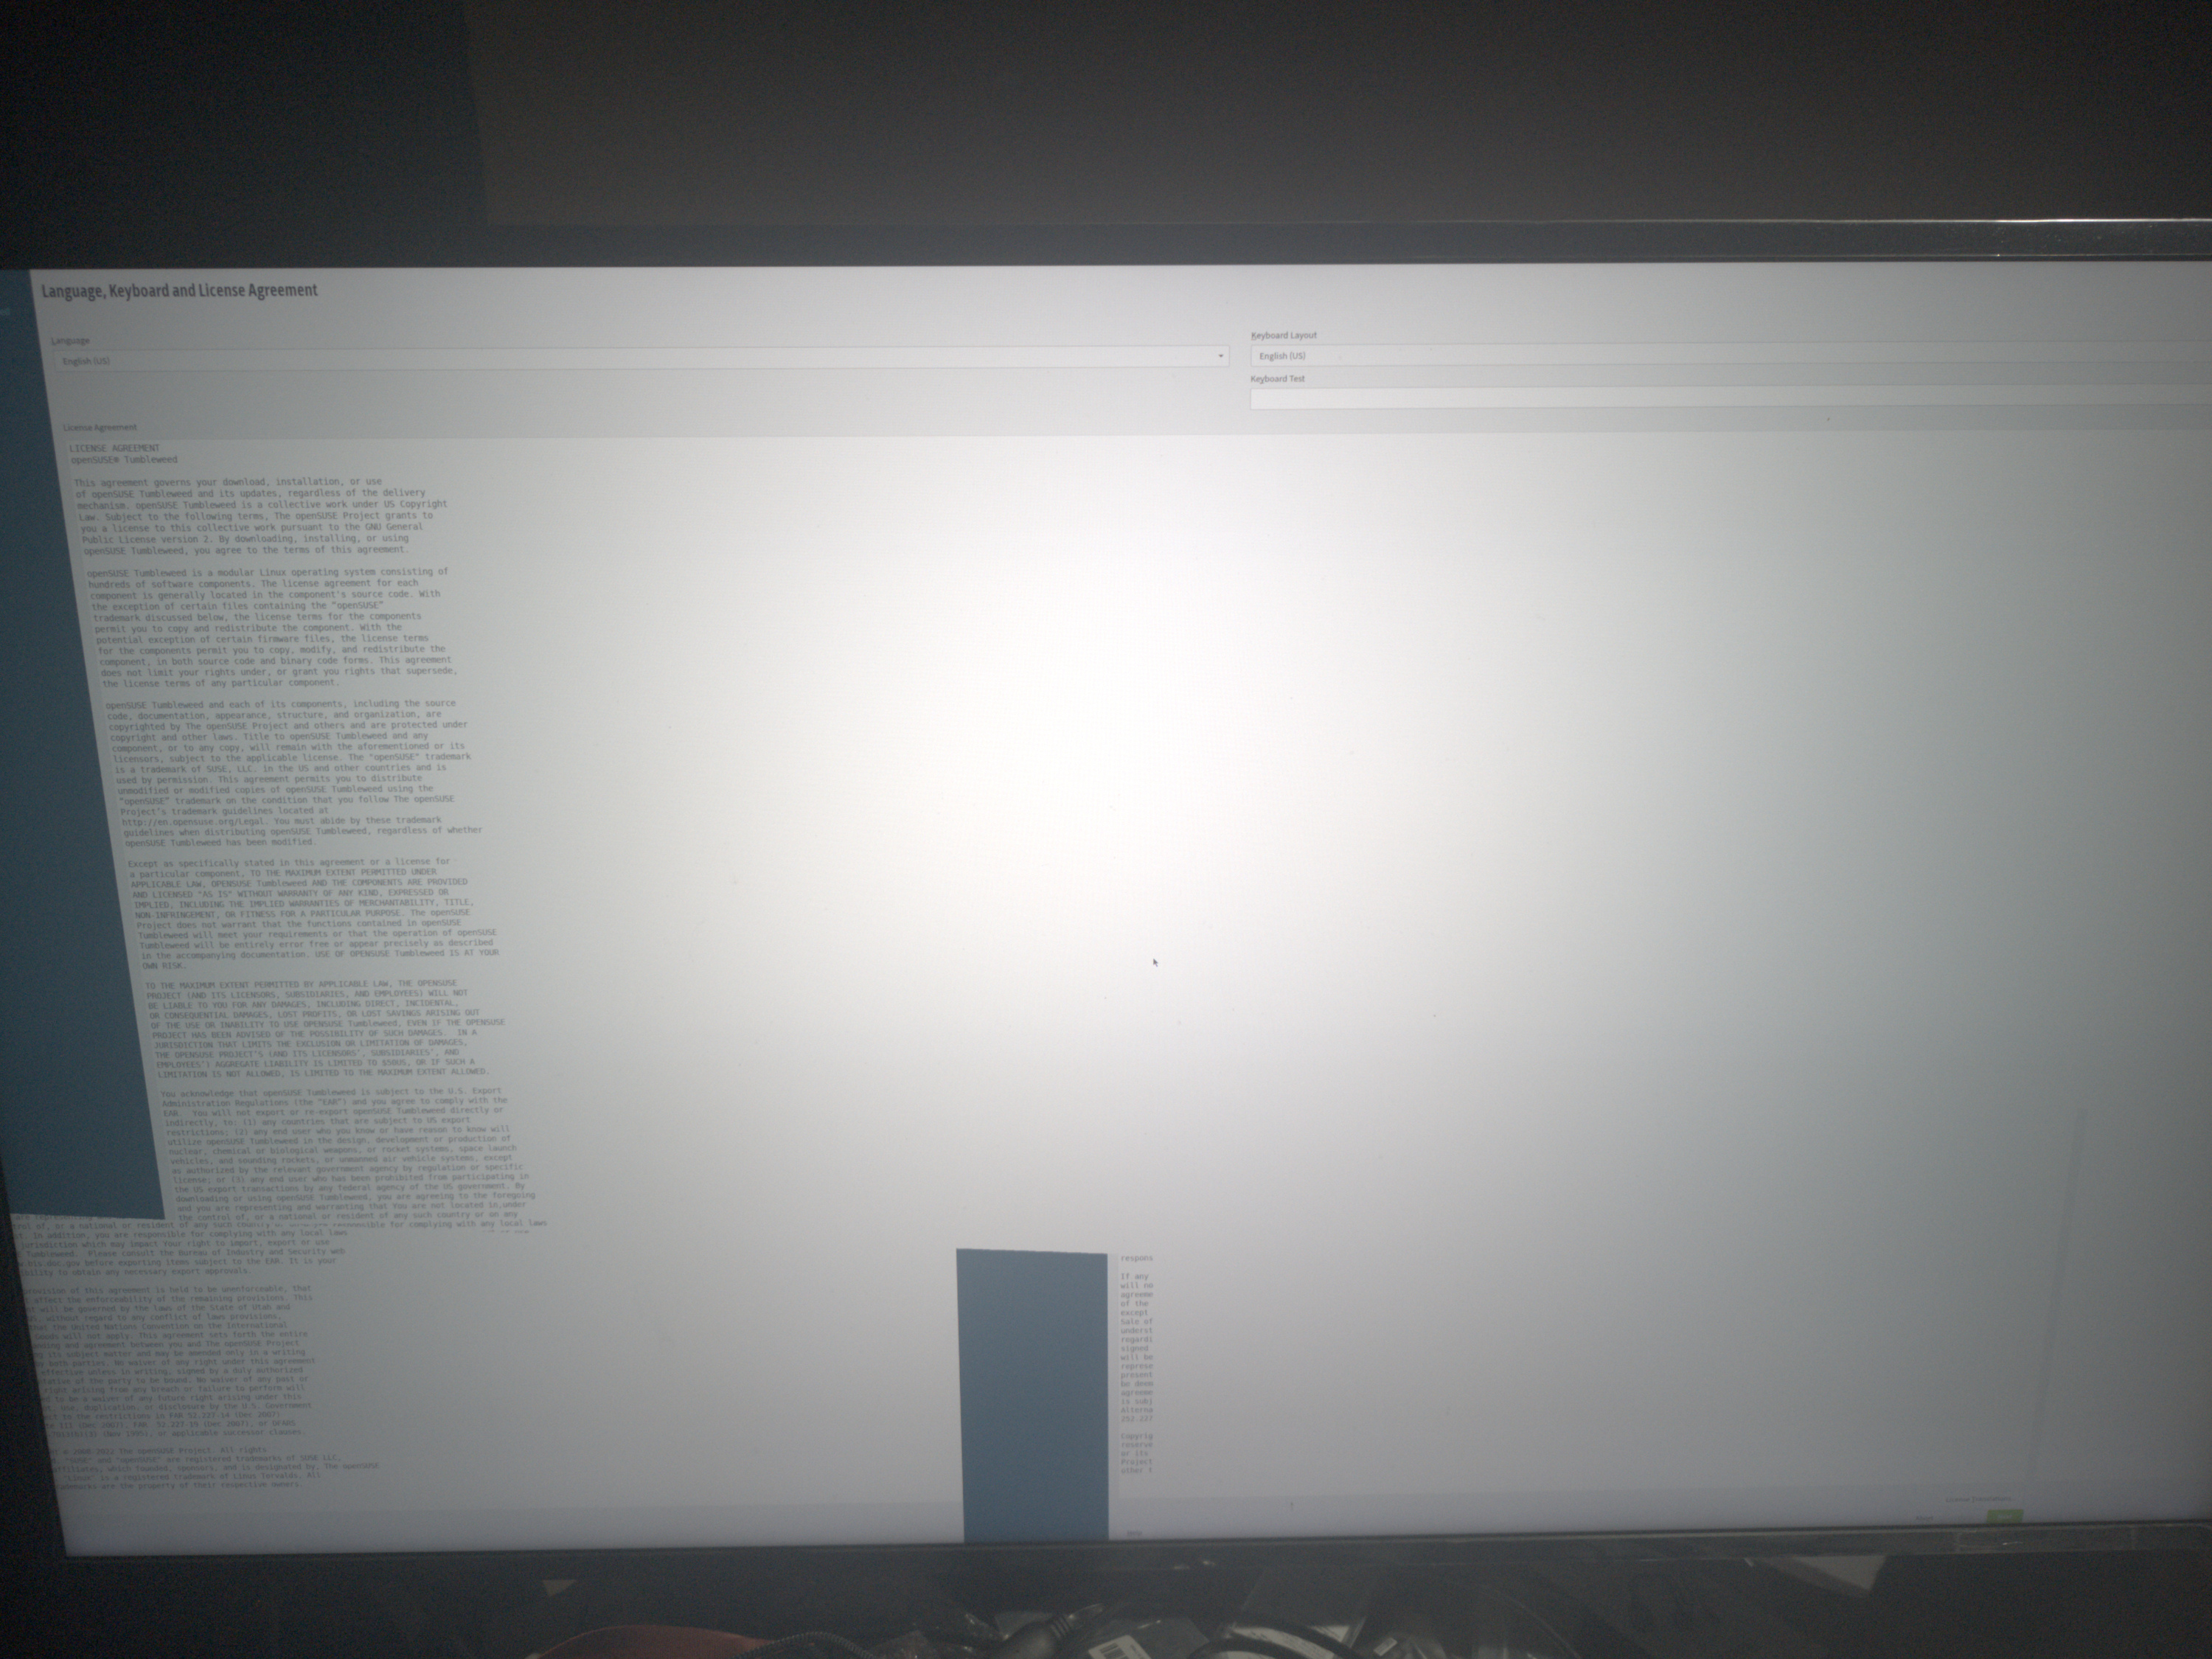
Which it wasn’t all sunshine and roses with Tumbleweed since trying to install it confirmed the Nouveau driver is trash:
This doesn’t really bode well for Linux adoption…
Since I’m using 4K displays, Tumbleweed’s installer defaults to that: 4K at 60Hz. And I get some… interesting display corruption with no option – or at least one that’s obvious that I can see – to change the resolution and refresh rate for the installer. And since it defaulted to that in the installer, it defaults to that in the desktop as well, meaning I had similar display corruption on the desktop. Dropping the refresh rate cured the issue while I figured out how to install the NVIDIA driver through the repo above.
But let’s put a few things into perspective here. 4K@60Hz has been an option for nearly a decade, with NVIDIA’s cards leading the front on bringing 4K gaming to the desktop with the GTX 1080 back in 2016, with the 1080 Ti solidifying their position on that in 2017. Again, I’ve personally been using it since 2021.
So why the fuck does the Nouveau driver NOT support that option without display corruption? In all seriousness, there has to be someone working on the Nouveau driver with a 4K@60Hz display, right? Right?
Sure if you’re using an NVIDIA card with Linux, chances are you want the proprietary driver anyway unless you’re using an older NVIDIA card (like the GT620 in my NAS). So at least Tumbleweed makes that easy to incorporate – again it’s the reason I switched over.
But that is what I saw merely trying to install Tumbleweed, and then saw it again after I got to the desktop. I had an idea on what to do to get around the issue. A lot of people new to Linux, though, won’t. And it’s shit like that which pushes people away from Linux. And telling those of us with NVIDIA cards to switch to AMD isn’t an option.
And I had similar display corruption with OpenMandriva’s Plasma6 on Wayland install, but it wasn’t consistent. And like with Tumbleweed, the issue went away entirely after installing the NVIDIA driver. Mostly. There was still something… interesting about using the NVIDIA driver on an LLVM-compiled kernel that still meant things weren’t playing completely right.
I’m going to play devil’s advocate here on the part of the repair business since “scam” gets thrown around way too much anymore. A “scam” would be charging $275 and NOT fixing the issue. Or getting the diagnosis completely wrong and demanding more money to set it right.
First, though the pad is a ground pad, it exists for a reason as part of the HDMI spec, and it’s to spread out current. So it is not true that “it’s not even really needed”. Sure the connector will function without it, but it should still be connected.
And retaining $75 for trying to diagnose the issue isn’t unreasonable. The time it takes to take apart a PS5 is still the repair tech’s time. He had to tear apart the PS5 to get to the mainboard and HDMI port, then he removed the HDMI port and saw there was a missing solder pad. The console owner paid $175 in advance, and probably signed a contract acknowledging he may be charged more and was given a quote. That he would need to reroute the missing solder pad is additional cost beyond what he initially quoted.
So $275 to tear apart the PS5 to get to the mainboard and remove the HDMI port. That’s time and incidentals going into this. Plus time to reassemble the PS5 and test the console to make sure the repair worked. How much is that time worth? You can’t act like the repair business isn’t out anything merely trying to diagnose the issue.
And to everyone like “OMG, why don’t you name and shame the shop that tried to SCAM this PS5 owner?” One simple reason… DEFAMATION LAWSUIT. What the repair shop is demanding isn’t unreasonable given what’s needed to repair the PS5.
If you ever want a damned good reason to never consent to a police search of your phone or other electronic device, take this case out of Oregon recently decided by the Ninth Circuit. First a few facts.
Tyler Smith is a deputy with the Grant County Sheriff’s Department in Oregon. Haley Olson is his girlfriend. But they were keeping their relationship under wraps. Olson drove into Idaho and was arrested for marijuana possession. While in custody, she signed a form that waived her Fourth Amendment rights and granted Idaho police permission to search her phone, and the internal storage was cloned.
Let’s sidebar for a moment.
I’ve said before that your consent is the government’s absolute defense to the Fourth Amendment when it comes to a search without a warrant. There are very few exceptions to the warrant requirement, none of which would’ve applied here.
And combining the Fourth and Fifth Amendments is an exception called the “foregone conclusion” doctrine. In short, absent your consent, law enforcement must be able to articulate what crime they are investigating, what evidence of that crime they expect to find on your phone, and what evidence – testimony or something tangible – gives them reason to believe that evidence exists. I discussed that when discussing whether the government can compel you to unlock your phone. (Short answer: yes, but they have to satisfy the foregone conclusion doctrine first.)
But again, that’s absent your consent. In the above, scenario with Miss Olson, she consented to the search, so the Idaho State Police imaged her phone. Again, do not consent to a search. Let the police hold your phone while trying to get a warrant. Since consenting to a search means also consenting to whatever they find being used against you in a Court of Law.
But consenting to that search definitely does NOT mean she consented to… everything else that allegedly happened with what they found.
Unfortunately Miss Olson wasn’t able to get satisfaction out of the Courts. The Ninth Circuit ruled that, while there was clearly a violation of the Constitution, since no one beyond the Idaho State Police had reason to be in possession of the phone’s storage clone, the police officers and prosecution officials who participated in that are protected by qualified immunity.
So, again, another reason to never consent to a search.
Two things to say up front before getting into Rep. Ocasio-Cortez’s recent letter to the Attorney General. First, it is not a crime to inform people of their rights under the Constitution. And second, illegal aliens do have rights under the Constitution.
On the second point, one thing so many people seem to forget is the Federal government is indiscriminately restrained by the Bill of Rights and the rest of the Constitution. As I’ve pointed out on this blog before, there is nothing in the Constitution limiting the protections of rights only to citizens or legal permanent residents.
So let’s get into the details.
Representative Alexandria Ocasio-Cortez (NY-14) sent a letter to the Attorney General of the United States requesting clarification on whether the Department of Justice is pursuing a criminal investigation against her. This stems from a webinar she held on February 12 called “Know Your Rights”:
I’ve mentioned an organization on this blog called “Flex Your Rights” and their two videos informing you of your rights under the Bill of Rights when it comes to interacting with law enforcement.
Now what Ms Ocasio-Cortez released, both a pamphlet and her above webinar, is no different from the above videos with one exception: it explicitly calls out ICE and is targeted to helping illegal immigrants and migrants. Something many have called “aiding and abetting”.
And in response to the webinar, Tom Homan, the Executive Associate Director of Enforcement and Removal Operations (ERO) and the “Border Czar”, threatened an investigation for obstructing law enforcement, saying on Fox News: “I’m working with the Department of Justice and finding out. Where is that line that they cross? So maybe AOC is going to be in trouble now.”
But, again, the Representative did nothing wrong here.
It is not illegal to inform someone of their rights. Doing so is not “practicing law without a license”, something I’ve seen asserted countless times. Nor is it obstructing law enforcement. If I walk by someone who is in handcuffs while the police are processing them and inform them of their Fifth and Sixth Amendment rights, those officers cannot then turn around and arrest me. They absolutely can tell me to go away. But they can’t arrest me for merely informing someone of their rights, even if the person I’m informing is under arrest and in police custody!
I could make up my own pamphlet and walk into the inner cities, talking to gang members and illegal immigrants, distribute the pamphlet and hold conversations with people informing them of their rights. And absolutely nothing in the law can stop me from doing that.
People knowing their rights impedes law enforcement. And many conservatives treat that as a bad thing. I’ve pointed out several times on this blog cases where police have done some… shady things to circumvent the Constitution. Such as the cases of Timothy Bass and Jimmie Bowen. And even defending the Boston Marathon Bomber’s right to remain silent.
Again the Constitution indiscriminately restrains the government. The Bill of Rights is supposed to impede law enforcement. And the more informed everyone is of their rights, the better. And contrary to a very popular belief on the right, illegal aliens are still protected by the Constitution. That is why there is a “due process” they are entitled to per the Fifth Amendment before they are deported.
Again, Ms Ocasio-Cortez did not violate the law by hosting a webinar informing people of their rights. She is absolutely protected by the First Amendment here.


You must be logged in to post a comment.