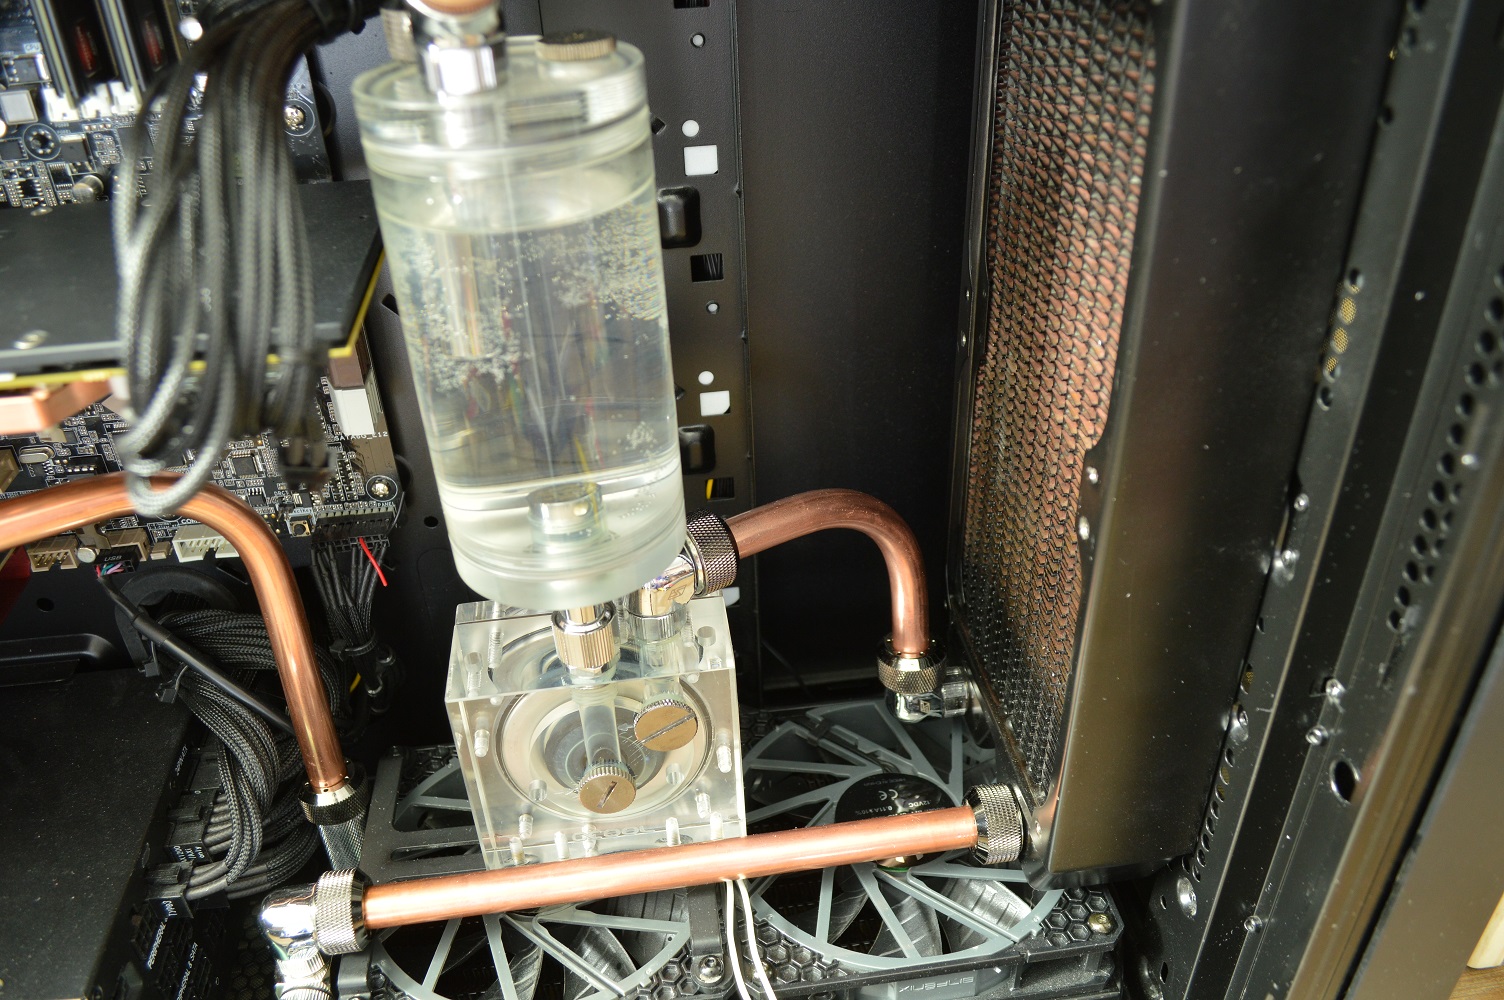
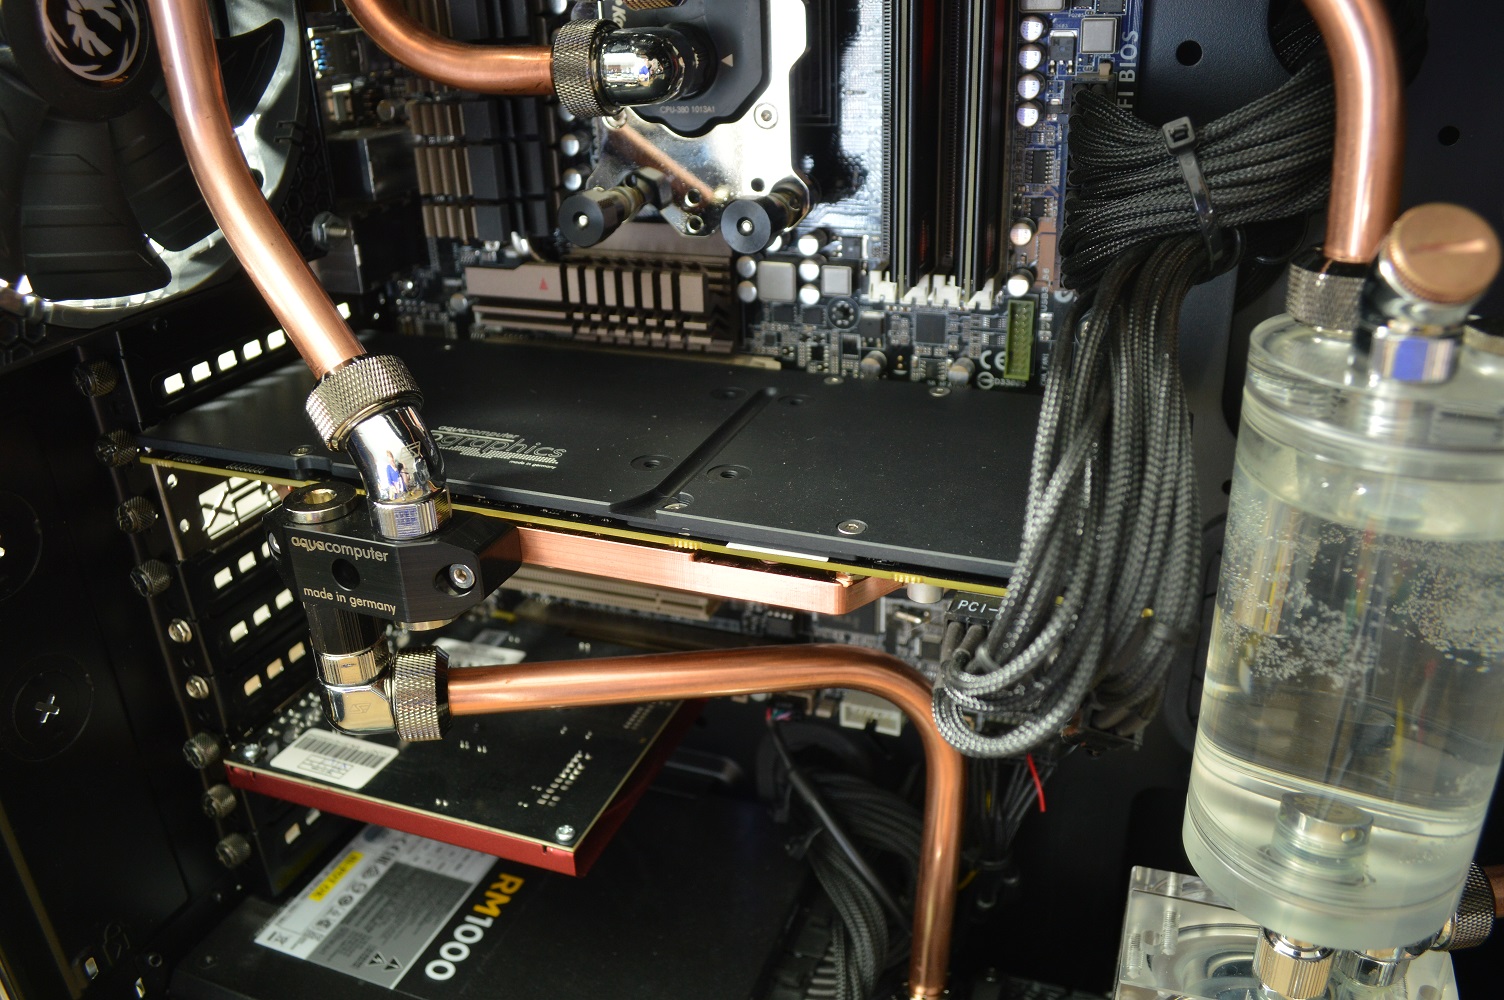
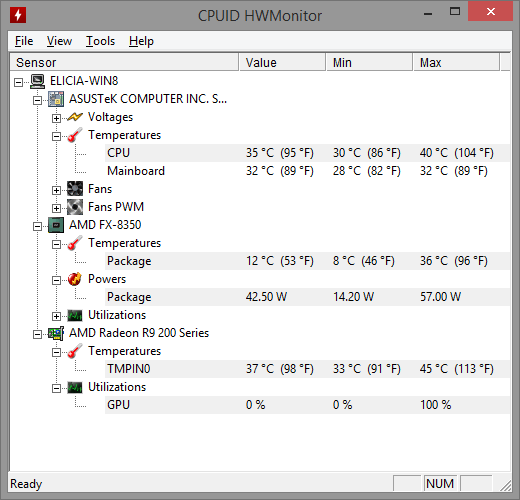
Beta Orionis – Part V

Build Log:

Where I last left off in Part IV, I mentioned that I would have preferred to have two 140mm radiators side by side instead of a 140mm and a 120mm, as is currently planned. Along these lines, I did discover that Koolance’s 140mm single-fan radiators are 140mm wide according to their specifications. However I’m not going to switch to using those for three reasons:

  1. they have M4 threads, and I really don’t want to drill out holes in my case to accommodate different screws if I can avoid it
  2. they have a high-FPI, meaning I’d need to use high RPM fans to have effective cooling, and
  3. they are more expensive than the XSPC radiators I am considering

These have the potential to fit the way I had hoped two XSPC 140mm radiators would fit, but being more expensive and a higher FPI, I’m not going to go with them.

Changes at Performance-PCs

Since posting Part 4 of this build log, Performance-PCs has made some changes to their website and business operations. The former I welcome – and will even more when they get all the kinks worked out – but the latter, not so much.

In the past, virtually every order I’ve placed through Performance-PCs has shipped the same business day as it was placed. If the order was placed at night after their business hours, it went out the next day. And I cannot think of a single instance where this did not happen. Now, however, you have to pay an additional $2.99 for “Rush Order” service to have it go out the same day. In other words, they’re now charging for what they used to do for free.

So the order I placed on an early Friday morning didn’t ship that Friday, which is what would’ve happened in the past. I understand that they may be getting a ton more business, thereby impacting their ability to get orders shipped out the same day, but they could’ve at least sent out an e-mail to the customers letting us know about the change in business practice rather than springing it on us. A quick e-mail saying “due to an increase in business, we can no longer guarantee same-day shipping, but for a rush order fee, we will prioritize your order.”

I may opt to pay the fee in the future – they’ll refund it if they don’t ship it same business day – but we’ll see.

One thing they definitely need to change is making overnight orders priority orders by default. I shouldn’t have to pay an additional $3 to have something overnighted.

They’ve been quick to handle mistakes and RMAs whenever I’ve had issues, so they’ll continue to receive my business – plus they tend to have some of the lowest prices. They also now have an explicit price match option, so that’s a plus, and I may have to exercise that in the future. They also have a new wishlist feature as well, which is where I’ve got listed everything I’m planning to purchase for this build – well everything short of the fittings.

Second GTX 770 or a GTX 970/980?

With all the fervor going on right now about the new 900 series of graphics cards, I’m not going to be upgrading to that. Instead I’ll be adding a second GTX 770 to my mix sometime down the road. And it’ll be the PNY board as well.

For Absinthe, though, a GTX 970 will be in order, especially given the current price tag on them. Absinthe is currently running a GTX 660 SLI pair. PNY’s board is apparently built onto the GTX 670 reference board, meaning water blocks already exist for it according to EK’s cooling configurator, and that’s likely the path I’m taking. I’ll start with one, and eventually I’ll get her the second.

That’ll be a few months down the road though. She doesn’t need them right now. Her 660 SLI pair can handle everything she currently plays without difficulty, and that’ll likely remain true for the foreseeable future.

Test fit #3 and change of plans

But their changes to practice meant I had to wait an additional day to do the test fitting on everything to plan future orders accordingly. The next test fit, however, was not for the radiator that was on the way. I found an XS-PC EX240 radiator at my local Microcenter and decided to pick it up for a different test fit to see whether it could fit mounted to the fan screw holes. It was then that I made a discovery that I wish I’d made while building Absinthe.

See those holes with 140 and 120 next to them? Those are the mounting holes that are recommended for a radiator. In building Absinthe, those were the holes I used for mounting the front radiator. Notice the other lines of holes on the case? Those are vent holes for the 140mm fans that come with the fan. The glints in the picture are two of the mounting screws for the radiator, so I’m using the vent holes to mount the radiator. The only downside to this is that you can only mount the 4 corner screws instead of all 8 of the screw holes on the radiator.

That is what I wish I’d noticed when building Absinthe. A little more test fitting by front-mounting the AlphaCool 240mm radiator I already have and putting the XSPC radiator on the bottom with a fan shows what I’m going to be doing for β Ori and is the next loop upgrade for Absinthe.

So as you can see, the radiator with fan fits neatly under the front-mounted 240mm radiator. The holes labeled “120” wouldn’t allow for this as the put the radiator too low (see Part VI of the Absinthe build log for details). The EX240 is also slightly thicker than the ST30 – 35mm for the EX240 vs 30mm for the ST30 – so this picture guarantees the fit for another ST30 where the XSPC radiator lays in this picture. It also means that I can use another ST30 for Absinthe instead of an XT45.

This is why you need to order your parts in phases, and you should start with the radiators so you can do test fits. And it helps to fully investigate what you’ve got to determine the full range of options.

So I returned the EX240 to Microcenter. I requested an RMA on the EX120 as well, citing a change of plans, and requesting a store credit which will be used toward the next batch, which will include an ST30 240mm. The EX140 I can’t return to FrozenCPU as it’s too long past the return period, but I can use it in a future project.

But that’ll make the radiator configuration two dual 120mm radiators and a triple 120mm radiator, a total of 7x120mm of surface area.

Next order

As mentioned the order that arrived after making the above-mentioned test fit included the EX120, but also the ST30 360mm. I don’t need to do a test fit on it as I already know it’ll fit without an issue. I’m considering turning the radiator so the fittings are toward the front instead of the back, the way I originally had it in the original water cooling build that preceded Absinthe.

radiator.png

Only if I do this, I’ll be taking the tubing through the 5 1/4″ drive bay with a pass-through fitting. The reason for that is quite simple: the top and front radiator should be in line with each other, both centered in the case, meaning the fittings line up with each other. Dropping one of the tubing holes through the bottom of the 5 1/4″ bay should provide for a simple mechanism for tubing it up.

The order also had the pump. Originally I said I was going with the AlphaCool VPP655. I ultimately went with the Koolance PMP-450. They’re basically the same pump, and the Koolance offering was less expensive than the AlphaCool pump on Performance-PCs website. The AlphaCool pump housing I plan to buy should still work with it without any problem, though, or I could just use the Bitspower housing I currently have, but I think I’ll use that elsewhere. I just think the Bitspower mod tops are ugly, and I like the AlphaCool HF D5 clear top better.

The next order for Performance-PCs is going for the pump top and some small parts along with another ST30 240mm radiator. For the water blocks, since I’m going Koolance on everything, I may just order those direct from Koolance, especially since Performance-PCs recently jumped their price of the GTX 680 water block. But having the pump top and a few other things should give me enough parts to start physically planning the loop.

Project Absinthe – Part XVI

Build Log:

A bit has happened since the last part of the build log.

Let’s start off with what’s been in the news, and that’s the release of the GTX 970 and 980 chips from nVidia. Absinthe will be getting upgraded to that as well. Likely that’ll happen later this year, to give time for water block support to completely catch up. Currently I’m looking at PNY’s offering, mainly because EK’s Cooling Configurator says the GTX 670 water blocks should work with it. So that’ll come in a later part of the build log.

And eventually it’ll be two GTX 970s as well.

Another planned upgrade is adding a 1x120mm radiator, which will likely be put on the bottom of the case, whether below the fan for a pull configuration or above it for a push I’ve not yet determined. I’m not expecting a lot more temperature performance by adding the new radiator, but just adding it to give a little extra headroom to the loop. After all ambient temperature is the coolest the coolant can get in the loop, and your components will always be warmer than the coolant.

* * * * *

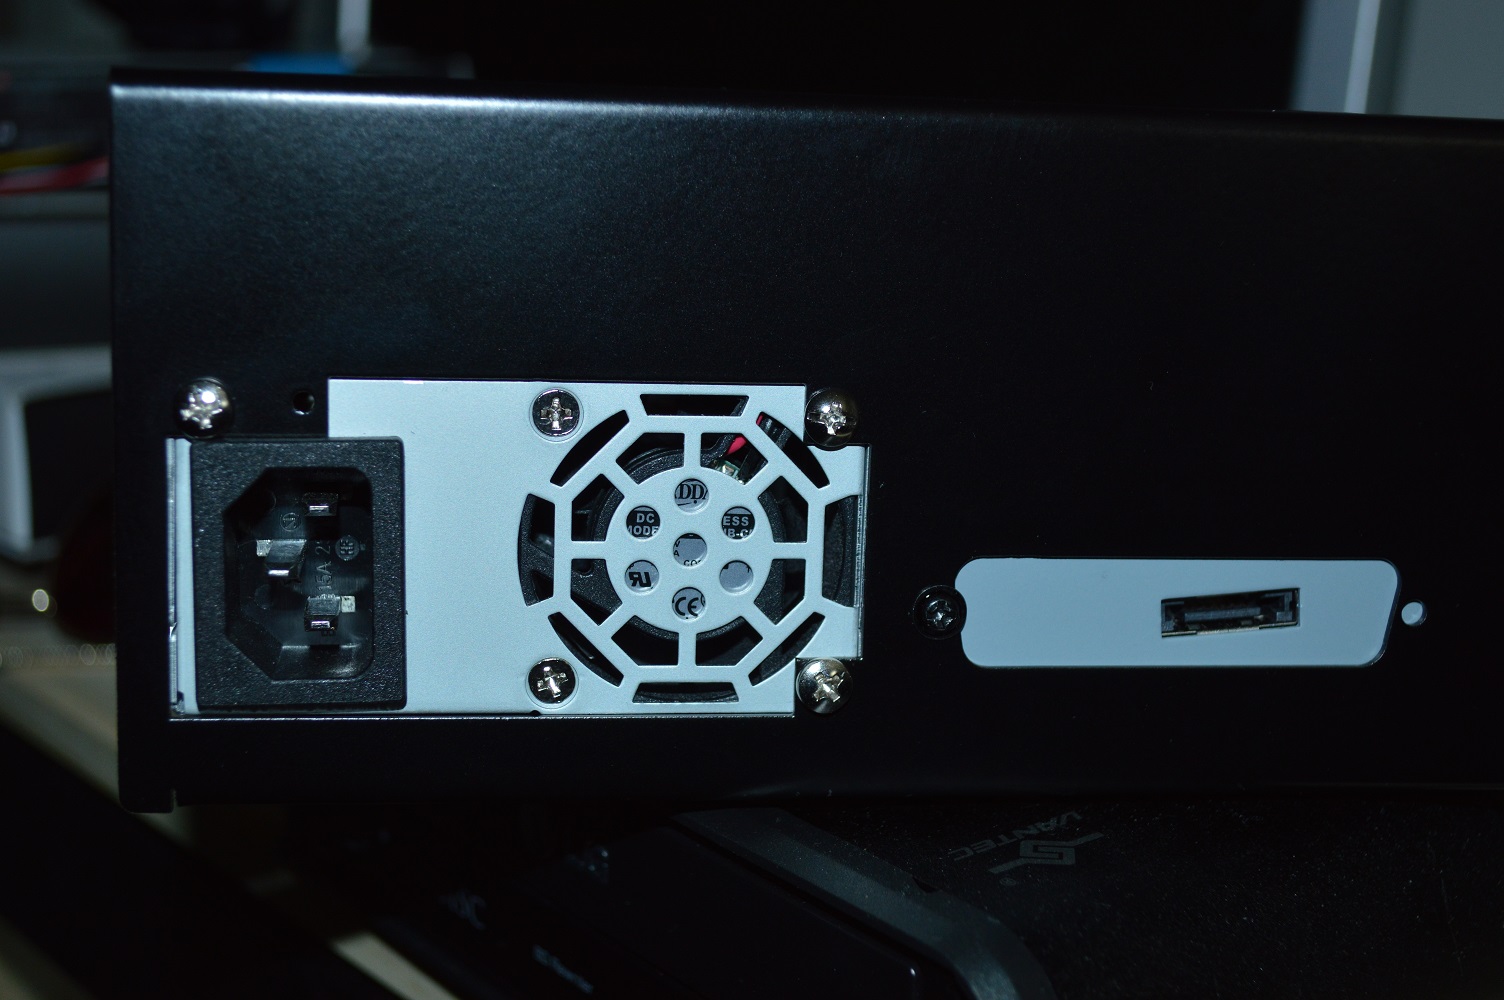
As I wrote previously, I wanted to pull the hard drives out of the case and put them into an external eSATA enclosure. This is for two reasons: 1. to free airflow in the case, since all intake fans except the rear have some kind of obstruction, and 2. to reduce cable bulk in the case.

And thankfully I didn’t need to drain the loop to do this. I was able to maneuver a screwdriver to the various spots and get everything loose. Then it was just a matter of lifting the hard drive cage out and getting the screws back into place for holding the fan.

Looks a lot cleaner, right?

The enclosure in this round is the MediaSonic ProRaid 2-bay enclosure, model no. HUR3-SU3S3. Before putting the drives in the enclosure, though, I actually needed to buy another hard drive. The two 1TB WD Blacks that were originally in Absinthe were two different models: a WD1001FALS and WD1003FZEX model. And for RAID 1, it is always recommended to have two of the exact same drive. So that was today’s trip to Microcenter.

Along with the hard drive, I managed to find another NZXT Grid for when I pull out the fan controller. I thought about hooking all the fans up to the mainboard, but that wouldn’t get rid of any extra power cables since I still need one for the pump and lighting. For monitoring the coolant temperature, I’m just going to connect it to an XSPC screen. Right now, it’s just a bit much of a hassle to pull it all out.

Anyway, for some reason Macrium Reflect did not want to detect the enclosure when it was on a USB 3.0 plug or plugged into the eSATA port. Plug it into a USB 2.0 port and it found it without a problem. That meant writing out the image to the hard drive took forever since USB 2.0 is about 1/10th the bandwidth of USB 3.0. Cloning everything from the WD1001FALS drive took a little shy of 2 hours for a little under 200 GB of data. I was running an outdated version of Reflect, so the issue may already be resolved.

But when I plugged it up into the eSATA port, making sure external SATA ports were enabled in the BIOS, the system recognized it and booted from it without any problem.

So moving your hard drives to an external enclosure is a great way to free up cable bulk, as I’ve talked about in another article. Whether you’re using SSDs or the standard platter drives, it’s worth it, in my opinion. Not only does it free up cable bulk, but it’s a lot more cable efficient overall if you have any kind of a RAID setup, even JBOD.

* * * * *

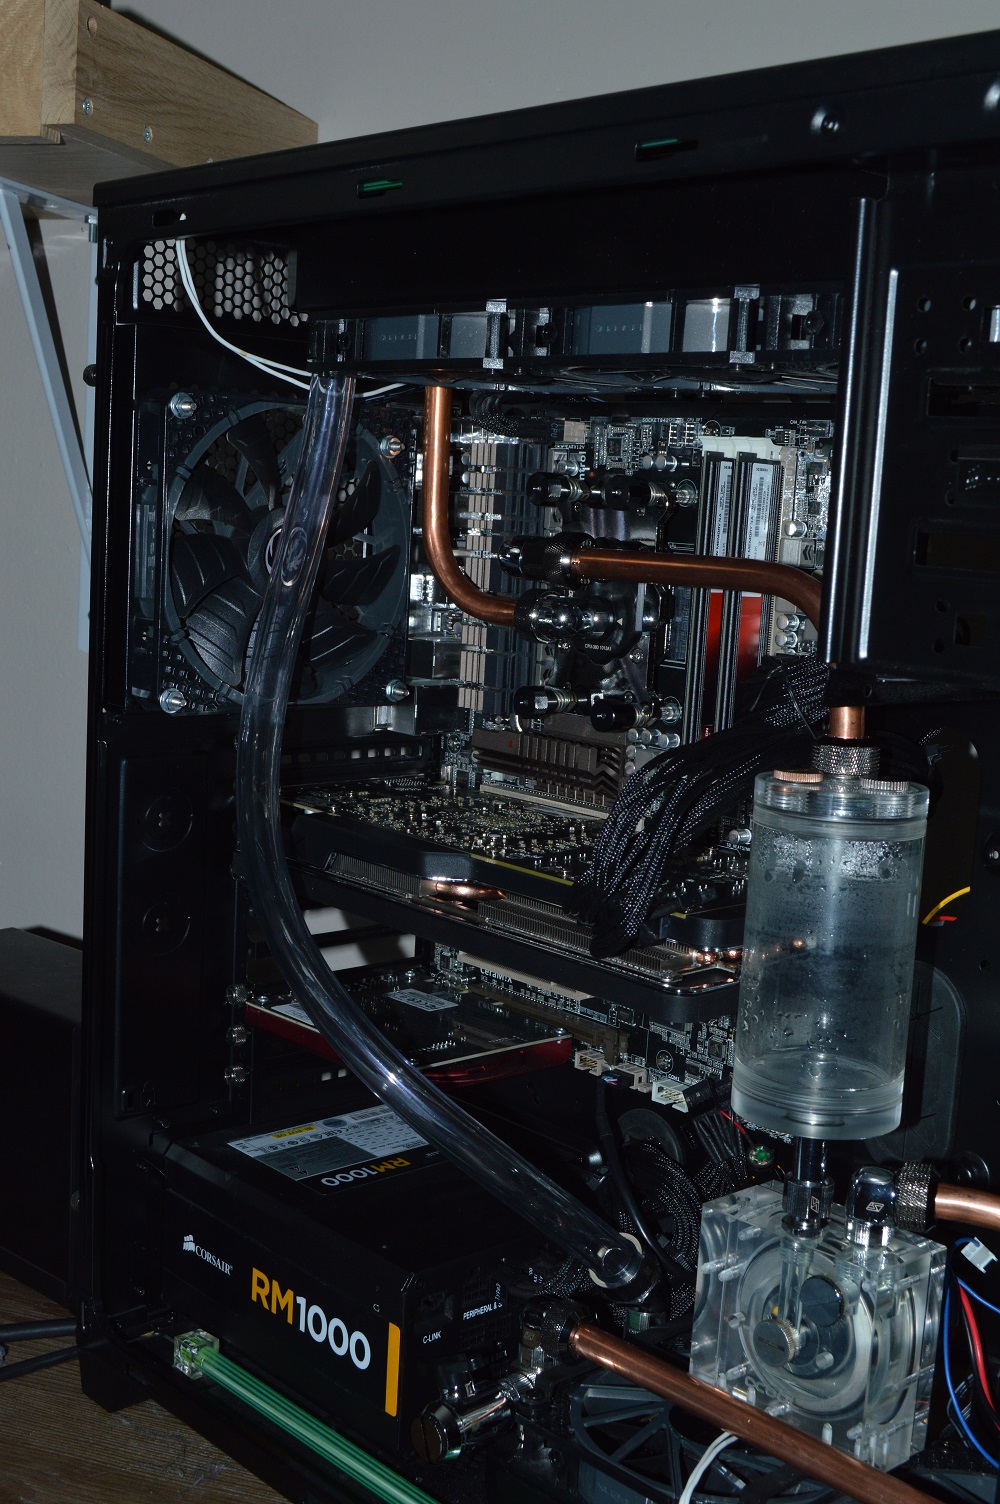
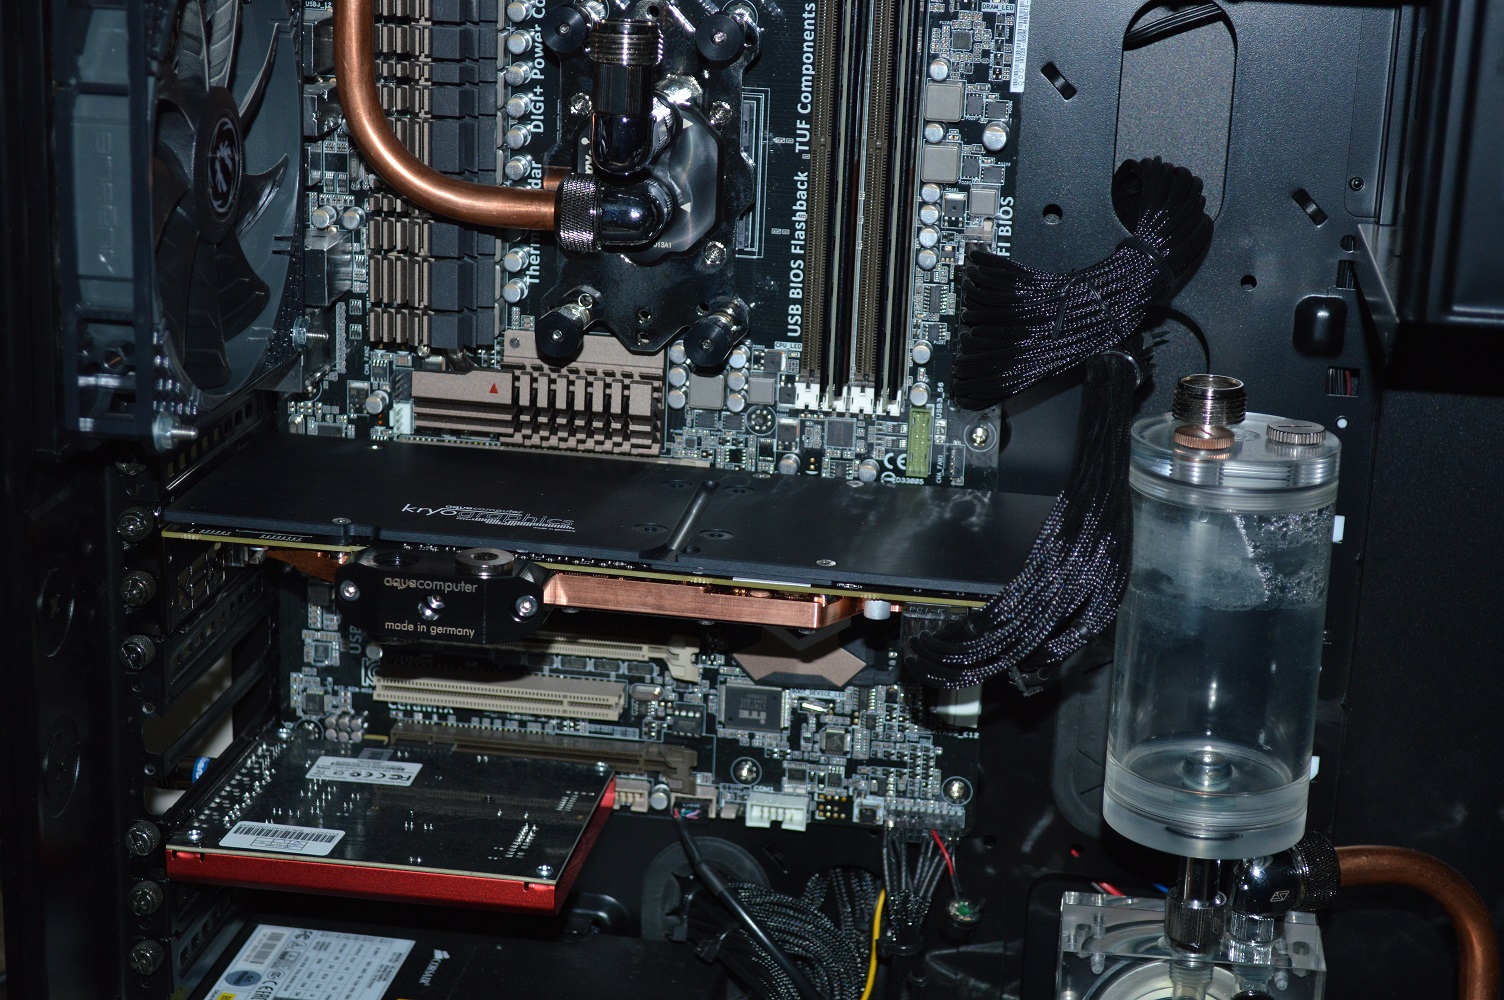
I’ll leave you with some more pictures of the build now that the hard drive cage is out of the picture. Yes it’s a little dusty as I didn’t bother dusting before taking pictures. The red glow is the LED on the sound card – I’m going to figure out how to disable or remove that at a later time as well.

Beta Orionis – Part IV

Build Log:

First order of business for the build was getting it out of the 750D case and into the Zalman.

That started with getting fans put back in, as I originally pulled all the fans out of the Zalman to max out the fan space in the 750D. I installed three 140mm fans where I could, two in the top for exhaust and one in the front for, obviously, intake. I also added two 120mm fans at the bottom and rear, both as intakes. The Mountain Mods fan bracket would be going in the Zalman case, to be used for mounting the radiator for the Corsair H60 if I could make it fit. If not, I would be putting that in the rear 120mm fan position and just have a fan on the fan mount.

Then there was getting the power supply installed as well. The spare GS800 will be powering things for the time being. When the CX750M comes back from Corsair, it’ll tag out the GS800.

That was Thursday night. The package came on Friday. My wife’s birthday. We went out for dinner, so there wasn’t much use in trying to move everything over, as I wouldn’t have a lot of time to function. Plus she collapsed into bed not long after getting home from the restaurant, and I didn’t want to disturb her.

With Saturday came a full-time shift for my wife, so plenty of time for me to move everything into the Zalman case and start with the test fits to find out if I was out of my mind with doing a single 140mm and single 120mm radiator in the front.

Test fit #1

First was the test fit on the 140mm radiator in the front, just to make sure it’ll fit the way I was originally thinking. It does.

Now this radiator is actually going to go over the bottom 140mm fan. I had it over the top fan to make sure it would clear the rivets that are a couple millimeters above it. But that is the intended orientation.

One question still outstanding is whether I can fit two 140mm radiators side by side in the configuration shown above. I’m currently under the assumption that I cannot. I know from this test fit that at least one will fit where I want it. And I know from doing a test with the short screws I bought – #6-32 x 1/2″ – that it will raise the Bitfenix fans up by about a millimeter or two, basically pushing the fan clear of any potential interference. This means that if I use a 120mm radiator in the position the picture currently shows the 140mm that it’ll fit without any problem.

The only concern is just that I’d probably have to pack out the radiator with some washers to ensure the screws will not go too far through and risk puncturing the radiator, or just use the XSPC radiator gasket.

So my next radiator order is actually two more single-fan radiators: a 120mm and a 140mm radiator. If the 140mm fits where I hope it will, then the 120mm will either go in the rear mount position, or I may add it to Absinthe. If it won’t fit, then the 140mm will likely get returned, unless test fitting it in the fan position on the back of the case turns out well.

Test fit #2

Now for the 240mm radiator I bought. I had no reason to believe it wouldn’t fit. My concern was how it’d fit with the 140mm radiator in the lower position. Everything told me that it should work without any problem, but I wanted to be certain, as these test fits govern my future planning.

This was also part of my concern: would the cable for the lighting fit between the fans when mounted on the radiator. As can be clearly seen, the answer is Yes.

And with the 140mm radiator mounted in the lower position, there is little concern here as well with the fit. As you can see I have the fans mounted for a pull configuration as opposed to a push configuration. With low FPI radiators and lower RPM fans, there is little difference between the two. With how the radiator is mounted in the 750D, you can see there is a small gap with some vent holes exposed. I’ll need to think of something I can do to cover that. Just not sure what at this point.

But this still leaves outstanding the question of whether a second 140mm radiator would fit above where it is mounted here. I know I have plenty of clearance for a 120mm radiator and I’ve been leaning toward just buying the 120mm radiator and foregoing the possibility a 140mm radiator would fit.

So let’s do a little math to find out if it’ll be worth the trouble, or whether I should just go for something that I know is guaranteed. Now each 120mm of radiator space provides for 14,400mm2 of surface area. Each 140mm of radiator space provides for 19,600mm2 of surface area. This means that the two configurations I’m considering each provide for:

5x120mm + 2x140mm = 111,200mm2 surface area
6x120mm + 1x140mm = 106,000mm2 surface area

A difference of 5,200mm2 of surface area. But what’s that compared to the overall surface area of the smaller configuration? Only a 4.9% improvement. I think I’ll go with what’s guaranteed and save myself the trouble.

Rationale

Now some would probably question why I’m going through the trouble of trying to fit two single-fan mounts on the front. And the answer is quite simple: to maximize radiator capacity.

If I put a 240mm or 280mm radiator on the front, I can only put a single 120mm radiator on the bottom, meaning maximizing radiator space would require putting another 120mm or 140mm radiator on the back. If that front radiator is a 280mm, I also lose a 120mm fan mount at the bottom, as the 280mm radiator would interfere.

If I went with the maximum size supported, that would mean a triple 120mm in the top, a single 120mm in the bottom, a dual 140mm in the front and single 140mm in the back. That’s 4x120mm and 3x140mm, for a total surface area of 116,400mm2, a 9.8% increase in surface area over what I have planned currently. But, again, I lose a 120mm fan mount position doing that. I don’t consider that a good trade-off.

Plus with my current plan, if I add another 120mm radiator to the back, I increase the total surface area to 120,400mm2, a 3.5% improvement. If I make it a 140mm radiator, that goes up to 125,600mm2, a 7.9% improvement in surface area. Both obviously surpass in surface area what would arguably be a less complicated solution. So my current plan leaves me with the option of that additional level of expansion if I want to use it. It’s also why the 240mm radiator is the ST30 instead of something wider like the XT45, giving room to mount two single-fan radiators on the front.

It’s an unusual setup, and I look forward to planning out the loop. Ideally we would have side-flow radiators that can flow similar to what I’ve got planned here, only as one unit. The closest I’ve found to that is the Aquacomputer Airplex Modularity System. But the single 140mm fan option is 146mm wide, making it useless for my needs. Plus it’s three times the cost of the XSPC radiator.

Next phase

So that’s it for this iteration. The next order will be the two remaining radiators: the AlphaCool ST30 360mm and XSPC EX120. This will allow me to have all the radiators mounted for test fits, along with starting some of the planning on the loop.

The drain is currently planned to come off a T-fitting on the lower radiator. The water blocks are in a fixed location, while the pump and reservoir will be mounted atop the 120mm fan closes to the fittings on the bottom radiator. But having the other radiators will allow me to finish the test fits and start determining how the loop will be tubed up.

What unconstitutional actually means

Let’s clear something up since I’ve seen way too many people confuse this concept: what does it mean when a Court declares a law to be unconstitutional? What must happen once the Court declares a law unconstitutional?

Here’s what many seem to think must happen: the legislature must promptly modify or repeal the law in question.

Here’s what actually happens: nothing.

The decision declaring a law unconstitutional just means said law is now unenforceable. Accompanying the declaration is an implicit injunction on the Executive Branch against enforcement of that law. There’s still little stopping the law from being enforced despite being declared unconstitutional, though.

The legislature can pass any law it wants, but whether that law will be enforced is entirely a different matter. Because the law is still actually on the books, a person may become subject to arrest and/or civil penalty for violating it. And in Court they may raise the challenge that the law has been declared unconstitutional, presenting the necessary citations, and the judge will dismiss the charges or lawsuit with prejudice. If the law is being actively enforced, in a manner suggesting the Executive Branch was basically ignoring the Court’s declaration, then the Court may explicitly bar enforcement by direct Court order – but rarely is that necessary, because attempting to press charges on a law that cannot be enforced through the Court is just a waste of time and money.

Let’s look at the sodomy bans that existed prior to Lawrence v. Texas, 539 US 558 (2003), arguably the largest demonstration of the misunderstanding of the “unconstitutional” concept. Many States still have such bans on the books. I would add that given the breadth of the decision in Lawrence, that fornication laws are also unconstitutional1Lawrence v. Texas, 539 US 558 at 567: “To say that the issue in Bowers was simply the right to engage in certain sexual conduct demeans the claim the individual put forward, just as it would demean a married couple were it to be said marriage is simply about the right to have sexual intercourse. The laws involved in Bowers and here are, to be sure, statutes that purport to do no more than prohibit a particular sexual act. Their penalties and purposes, though, have more far reaching consequences, touching upon the most private human conduct, sexual behavior, and in the most private of places, the home. The statutes do seek to control a personal relationship that, whether or not entitled to formal recognition in the law, is within the liberty of persons to choose without being punished as criminals.

This, as a general rule, should counsel against attempts by the State, or a court, to define the meaning of the relationship or to set its boundaries absent injury to a person or abuse of an institution the law protects. It suffices for us to acknowledge that adults may choose to enter upon this relationship in the confines of their homes and their own private lives and still retain their dignity as free persons. When sexuality finds overt expression in intimate conduct with another person, the conduct can be but one element in a personal bond that is more enduring. The liberty protected by the Constitution allows homosexual persons the right to make this choice.”
, but many States still have those. As those bans are not enforceable, any person arrested under those laws would find the charges dismissed, either before pleading “not guilty” as the judge would just throw them out without even considering them, or when the challenge is made.

But the legislature is under no obligation to remove the law from its books. It just cannot be enforced.

If the text of the law is problematic, rather than what it seeks to pre- or proscribe – Courts have declared laws to be “unconstitutionally vague” – then the Court may give the legislature a set amount of time to update the law. If the law is not updated in that time frame, the challenged law then becomes unenforceable, because the Court will take their failure to act as a sign that they’re not interested in updating, and by extension enforcing that law. Even if they are attempting to draft new legislation in that time frame, the expiration date determines when the ex post facto prohibitions kick in – see Article I, Sections 9 and 10 of the Constitution of the United States.

Let’s look at Chicago, where the Court struck down their law that essentially forbids the establishment of gun shops within city limits. Because the Court recognized the city still has an interest in regulating gun shops – just as cities like to regulate any commercial establishment through their zoning ordinances among other ordinances – the city was given a time frame by which to establish new zoning laws. If they failed to act in that time frame, then gun shops would’ve been subject to the standard commercial zoning ordinances and could not be specially zoned until new zoning laws were written. Yet the new laws would probably not withstand Court challenge, meaning Chicago just wasted more time and money.

Basically it all comes down to this: whether a law is enforced is on the judicial and executive branches. Whether the law exists is up to the legislature. Declaring a law “unconstitutional” just means it cannot be enforced. But the Courts in the United States do not have the authority to order the legislature to repeal a law and, to the best of my knowledge, have never done so.

Whether the legislature repeals or modifies a law that is declared unconstitutional is entirely on them, but they are under no obligation to do so.

References[+]

Beta Orionis – Part III

Build Log:

I have not had a lot of luck with power supplies over the years. They are the one part I have had to replace more than anything else in the last 16 years I’ve been working with computers. And unfortunately the most recent casualty is my Corsair CX750M.

What told me I needed to replace the power supply is when the mouse and keyboard would shut off and the monitors would go blank, but the fans and CCFL would still be running. The reset button would not function, and holding the power button would not get it to turn off. This tells me the power supply was randomly losing current or voltage and the current or voltage would drop below what is capable of running the mainboard and graphics card, but still large enough to run the fans and light.

The consideration in the replacement of the power supply is the depth. I have a plan on the loop, in that I plan to put the 240mm radiator laying on the floor, so I cannot have too long a power supply otherwise that plan would be disrupted. I took this as an opportunity to go with a better power supply as well rather than just replacing it with one of the same. So the CX750M will be replaced by a Corsair AX860. This power supply is platinum rated, meaning a better efficiency curve, and is fully modular and uses the same modular cable kit as the RM1000 and CX750M.

But again one of the primary considerations was the size of the power supply. The CX750M is only 140mm deep. The AX860 is 160mm deep. That is not nearly as deep as the 180mm of the RM1000. In Absinthe I was originally wanting to have the 240mm radiator on the floor as I have planned for β Ori. The problem was the modular cables sticking out from the back of the RM1000. There just wasn’t any way to lay the radiator on the floor of the case without the cabling interfering.

Unfortunately FedEx screwed up in trying to deliver it to me. As this machine is my main computer, I had to instead retrofit a spare power supply to power my system. This confirmed the power supply was indeed the issue, as my system had no difficulty remaining stable, instead of dying after a relatively short period of time. Unfortunately it means the computer looks like it’s attached to a heart-lung machine.

Thanks, FedEx.

* * * * *

So before talking about the PSU upgrade, I think I need to mention why the power supply died. Now one thing that can kill electronic components faster than anything you can reasonably do to them is continually powering it off and on, especially if it is powered off after being on a short period of time. The mainboard in this system is the Gigabyte 990FXA-UD3. In getting my overclock, I adjusted some settings in the BIOS. After making those changes, when powering on the system it would come on briefly (not even a second), then power back off again for a few seconds before coming back on and booting up.

In a Google search, I came across a thread discussing the very problem I was having. Turns out the concern was the fact that I had turned off the “CPU Performance Boost” setting. There’s a good reason I turned it off: I noticed that with it on, the CPU would throttle the multiplier while I was running Prime95. I had the bus speed set to 220MHz with the multiplier still set to 20, and I saw in CPU-Z that the multiplier would throttle down to 17 and back up to 20. Turning off the “CPU Performance Boost” kept that from happening, but also forced me to drop the bus speed to 215MHz to have a stable overclock.

In another thread on TomsHardware.com, someone said that the off/on behavior would not damage your components. Actually it will. Some components are just more robust than others, and apparently my power supply was on the short end of that list.

I’ve since rolled back the overclock and have the processor running at stock speeds. I may try to overclock it later, but I know now that I’ll need to leave the “Performance Boost” option enabled, thus risking throttling, meaning I’ll actually need to look for an overclock setting where that does not happen. I think I’ll need to play around with some of the settings a little bit to see what causes the power off/on behavior and what doesn’t. I’ve seen a couple threads that say it seems to rest on either the “CPU Unlock” feature or the “CPU Performance Boost” feature.

Now does this mean the CX750M “sucks”? No.

The power supply worked perfectly fine during the time I had it in my system, and I consider it to be a pretty good value – a 750W, bronze-rated modular power supply for only $70 to $80 at current prices – and I will be RMA’ing it so I can make use of it elsewhere, likely in building out a server system I’ve mentioned a couple times. The problem only started occurring when the overclocking settings caused the weird power on/off behavior that would be deadly to any electronic component if it goes on long enough. Again some components can handle it better than others, and this is a behavior that Gigabyte really needs to address, especially if it’s present in any of their other mainboards.

* * * * *

There’s been a slight change of plans.

I decided I needed radiators before everything else so I can see how things would fit. The pump is pretty much set in stone, as are the blocks and some of the radiators (more on that in a sec), but not everything is set in stone. So because of this and the possibility things could end up changing, two things are going to happen: 1. I’m going to move my system out of the 750D, like I did with Absinthe, and into the Zalman case (provided my GTX 770 can fit), and 2. I’m going to plan things out several parts at a time, starting with the radiators.

On that mark, I’ve opted toward the ST30 instead of the XT45. According to Martin’s Liquid Lab, the ST30 and XT45 perform pretty neck and neck on lower RPM fans like the Spectre Pro, but the ST30s are much less expensive: the 360mm model goes for $59 on Performance-PCs for the ST30, compared to $76 for the XT45. Similar price difference with the 240mm model as well – $43 for the ST30 and compared to $54 for the XT45.

Total savings going with the ST30 over the XT45: $28. Apparent loss of cooling capacity: none. So if you’re using lower RPM fans, go with the AlphaCool ST30 lineup and save some money in building out your loop. I wish I’d known about this in building Absinthe, since they are thinner.

Anyway…

Now the 240mm radiator will be laying on the floor with the fans in a pull configuration, so the radiator poses the least amount of interference to the power supply – I found a forum post showing a 750D build with an XS-PC 240mm radiator mounted on the floor with the AX860, though in push/pull, so it’s good to see a picture of what I want to do. The 360mm radiator will be going in the roof with the fans in push. That’s 5x120mm of radiator space, just like in Absinthe and most 750D builds. And for a CPU and one graphics card plus the memory, that’s plenty of radiator capacity.

But I’m not stopping there. More radiators will ensure everything can stay nice and cool with the slower fans when things start getting intense, and it should provide plenty of headroom for a future upgrade.

To that end, I ordered the ST30 240mm radiator and an XS-PC EX140 radiator. And that’s not for the rear mount point.

The 750D features two 140mm fans in the front. Those fans are mounted with #6-32 screws in screw holes that are pass-through. My hope is that I will be able to mount the 140mm radiator with the fitting ports to the side as opposed to either up or down in the typical configuration. It’s potentially a close fit as well, as the radiator is 180mm long, meaning the fitting channels extend about 30mm past the edge of the fan.

The #6-32 screw holes are important on this, hence why I went with the XS-PC radiator. Most radiator manufacturers use M3 or M4 – AlphaCool uses M3s – but from what I’ve so far seen, only Swiftech and XS-PC use #6-32 UNC threads on their radiators. I’ll be buying longer #6-32 screws to go completely through the screw holes and into the radiator. Not sure what size I need right now. I’ll figure that out when the time comes.

Along with the 140mm radiator, I’ll also be going with a 120mm radiator on the front, but above it: the XS-PC EX120. The EX140 is 143mm wide, and the fans on the front appear to be mounted tight against each other with no margin, and I’d need a 4mm gap between the fans to be safe to mount 2x140mm radiators side by side on the top. It’ll look odd at the least, but it’ll at least give me more cooling capacity in the loop, a total of 6x120mm plus 1x140mm – provided it all works as I hope it will.

The move and the initial test fits will be happening this weekend after the first two radiators arrive.

Follow-up on FedEx

The response from FedEx to the complaint I filed wasn’t exactly all that helpful:

Thank you for contacting FedEx. We regret any inconvenience this has caused.

Our records indicate that there is an existing request for this package to be held at our station for pick up. Your package is going to be held at our station located at [redacted]. Kindly present your tracking number and your government issued Photo ID upon claiming for your package.

Please be advised that our courier will need one business day to transfer your shipment to your preferred location.

May we suggest for you to call our customer service department at 1.800.463.3339 before heading to the station to ensure that the package is ready for pickup or you may wish to continue monitoring your shipment to obtain updated status by using our online tracking page: http://www.fedex.com/us/Tracking

We hope that this information is helpful. Thank you for shipping with FedEx.

I wasn’t exactly cordial in my response to this, but then I didn’t really have any reason to be:

Thank you for telling me that which I had already pointed out in my original message. Yes I’m aware of to which branch I requested the redirect. I’m aware of when I requested the redirect, and what to do when I pick up the package as I routinely have packages held for pickup since it is just more convenient for me to do so. I was filing a complaint about what happened, not asking for assistance on the matter.

My concern is that my redirect request on the package was not honored.

You might be interested in looking at the record for Tracking No. [redacted]. That was an order I placed back in July for overnight delivery via FedEx. The shipment record shows that the delivery option was changed to have it held at a FedEx Office location, and that is where the package was redirected and where I ultimately picked up the package. The redirect request was honored without issue.

Another such package is [redacted]. Like the package discussed herein, this package was shipped for Saturday delivery via FedEx. A redirect request was given, and that request was honored.

I have never had problems with redirect requests with FedEx, so given this redirect request was not honored but blatantly ignored is what has me frustrated over this. If I never put the redirect request in at all, then that would have been entirely on me. But the fact I did and the package was not redirected as requested is why I’m livid.

Again the request was reflected as acknowledged in the record: 9/13/2014, 5:21am, the record shows it will be redirected to FedEx Office, and it never was! That is the whole concern of my complaint. The fact that I requested it be handed over to FedEx Office, and that request was ignored, despite the fact I have had previous overnight orders, and numerous other packages redirected as requested. I wish there was some way that FedEx could have corrected this error once it was pointed out, such as by allowing me to pick up the package from the FedEx Ground sorting facility, but unfortunately that time has now long passed.

So all I can instead ask is that redirect requests be honored. Some kind of corrective action here appears necessary. All I’m trying to do here is point out that a problem has occurred and ask that corrective action be taken to prevent this concern in the future.

As of the time I posted this, FedEx had not yet made another delivery attempt on the package and there is no indicator it has been delivered or redirected to the requested FedEx Office location, meaning if they move on it on 9/16, it’ll be delivered 3 days late. And yet I have no recourse on this, no way to demand that FedEx compensate me for my inconvenience on this.

Update (9/16/2014): FedEx delivered the package to my apartment instead of redirecting it. The box even had the redirect label on it. Someone royally screwed up here.

When overnight isn’t, Part II: FedEx screws up this time

This is the e-mail complaint I sent to FedEx through their contact system, Tracking->FedEx Ground->Re-routing of shipment, as a complaint:

Good day,

I placed the order for the given tracking number on 9/12/2014 to be delivered for Saturday delivery on 9/13/2014. Upon receiving the e-mail that the package had been picked up and was on its way, I attempted to customize delivery on the package to have it held for pickup at a FedEx Office location as I knew I would be out of town much of the day and wanted to be able to retrieve it on the day of delivery.

As the tracking information for this notes, the delivery change was acknowledged by the system. It even said the package would be redirected to FedEx Office. But the package was never redirected. Instead an attempt to deliver to my home address was made.

In other words, the delivery change was acknowledged by the system, but ultimately completely ignored. And as such I now must wait till Monday to receive my package unless there is a way you can get my package to me on a Sunday.

Thank you, FedEx. Thank you very much for screwing things up.

Beta Orionis – Part II: New fans

Build Log:

I got to work pretty much right away after picking up the fans from my local FedEx Office. I also made sure to test all of them out of the box with another power supply to ensure none were DOA before installing them. To hold the fans in place, I opted against using the typical self-tapping screws and the included mounts and instead picked up some #8 screws w/ nuts from my local Home Depot.

And I replaced all of the 120mm fans in the system, including the two on the AIOs. And initial temperature testing is acceptable.

I ran Prime95 small FFT for about 18 minutes (long enough for the 28K test to pass on all cores), and the temperature topped out at 60C. It bounced around between 59C and 60C when it topped out as well and there wasn’t any indication it would go any higher. This doesn’t have me very worried as the Prime95 test puts more stress on your CPU than typical unless you’re doing a lot of high-end stuff on your machine – video rendering, 3D modeling and rendering, and so on. Under the stress I typically put my computer, it should stay comfortably in the lower 50s.

It is still significantly higher than with the SP120 fans, so I might change the AIO fan out. Not sure yet.

For the ThermalTake water cooler on the graphics card, temperatures climbed into the 50s with Valley Benchmark. The GPU is one that would need to concern me a little more, though, because games can put a significant load on the GPU, but the temperatures are still quite acceptable. Unfortunately, though, the unit I have has developed a noisy pump, so it will need to be RMA’d to the manufacturer, meaning my graphics card is once again on the stock cooler. I’m thinking this time I might just leave it at that configuration until I start building the custom loop – still RMA’ing the unit since I can repurpose it.

I switched out the fans simply to have a quieter system, and that is certainly the result. I think quieting down the system actually revealed the noise in the ThermalTake’s pump – one good reason to go with quieter fans, as noise from any component is not a good sign.

I expected as well that there would be higher temperatures than with the SP120s. The question was whether the temperatures would still be considered “acceptable”. The CPU is overclocked and cooled only on a single 120mm radiator, and now with a fan that has 10% less airflow and less than half the static pressure of the SP120.

So one question that could be asked is this: if I wanted a quieter system, why did I not just use the 7V step-down adapter that comes with the SP120 and saved the expense of buying the Bitfenix fans? Two reasons. First, these fans will be repurposed into the Zalman Z12 case for a server, which can benefit from the higher static pressure fans – and I’d probably use the step-down adapters there since there wouldn’t really be high-end components in the case. And they likely still would not be nearly as quiet as the Bitfenix fans.

There was a minor hiccup in installing the fans.

The fan filters, Silverstone FF123s, have a curl in their fabric. In the other fan filter I had installed months ago, the curl was toward the magnet side of the filter, with the magnet attaching side attached to the case, meaning it curled away from the fan. In the additional filter I ordered, the curl was away from the magnetic side, meaning it went toward the fan, rubbing on the fan as it spun and creating some additional noise. So consider this when you’re using non-rigid filters like the Silverstone FF123. Just take a glance and make sure any curl in the filter will go away from the fan.

Mountain Mods fan mount

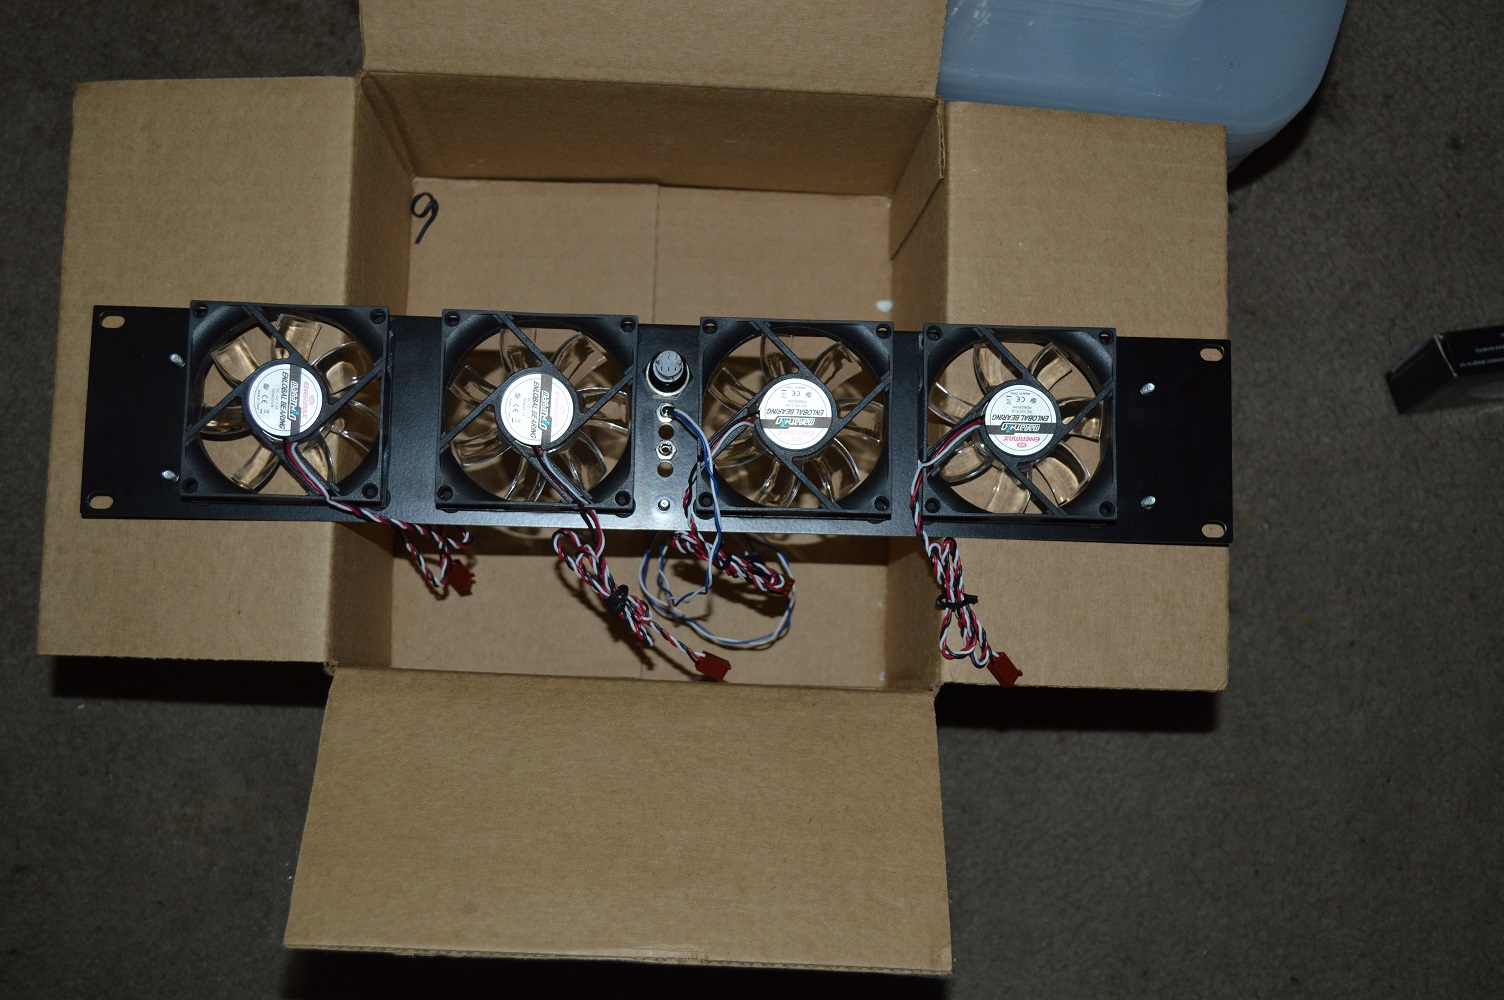
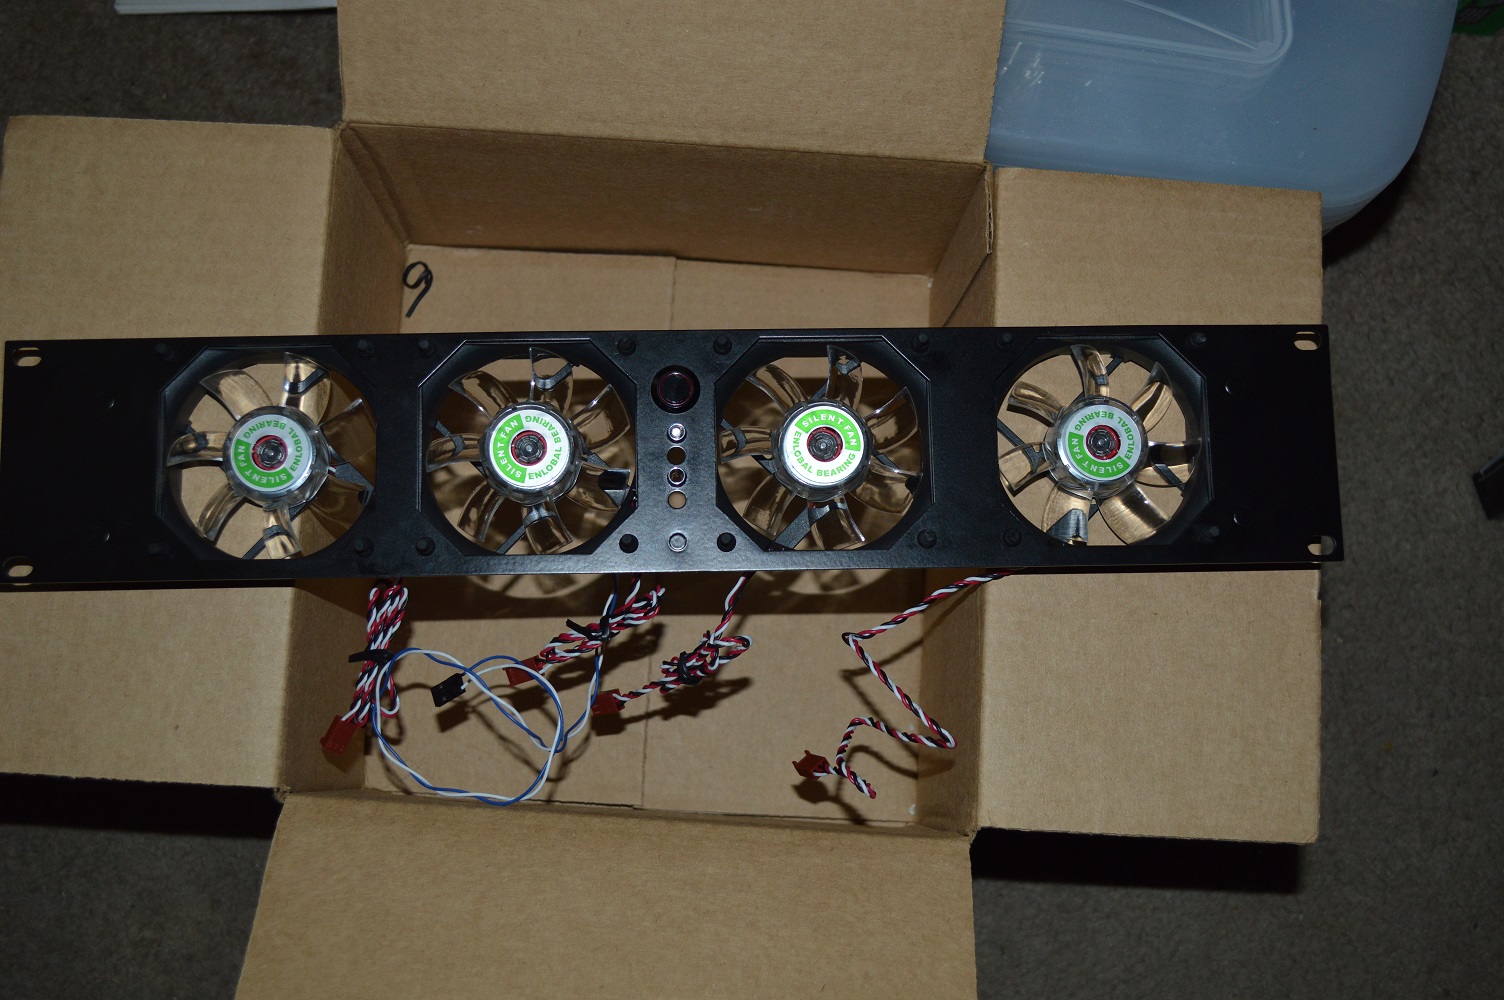
Along with moving the hard drives to an external enclosure, I wanted to do the same with my Blu-Ray writer. External enclosures, though, aren’t exactly cheap. They’re also not really necessary for optical drives. Plug it into a SATA to USB 3.0 converter and you’re pretty much golden, then find a place to put it. Pulling out the optical drive allowed me to pull off the last SATA power line from the power supply as well as remove the last SATA data cable. The case is really starting to look bare, now.

Part of what pushed me to go this route is discovering this:

This is bracket from Mountain Mods that allows you to mount a 120mm fan into 3 x 5 1/4″ drive bays. This one is made of acrylic, though a metal one is also available. The fan is a Bitfenix Spectre Pro 120mm I ordered, and there’s a Silverstone FF123 filter between it and the grill. Unfortunately this doesn’t fit directly into the drive bay courtesy of the support “fins” for the optical drives, but a Dremel took care of that and allowed me to get it in.

But the screw holes drilled into it don’t line up with the drive cage, so I had to use some 3M VHB tape to get it held in place.

I tried using the thinner filter on this, but it kept interfering with the fan, so this’ll have to do for now until I order another FF123.

I’ll definitely be ordering one of these for Absinthe since the fan controller isn’t used, and I’ll just think of something for the temperature sensor so the coolant temperature can be monitored. Perhaps I can make it an Arduino project of some kind. Anyway… This will come in handy for the top radiator in Absinthe to ensure it can get some fresher cool air from the outside. Not expecting a huge difference in temperatures, more just making sure the case pressure stays positive since the front 140mm fans have the 240mm radiator in front of them and the bottom 120mm fans have hard drives (that’ll be changing soon) and the pump and reservoir.

And when I build a server into the Zalman case, I’ll also be ordering one for that as well. That case actually has the benefit of having more than three drive bays, so if I wanted to use an optical drive with it, that’s still an option.

AlphaCool fittings

When I learned that AlphaCool was getting into the hardline business, I was intrigued. They have introduced the least expensive fittings I’ve seen so far, called the AlphaCool HT, which stands for HardTube. Currently they’re only available in black and chrome, and I ordered a pair of the chrome ones to try them out to see how well they’d fit with copper tubing. They’re listed for 13mm OD tubing, and 1/2″ is 12.7mm, so I presumed they’d fit, but wanted a pair to be sure.

This is a compression fitting like the PrimoChill fittings, but they seem to combine both the Bitspower/EK offerings with the PrimoChill offering.

Like the Bitspower and EK fittings, this has an internal O-ring that will seal around the tubing, so whether you’re using copper or acrylic tube, you will likely need to polish the ends of the tubing to avoid damaging the O-ring. Like the PrimoChill fittings, there is another O-ring that goes around the tubing and is compressed on by the collar. And further sealing everything is a rubber washer that goes between the O-ring and collar. The fittings appear to be about the same shape and style as PrimoChill’s Ghost fittings.

Will I be using this to build out β Ori.’s loop? I’m not sure.

I’m stoked about the price: Performance-PCs has them listed at just $6 each, less than the price per fitting of the PrimoChill muti-packs. But the internal O-ring gives me a little pause. When cutting tubing with a tubing cutter, the outside edge is tapered slightly by the cutting blade, but not enough that I’d be comfortable with just reaming the inside of the tubing and using it with these fittings. But having the external O-ring like in PrimoChill’s fittings kind of gives me a little bit of peace of mind. If I end up damaging that internal O-ring, the external O-ring plus rubber washer should prevent any potential catastrophe.

I’ll still need to polish the outside of the cut end just to be safe, but I don’t need to worry about it being perfect. And using just a reamer on the inside to make sure it’s clear of copper filings should also be adequate without having to take sandpaper or a grinder to it.

So we’ll see. It’ll be either PrimoChill or AlphaCool. It’ll be a while before I order fittings – I’ll be ordering the radiators, blocks, pump and reservoir first – so I’ve got plenty of time to make a decision. And it’ll likely be Swiftech for any 90-degree adapters I need, presuming suppliers will have them in stock – everyone including Swiftech are out of stock as of the time I write this. If I need to fall back to something else, it’ll likely be to Koolance.

Come to think of it, I may just go with them anyway – Koolance adapters and blocks, AlphaCool pump and housing, radiators and hardline fittings, and Phobya for the reservoir.

Beta Orionis

Build Log:

With Absinthe complete – well, pretty close as of the time I write this – I’ve started planning out a similar build for my system. Absinthe got its name from the green lighting, and the blue lighting in my system has lent to the potential for several different names.

There were a couple names I considered. One was Azurite, which is a blue copper carbonate mineral. While darker than the blue of the CCFL kit in my case, I will be using annealed copper tubing for this build, so the name would work well. The recent death of Robin Williams brought to mind the name “Genie”, as the lights would give it a blue glow similar to the genie’s coloration in the 1992 animated film Aladdin. I have more in-depth reasons for considering the name that I won’t elaborate here.

But the name I ultimately settled on is Beta Orionis (image credit: Guillebot at deviantART)

Beta Orionis is the Bayer designation for the star commonly known as Rigel, in the Orion constellation. It’s a blue supergiant star, the brightest in the Orion constellation, with Alpha Orionis – i.e. Betelgeuse – being the second. And as beta is the second letter of the Greek alphabet, and my second watercooling build is going to be a large blue-lit computer, I think the name certainly fits well.

But enough talk on the name.

Specifications

Here are the current system specifications:

About the only potential upgrade on this system would be to double the memory capacity – I use this computer not only for gaming but also for writing code and running VMs for testing (see my AMD vs Intel discussion).

I’m not hugely concerned about the power supply. It is bronze rated, so going with a gold rated like the RM1000 in Absinthe would be better, but with just one graphics card I’m not hugely concerned.

Planned water cooling loop

For the water cooling loop, I’m going with Koolance for the water blocks: CPU-380A for the CPU and the VID-NX680 for the GPU. The PNY board is built into the GTX 680 reference board, so this should work fine. I could go with EK for the GPU like I did in Absinthe, but the only reason I went with EK with Absinthe is the fact no one else had anything for the GTX 660. Going with Koolance blocks means I’m going with Koolance coolant as well, so it all works out.

I’m also considering putting water blocks on the memory with the Koolance RAM-33. If all goes well with that, I might consider the same as an upgrade for Absinthe, though it’d be something requiring me to pull apart the loop to reconfigure it – possibly adding a second pump if restriction might be an issue. What I like about the Koolance block compared to other offerings is the fact it sends coolant down through a thin channel along the chips themselves. Most memory water blocks work by flowing coolant across a block that is mounted to heat spreaders, with minimal contact on the heat spreaders as well, while relying on passive heat transfer.

Now while most memory is water cooled purely for bling, with air cooling being more than adequate unless you’re running a server that is constantly hit around the clock, I might as well get some more effective cooling out of the bling. Plus it’ll go with the other Koolance blocks. And by taking the loop across the memory, it alleviates the need to figure out how to get around it in planning the loop, though it does add some complication to planning it.

Like in Absinthe, the radiators will be AlphaCool, 360mm at the top and 240mm at the front – a lot of radiator space for just two blocks, meaning I shouldn’t have any problem keeping things cool, even if I add the memory into the mix. The fans are going to also be switched over to the Bitfenix Spectre Pro fans, but not using a fan controller. And also like in Absinthe, I’m going with the AlphaCool VPP655 pump and HF D5 pump top.

Where things will differ with Absinthe is the reservoir: the Phobya Balancer 150 Silver Nickel. This will mean a different loop design to what I had in Absinthe, as both the inlet and outlet are on the bottom of the reservoir. I was first considering going with the PrimoChill fittings like in Absinthe, but AlphaCool has recently introduced their own 13mm OD fittings – 13mm is a hair above 1/2″ (12.7mm). So I will order a pair of those and give them a try to see how well they work with 1/2″ copper tubing.

Build phases

There will basically be two phases to this build: the fans, and everything else, maybe some experiments in between.

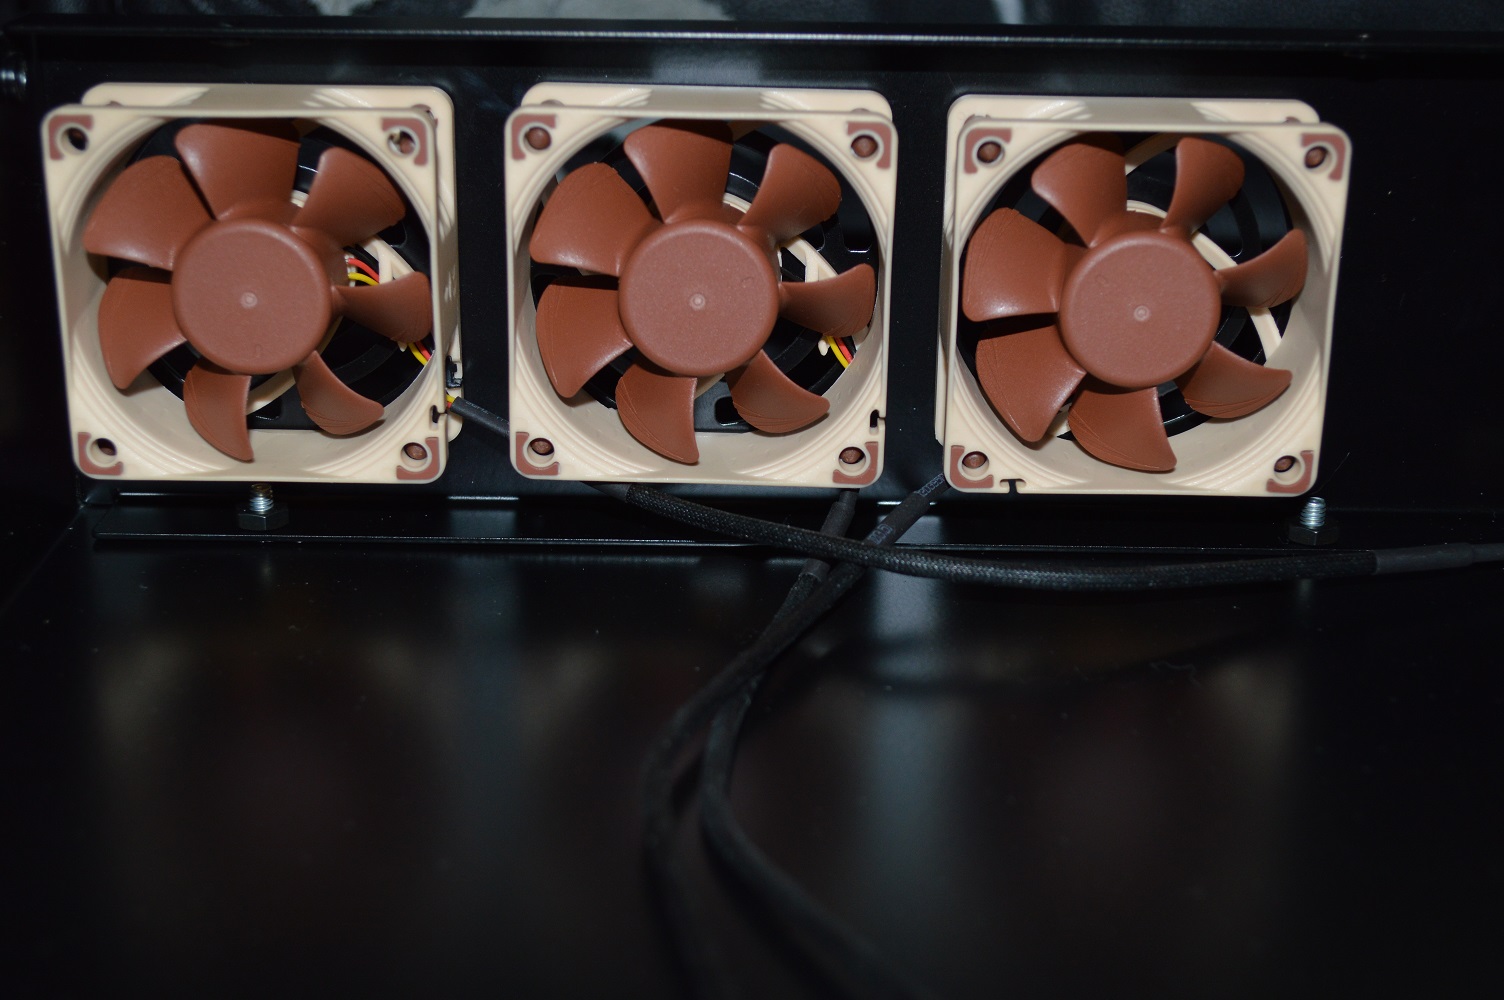
In selecting the Bitfenix fans for Absinthe, I was wildly amazed at how quiet they truly are. As my system currently sounds like a beehive, it’s something I’d certainly like to remedy, so that will come first before everything else. The Bitfenix fans aren’t that much quieter than the 140mm fans that come stock with the Corsair 750D, so it’s only the 120mm fans that’ll be getting replaced up front, five in all. The 140mm fans will wait until I’m building out the loop and have the front radiator completely positioned – I had to pull the front ones off too many times in trying to build out Absinthe that I’m willing to wait.

Now with two of the 120mm fans on AIOs, I’m not sure yet if I’ll be replacing all, or only the three that aren’t on AIOs. In Part 2 of Absinthe’s build log, I posted charts showing a comparison between the Corsair SP120 and two other fans: Noiseblocker PL-2 and Bitfenix Spectre Pro 120mm. The chart shows that for airflow the SP120 and Spectre Pro aren’t that much off, only about a 10% loss in airflow going with the Spectre Pro, but the SP120 has more than double the static pressure, but close to double the noise pressure as well.

The AIOs both have high fin densities, and with those kind of radiators you typically want to lean toward fans with higher static pressure to get the best performance. The question is whether they will still perform well enough with the Spectre Pros that I’m willing to live with it, and I’ll experiment to answer that question. I’m willing to sacrifice a few degrees on the CPU and GPU to have a quieter system.

For refrence, in testing the CPU with Prime95 to get my 4.3GHz overclock, the CPU temperature topped out at 45C on the cores and 49C on the socket running Prime95 on small FFT for about 15 minutes. For the GTX 770 running Unigine Valley Benchmark on Extreme HD preset, the temperatures barely touched 50C as well. So if temperatures are significantly higher than that, like climbing into the high 50s, I’ll keep the SP120s on the AIOs.

* * * * *

Well that’s it for this introduction into the next build I’ll be doing. The first order of fans is on its way and will be arriving later this week, so I’ll be switching out the fans and experimenting with the AIOs when those arrive. After that, parts will be acquired over time, so it may be a while before I have another actual update on any build progress.

Teach hackers to not hack!

We need to teach people to not hack instead of teaching people to not get hacked!

— Said no computer security specialist, ever…

Just as guys learn how to overtake women in order to rape, computer hackers learn their trade in order to cause harm to others – the "black hat hackers" including the ones who got ahold of pictures celebs like Jennifer Lawrence were storing on iCloud. The outstanding question is how the pictures were stolen, as that will determine the course of action needed to be taken by others.

There are steps you can take to reduce the likelihood you’ll be a victim of any kind of crime. You can lock your doors and make other changes/arrangements to your property to prevent burglaries. You can use a car alarm and other such devices to prevent car thefts – to varying degrees of success. Online you can generate secure passwords to prevent accounts from being hacked.

And there are measures a woman can take to reduce the likelihood she’ll be raped.

If Lawrence’s and other celeb accounts were hacked by guessing passwords, they need to use better passwords. If they were hacked by infiltrating the iCloud system, then there was nothing that Lawrence or others could have done, and the entire security breach rests on Apple.

Or perhaps we could tell hackers to not hack instead of Apple needing to beef up their security. After all, if we just taught hackers to not hack, then computer security wouldn’t be needed.

Again, said no reputable computer security specialist. Ever.