- Water cooling build in my wife’s computer – Part IX
- Project Absinthe
- Project Absinthe – Part II
- Project Absinthe – Part III
- Project Absinthe – Part IV
- Project Absinthe – Part V
- Project Absinthe – Part VI
- Project Absinthe – Part VII
- Project Absinthe – Part VIII
- Project Absinthe – Part IX
- Project Absinthe – Part X
- Project Absinthe – Part XI
- Project Absinthe – Part XII
- Project Absinthe – Part XIII
- Project Absinthe – Part XIV
- Project Absinthe – Part XV: It’s alive!
- Project Absinthe – Intermission and future plans
- Project Absinthe – Part XVI
- Absinthe – Part XVII
- Absinthe – Part XVIII
- Absinthe – Part XIX: Valentine’s Day
- Absinthe – Part XX
- Distilling another batch of Absinthe
- Distilling Absinthe – Part II
- Distilling Absinthe — Part III
- Another glass of absinthe
- Another glass of absinthe — II
- Adjusting the recipe
- Absinthe to Amethyst
Finally we come to the part of the build that I have been looking forward to for weeks: connecting the dots.
The first order of business, though, wasn’t running tubing, but testing the drainage system I had earlier worked up with fittings. I wanted to make sure everything was tight and wasn’t going to leak. More importantly I wanted to make sure it was going to work the way I was seeing it in my head.
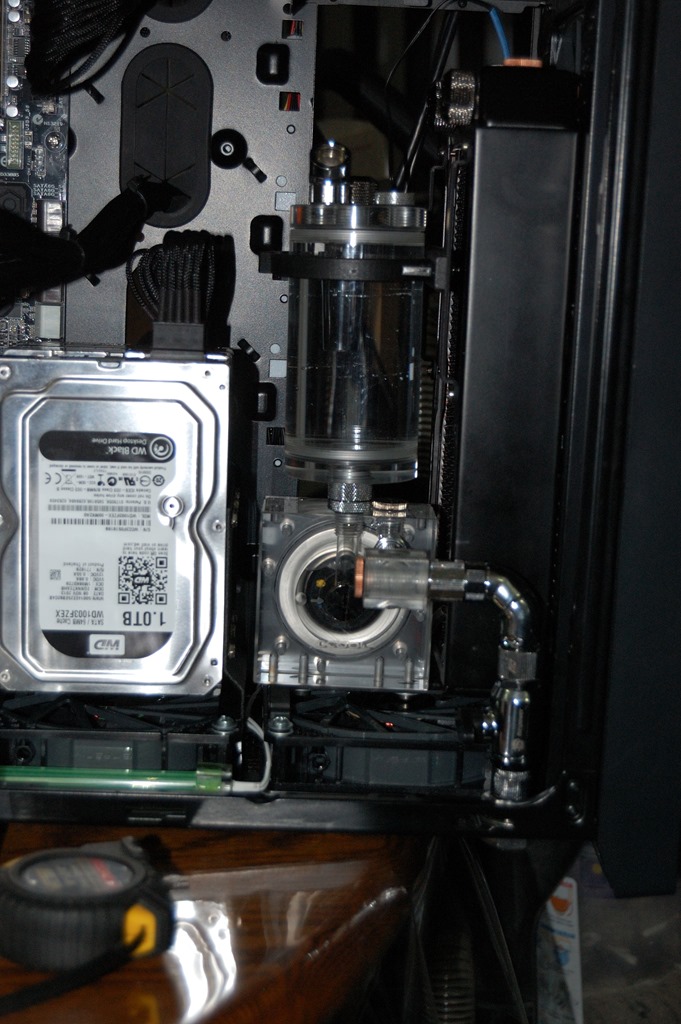
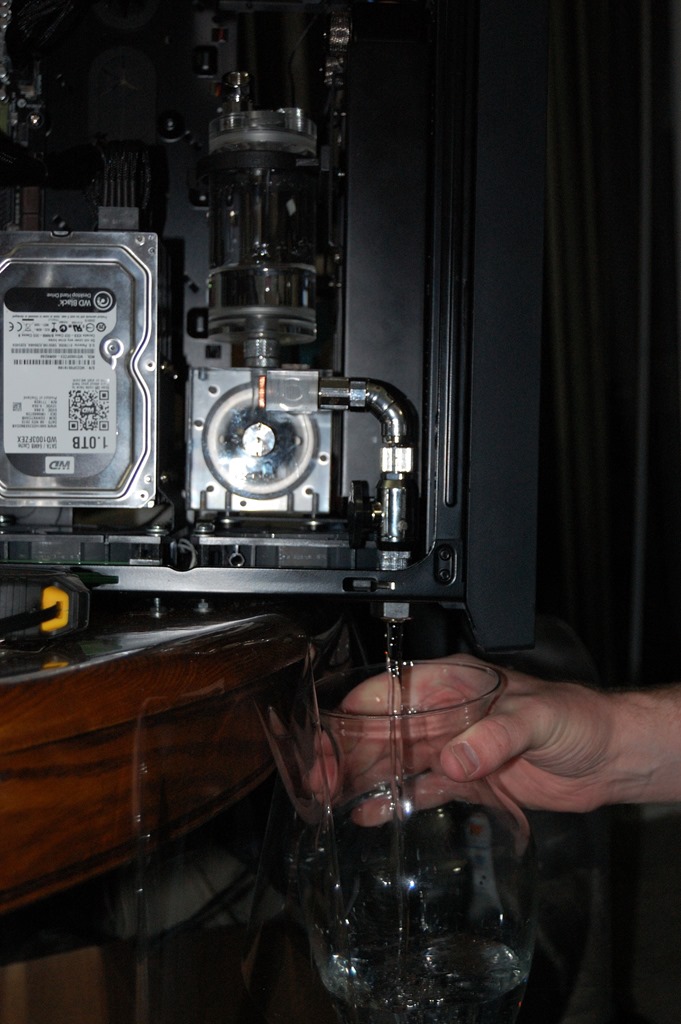
I just used distilled water for this. As you can see, it drains as I said: like draining the coolant from a car. I think that vase is about a half gallon volume (about 1.9L) as well, so when it comes time for the real leak and drainage testing, it’ll hold volume without a problem.
Down to business.
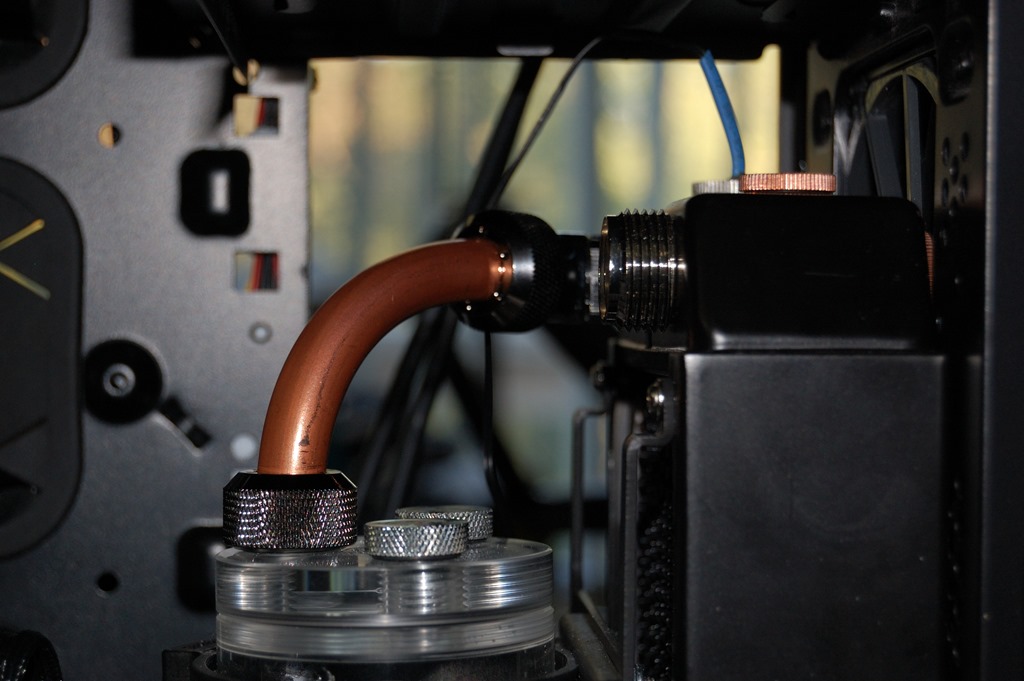
I started running the tubing on Friday night. Living in an apartment, that meant that cutting and straightening tubing more than what I originally had during my earlier experiments would have to wait till the next day. I had some tubing already pulled that I could use, and I was able to make the first run from the pump to the SLI bridge.
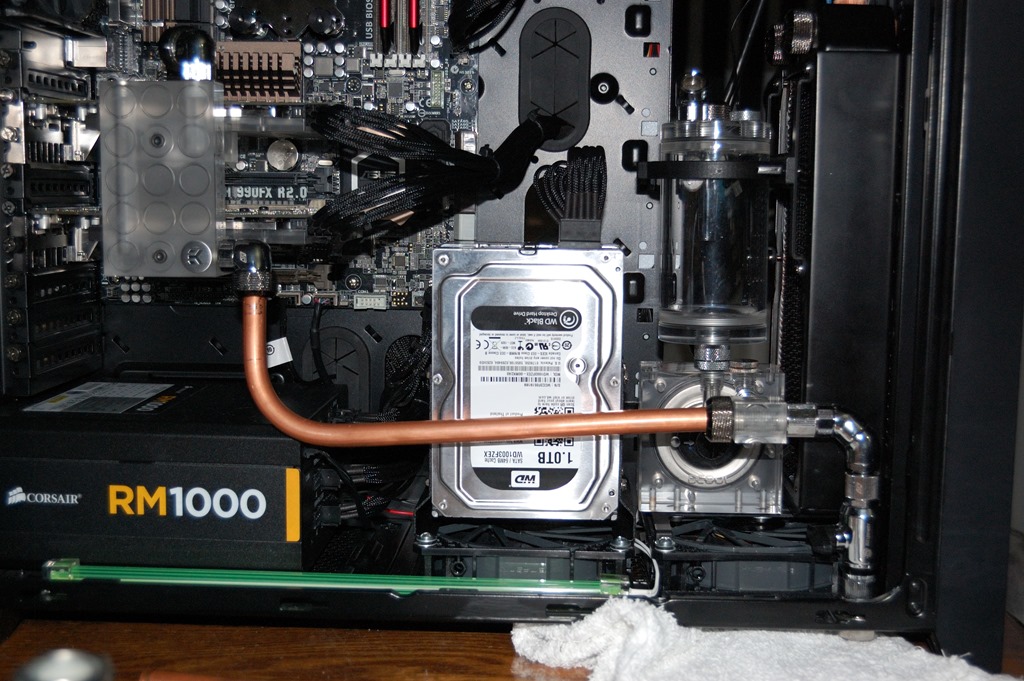
You can probably tell that piece of tubing isn’t entirely straight on the fittings. That’s actually one of the beauties of the Primochill fittings and one of the key points where they beat the Bitspower fittings: the tubing doesn’t need to perfectly line up. With the Bitspower fittings, a slight deviation could mean leaks. With the Primochill fittings, so long as you can get the compression ring down and tight on the fitting, all should be good. Sure the cockeyed lineup might impact flow a little, but it shouldn’t leak.
But I left it for the next day to fix as I didn’t have any lengths of straight tubing long enough to handle it.
* * * * *
Yet another Saturday in this long journey for Absinthe.
Straightening and bending copper tubing is certainly an exercise in patience. Even tubing with single 90-degree bends will probably take a half hour of adjustments to the tubing length. Whether you’re taking 2″ or 1/4″ inch off the end of the tube, both cuts take the same amount of time. And as you get the tubing dialed in to the proper lengths, your cuts are going to get shorter and shorter.
And let’s not discount mistakes as well, which will also eat your time.
Initially I started by looking at connecting the SLI bridge to the top radiator. It was a single 90-degree bend followed by cutting down the tubing little by little until I had it right.
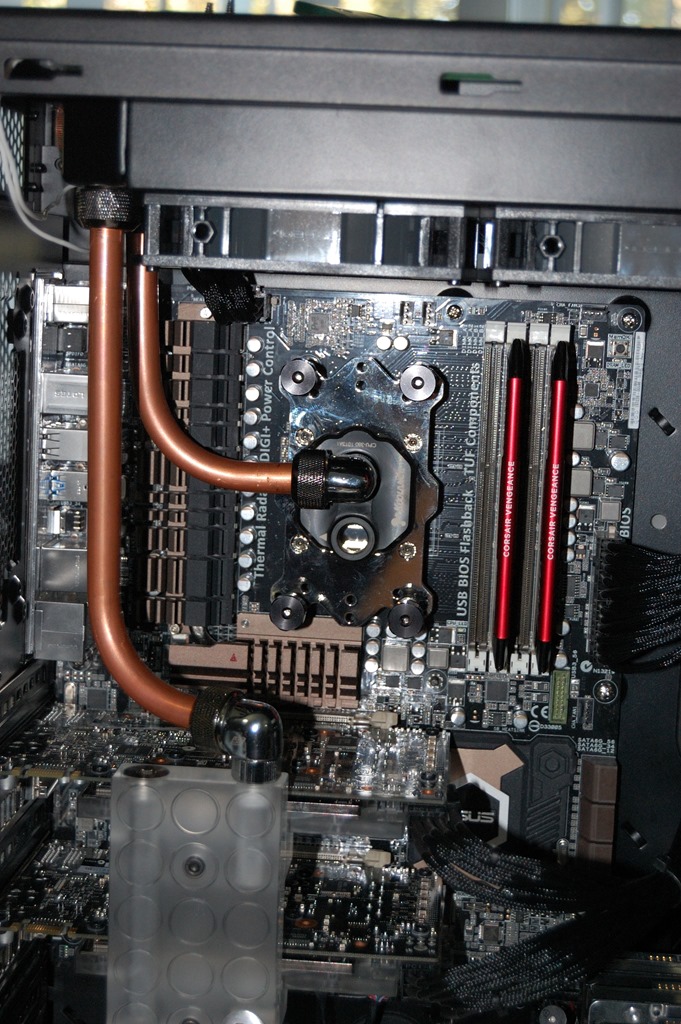
Afterward I turned my attention to attempting to redo the front connection, the one that was a little off-angle, but ended up messing up the tubing trying to cut it down. So instead I tried to use it as a guide to measure up the top radiator to CPU connection. That allowed me to discover that a 90-degree single rotary fitting plus the bent tubing lined up perfectly. So the top radiator ended up tubed up sooner than I had originally planned.
I was certainly pleased because it meant some of the bends would be significantly less complicated than I originally imagined.
With another piece of a screwed up bend and a 45-degree single-rotary fitting, I was able to tube up the flow from the front radiator back to the reservoir.
This was a very tight fit on the fittings too, so I’m not sure if I’m going to leave this like that.
Now with both my 90-degree single-rotary fittings used on the radiator connections, I turned to Microcenter to find another one. Their web site said they had one Bitspower matte-black fitting in stock, but unfortunately I couldn’t find it once I got there. It was either sold and their online inventory hasn’t adjusted yet – given they don’t have their nice current stock of 45-degree single rotary and 90-degree dual rotary fittings listed, this is likely – or the fitting was lifted – which is also likely given I found open and empty packets for a Bitspower valve and stop fitting.
So I tried to tube up the rest of the loop with what fittings I still had.
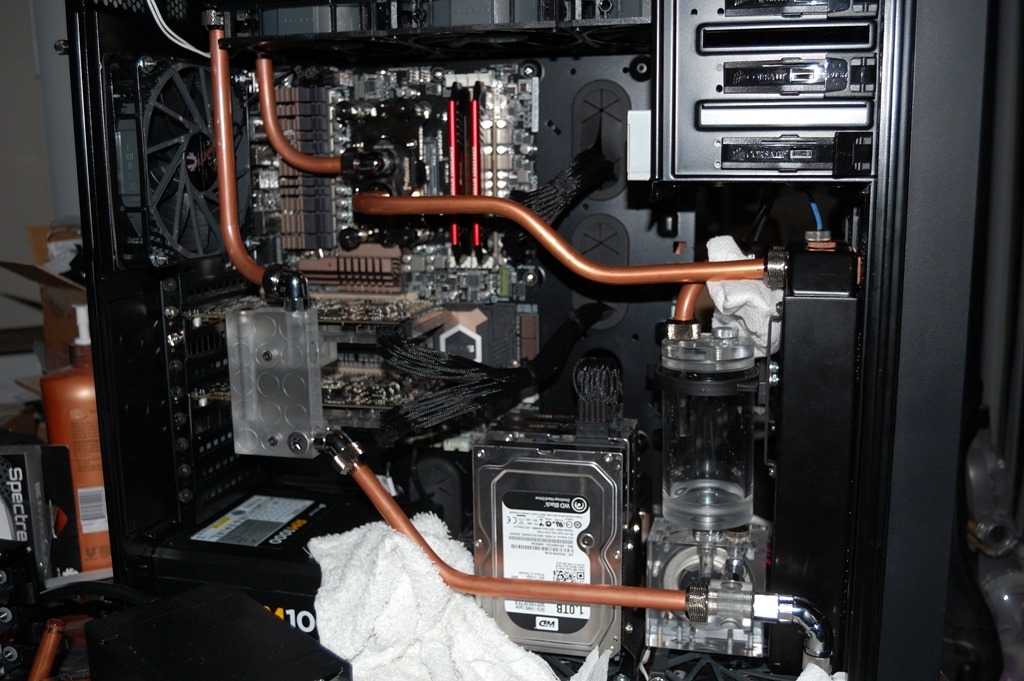
There are paper towels placed because I initially tried to do a leak test on this, which worked out somewhat well, but not nearly as well as I would’ve liked.
The 45-degree connection going from the pump to SLI bridge leaks if it’s jostled. And I don’t like how the tubing from the CPU to the front radiator looks a little cock-eyed as well. At the least that needs to be re-done. And the initial flow line out of the pump is also going to get replaced. I’ve got an order for a few more single-rotary fittings on an overnight order from Performance-PCs, so those should be here Tuesday.
The 45-degree connection will be replaced with a 90-degree connection similar to what is leading from the SLI bridge to the top radiator. I’m going to also replace the connection going from the front radiator to to the reservoir using another 90-degree single-rotary fitting coming off the port that currently has the temperature probe, alleviating the tight fit on the compression fittings. As for the CPU to front radiator, I’m not entirely sure what I’m going to do with that yet. I’m also considering figuring out how to redo the drainage system using copper tubing as opposed to fittings.
Unfortunately it means more waiting, but everything should be better in the end.
And once the fittings arrive and the connections are re-done, I’ll be doing another leak test. If everything goes well, the tubing will be taken out of the system to be polished and re-installed for another leak test. Once that leak test is done, the distilled water will be changed out for the coolant.