- Beta Orionis
- Beta Orionis – Part II: New fans
- Beta Orionis – Part III
- Beta Orionis – Part IV
- Beta Orionis – Part V
- Beta Orionis – Part VI
- Beta Orionis – Part VII
- Beta Orionis – Part VIII: Delays
- Beta Orionis – Part IX
- Beta Orionis – Part X
- Beta Orionis – Part XI
- Beta Orionis – Part XII
- Beta Orionis – Part XIII
- Beta Orionis – Part XIV
- Beta Orionis – Part XV: Follow-up with Koolance blocks
- Beta Orionis – Part XVI: Overclocking the GPUs (or not)
- Beta Orionis – Part XVII: The AX860
- Beta Orionis – Part XVIII: New power supply and quieting things down
- Beta Orionis – Part XIX: Taking it outside
- Beta Orionis – Part XX: New loop
- Beta Orionis – Part XXI
- Beta Orionis – Part XXII
- Beta Orionis – Part XXIII
- Beta Orionis – Part XXIV
- Radiator box for PC water cooling
- Beta Orionis – Part XXV
- Corsair AX860: A retraction
- Mira
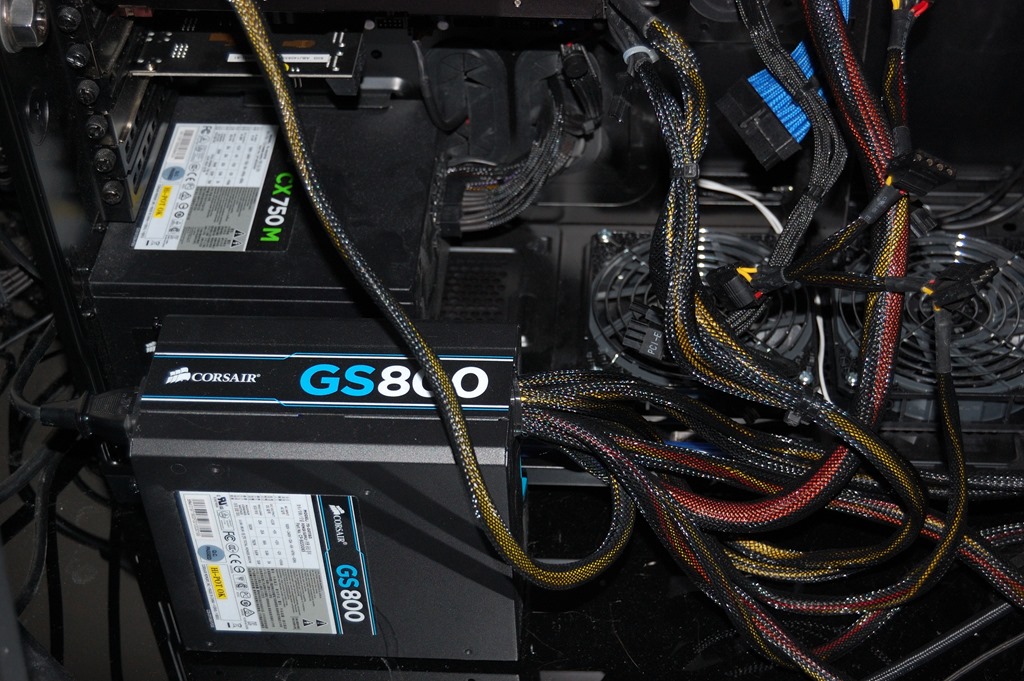
I have not had a lot of luck with power supplies over the years. They are the one part I have had to replace more than anything else in the last 16 years I’ve been working with computers. And unfortunately the most recent casualty is my Corsair CX750M.
What told me I needed to replace the power supply is when the mouse and keyboard would shut off and the monitors would go blank, but the fans and CCFL would still be running. The reset button would not function, and holding the power button would not get it to turn off. This tells me the power supply was randomly losing current or voltage and the current or voltage would drop below what is capable of running the mainboard and graphics card, but still large enough to run the fans and light.
The consideration in the replacement of the power supply is the depth. I have a plan on the loop, in that I plan to put the 240mm radiator laying on the floor, so I cannot have too long a power supply otherwise that plan would be disrupted. I took this as an opportunity to go with a better power supply as well rather than just replacing it with one of the same. So the CX750M will be replaced by a Corsair AX860. This power supply is platinum rated, meaning a better efficiency curve, and is fully modular and uses the same modular cable kit as the RM1000 and CX750M.
But again one of the primary considerations was the size of the power supply. The CX750M is only 140mm deep. The AX860 is 160mm deep. That is not nearly as deep as the 180mm of the RM1000. In Absinthe I was originally wanting to have the 240mm radiator on the floor as I have planned for β Ori. The problem was the modular cables sticking out from the back of the RM1000. There just wasn’t any way to lay the radiator on the floor of the case without the cabling interfering.
Unfortunately FedEx screwed up in trying to deliver it to me. As this machine is my main computer, I had to instead retrofit a spare power supply to power my system. This confirmed the power supply was indeed the issue, as my system had no difficulty remaining stable, instead of dying after a relatively short period of time. Unfortunately it means the computer looks like it’s attached to a heart-lung machine.

Thanks, FedEx.
* * * * *
So before talking about the PSU upgrade, I think I need to mention why the power supply died. Now one thing that can kill electronic components faster than anything you can reasonably do to them is continually powering it off and on, especially if it is powered off after being on a short period of time. The mainboard in this system is the Gigabyte 990FXA-UD3. In getting my overclock, I adjusted some settings in the BIOS. After making those changes, when powering on the system it would come on briefly (not even a second), then power back off again for a few seconds before coming back on and booting up.
In a Google search, I came across a thread discussing the very problem I was having. Turns out the concern was the fact that I had turned off the “CPU Performance Boost” setting. There’s a good reason I turned it off: I noticed that with it on, the CPU would throttle the multiplier while I was running Prime95. I had the bus speed set to 220MHz with the multiplier still set to 20, and I saw in CPU-Z that the multiplier would throttle down to 17 and back up to 20. Turning off the “CPU Performance Boost” kept that from happening, but also forced me to drop the bus speed to 215MHz to have a stable overclock.
In another thread on TomsHardware.com, someone said that the off/on behavior would not damage your components. Actually it will. Some components are just more robust than others, and apparently my power supply was on the short end of that list.
I’ve since rolled back the overclock and have the processor running at stock speeds. I may try to overclock it later, but I know now that I’ll need to leave the “Performance Boost” option enabled, thus risking throttling, meaning I’ll actually need to look for an overclock setting where that does not happen. I think I’ll need to play around with some of the settings a little bit to see what causes the power off/on behavior and what doesn’t. I’ve seen a couple threads that say it seems to rest on either the “CPU Unlock” feature or the “CPU Performance Boost” feature.
Now does this mean the CX750M “sucks”? No.
The power supply worked perfectly fine during the time I had it in my system, and I consider it to be a pretty good value – a 750W, bronze-rated modular power supply for only $70 to $80 at current prices – and I will be RMA’ing it so I can make use of it elsewhere, likely in building out a server system I’ve mentioned a couple times. The problem only started occurring when the overclocking settings caused the weird power on/off behavior that would be deadly to any electronic component if it goes on long enough. Again some components can handle it better than others, and this is a behavior that Gigabyte really needs to address, especially if it’s present in any of their other mainboards.
* * * * *
There’s been a slight change of plans.
I decided I needed radiators before everything else so I can see how things would fit. The pump is pretty much set in stone, as are the blocks and some of the radiators (more on that in a sec), but not everything is set in stone. So because of this and the possibility things could end up changing, two things are going to happen: 1. I’m going to move my system out of the 750D, like I did with Absinthe, and into the Zalman case (provided my GTX 770 can fit), and 2. I’m going to plan things out several parts at a time, starting with the radiators.
On that mark, I’ve opted toward the ST30 instead of the XT45. According to Martin’s Liquid Lab, the ST30 and XT45 perform pretty neck and neck on lower RPM fans like the Spectre Pro, but the ST30s are much less expensive: the 360mm model goes for $59 on Performance-PCs for the ST30, compared to $76 for the XT45. Similar price difference with the 240mm model as well – $43 for the ST30 and compared to $54 for the XT45.
Total savings going with the ST30 over the XT45: $28. Apparent loss of cooling capacity: none. So if you’re using lower RPM fans, go with the AlphaCool ST30 lineup and save some money in building out your loop. I wish I’d known about this in building Absinthe, since they are thinner.
Anyway…
Now the 240mm radiator will be laying on the floor with the fans in a pull configuration, so the radiator poses the least amount of interference to the power supply – I found a forum post showing a 750D build with an XS-PC 240mm radiator mounted on the floor with the AX860, though in push/pull, so it’s good to see a picture of what I want to do. The 360mm radiator will be going in the roof with the fans in push. That’s 5x120mm of radiator space, just like in Absinthe and most 750D builds. And for a CPU and one graphics card plus the memory, that’s plenty of radiator capacity.
But I’m not stopping there. More radiators will ensure everything can stay nice and cool with the slower fans when things start getting intense, and it should provide plenty of headroom for a future upgrade.
To that end, I ordered the ST30 240mm radiator and an XS-PC EX140 radiator. And that’s not for the rear mount point.
The 750D features two 140mm fans in the front. Those fans are mounted with #6-32 screws in screw holes that are pass-through. My hope is that I will be able to mount the 140mm radiator with the fitting ports to the side as opposed to either up or down in the typical configuration. It’s potentially a close fit as well, as the radiator is 180mm long, meaning the fitting channels extend about 30mm past the edge of the fan.
The #6-32 screw holes are important on this, hence why I went with the XS-PC radiator. Most radiator manufacturers use M3 or M4 – AlphaCool uses M3s – but from what I’ve so far seen, only Swiftech and XS-PC use #6-32 UNC threads on their radiators. I’ll be buying longer #6-32 screws to go completely through the screw holes and into the radiator. Not sure what size I need right now. I’ll figure that out when the time comes.
Along with the 140mm radiator, I’ll also be going with a 120mm radiator on the front, but above it: the XS-PC EX120. The EX140 is 143mm wide, and the fans on the front appear to be mounted tight against each other with no margin, and I’d need a 4mm gap between the fans to be safe to mount 2x140mm radiators side by side on the top. It’ll look odd at the least, but it’ll at least give me more cooling capacity in the loop, a total of 6x120mm plus 1x140mm – provided it all works as I hope it will.
The move and the initial test fits will be happening this weekend after the first two radiators arrive.