- Water cooling build in my wife’s computer – Part IX
- Project Absinthe
- Project Absinthe – Part II
- Project Absinthe – Part III
- Project Absinthe – Part IV
- Project Absinthe – Part V
- Project Absinthe – Part VI
- Project Absinthe – Part VII
- Project Absinthe – Part VIII
- Project Absinthe – Part IX
- Project Absinthe – Part X
- Project Absinthe – Part XI
- Project Absinthe – Part XII
- Project Absinthe – Part XIII
- Project Absinthe – Part XIV
- Project Absinthe – Part XV: It’s alive!
- Project Absinthe – Intermission and future plans
- Project Absinthe – Part XVI
- Absinthe – Part XVII
- Absinthe – Part XVIII
- Absinthe – Part XIX: Valentine’s Day
- Absinthe – Part XX
- Distilling another batch of Absinthe
- Distilling Absinthe – Part II
- Distilling Absinthe — Part III
- Another glass of absinthe
- Another glass of absinthe — II
- Adjusting the recipe
- Absinthe to Amethyst
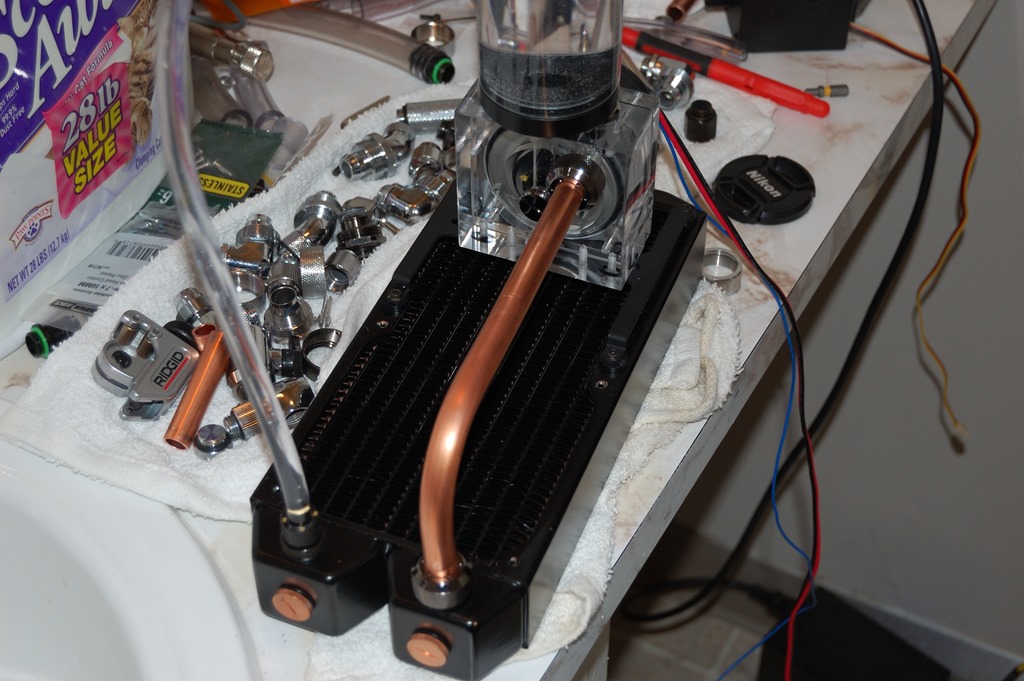
Let’s start with a proof of concept in a bid to do something different. For making hardline water cooling loops, most everyone is using acrylic or PETG tubing (note: do not use polycarbonate, as it can be destroyed by propylene glycol and ethylene glycol). But one thing that few are using is copper. I’ve looked around and found only a few builds using copper tubing.
Now Absinthe has its name from the green lights that my wife selected when we were upgrading her system. Absinthe is typically produced through distillation, and I think the soft copper tubing will make the system look as if it’s built to distill liquor. Plus the copper tubing is is still less expensive than some of the specialty water cooling tubing – I paid only $14 for 10′ at Home Depot, and the price is slightly better at Lowe’s. The green lighting that gave Absinthe its name will make it look like the “green fairy” watching over its latest batch being produced.
To that end I’ve had to make a couple acquisitions for the purpose of experimenting. Along with the aforementioned tubing – 3/8″ ID x 1/2″ OD – I also purchased a tubing bender: Imperial Tools 370-FH, which I was able to get through Zoro.com for under $50. It has a 1.5″ radius when bending, so something to keep in mind if you go this route. It was also the least expensive tubing bender I could find that could take 1/2″ tubing that also had a decent rating on it. I already had a tubing cutter from years ago, so I didn’t need that.
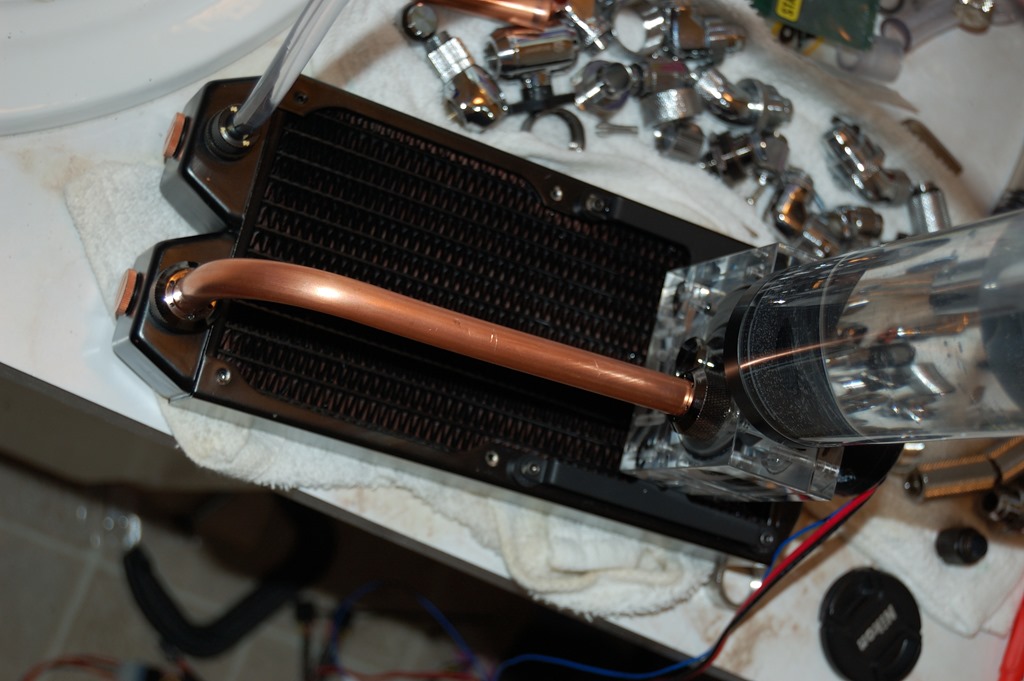
Now the tubing comes in coils, so I needed a way of straightening it. A crude method is using a C-clamp to clamp it to a countertop and using a mallet and wrench to pull it taught and straight. It works reasonably well and allowed me to straighten enough and bend a length of copper tubing:
But a better way of doing this is with an actual bench vice. Now I’m not expecting to get perfectly straight lengths of tubing, and I’m not willing to spend the outrageous price for a tubing straightener. If I was doing this for client builds, that might be a different story. Most options I’ve seen list for 200 USD, while the least expensive one I’ve seen available is 39.99 GBP (shy of 70 USD at current exchange rates) plus international shipping (though for US buyers it’d probably be less since I believe he’d have to subtract out the VAT), but isn’t available for 1/2″ OD tubing. I’ve seen some homegrown options that others have posted to DIY forums, but even then the bench vice option is the least expensive and easiest to obtain, especially since I was able to obtain a reasonable bench vice for only $24 from Harbor Freight.
For those wondering what a bench vice has to do with straightening soft copper tubing, watch this video:
http://www.youtu.be/LvGEKaaPf5E
But you also need fittings. Here’s where my research took me in a few directions.
Koolance makes compression fittings specifically for copper tubing – note that there is a difference between compression fittings used in plumbing and what companies like Bitspower and Alphacool call “compression fittings” for soft tubing. They’re also $10 each for 1/2″ OD fittings when bought in reasonable bulk through Koolance’s web site. But I was also already aware that PrimoChill made compression fittings for hard tubing, specifically for 3/8″ x 1/2″ tubing. So I ordered a pair to give them a try and gather the above proof of concept. They were less expensive than Koolance’s offering, and also looked better.
And I ended up ordering a 10-pack of them. I don’t know if 12 fittings will be enough, but we’ll find out.
Change of scenery
I have a lot planned for Absinthe, but a lot of what I need to figure out is going to require access to the case itself. But to have access to the case in the manner required, my wife really cannot be on her computer. Obviously there’s a conflict, as I need to access to the case without my wife losing access to her computer. Anyone with gamer wife likely knows the dangers involved here – I’m not sure if it’s on the same order as or worse than denying chocolate to a woman who’s menstrual.
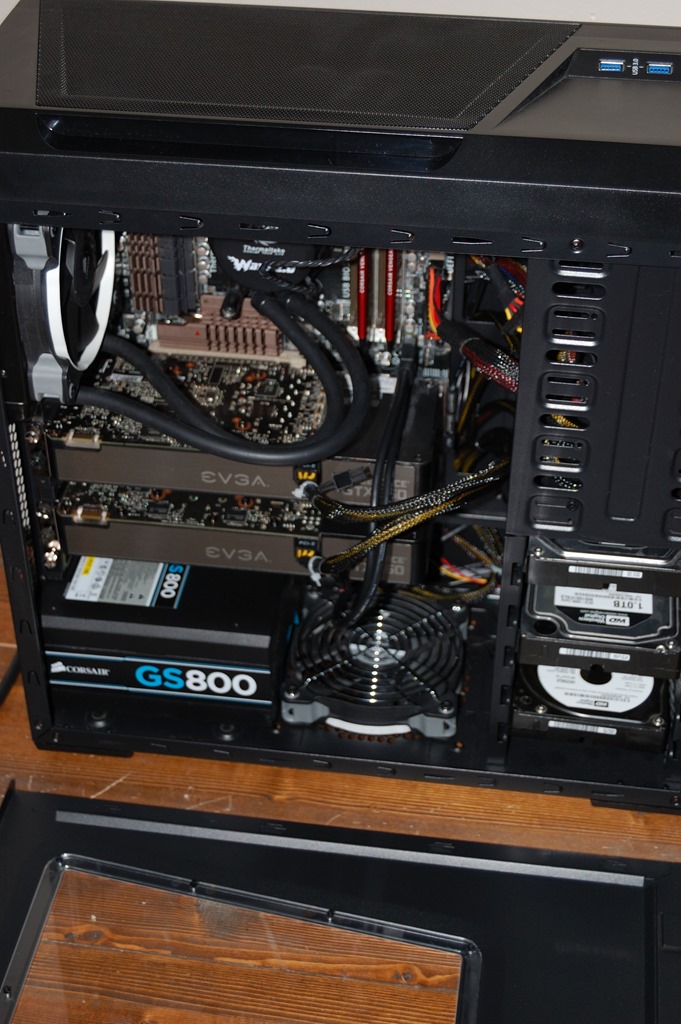
Looks a bit cramped, doesn’t it?
That case is the Zalman Z12 Plus, which is a mid-tower ATX case, or at least it’s called a mid-tower. It barely has room for her two graphics cards and the mainboard. I bought this case earlier this year to house my computer as I was moving it out of an Apevia mid-tower case. Then my wife picked out the 750D for her computer, and I decided I needed one for my machine as well. I love building into the 750D, and I know I’ll like moving everything back into it.
Aside from room, the main downside on the Z12 is cooling space. It has room for only 5 fans: 2 in the roof, 1 in the front, rear and floor. The rear fan above the processor is 120mm only, but all the other fan spaces have a 140mm option, though the bottom fan mount can only fit a 140mm fan if you’re using a short enough power supply – and it cannot be a modular power supply either. More on that in a moment.
For water cooling, there’s no room for radiators with mounted fans. This case pretty much requires you to stick with external options using the tubing pass-through holes below the rear 120mm fan position to get the coolant into and out of the case.
Unfortunately for this build, only 4xSP120s could fit due to the radiator on the ThermalTake cooler, including the one on the radiator. I also had no choice but to put the radiator in the rear 120mm position as any other place and it would’ve conflicted with the components on the mainboard, and I couldn’t mount it on the floor without the radiator tubing kinking. And the absolutely poor cooling on this case made it such that it was more worthwhile leaving the side panel off the case and having a fan blowing directly onto it. Sure it’ll likely mean I’m going to have to clean a ton of dust out of it in a couple weeks, but it’ll be running a bit cooler in the mean time.
I also wish I could’ve put the RM1000 in there as it would’ve made cable management so much easier, but unfortunately that wasn’t possible without sacrificing the bottom fan slot, so I opted for the GS800 and difficult cable management instead. With the components in this build, having better cooling was more important than having the more efficient power supply. The GS800 is 160mm long, while the RM1000 is 180mm long. My CX750M, however, is only 140mm long, so using that power supply in the Z12 would allow for a 140mm fan in the floor.
Again, this freed up her case so I could mount radiators and figure out how things will generally be tubed up, where and how things will be mounted. The 120mm Spectre Pros will be ordered when I’m about ready to move everything back into the 750D. The 140mm fans were ordered with fittings I knew I would need for this build and will be put in as soon as they arrive.
Breaking ground
As mentioned in pulling apart her system from the 750D, I initially removed the power supply because I was hoping I’d be able to use it in the Zalman case. So in freeing up her case, the first thing I did was remount the power supply, followed by mounting the 360mm radiator. This time, though, I used #6 washers under the M3 screws to ensure none of the screws would start slipping through the grommets. I left draining the test loop to free the 240mm radiator for the next day.
Earlier in the day I did visit Lowe’s to buy some brass #8-32 1-1/2″ screws, with corresponding washers and nuts. This was for mounting the radiator to the rear 140mm fan slot. Externally.
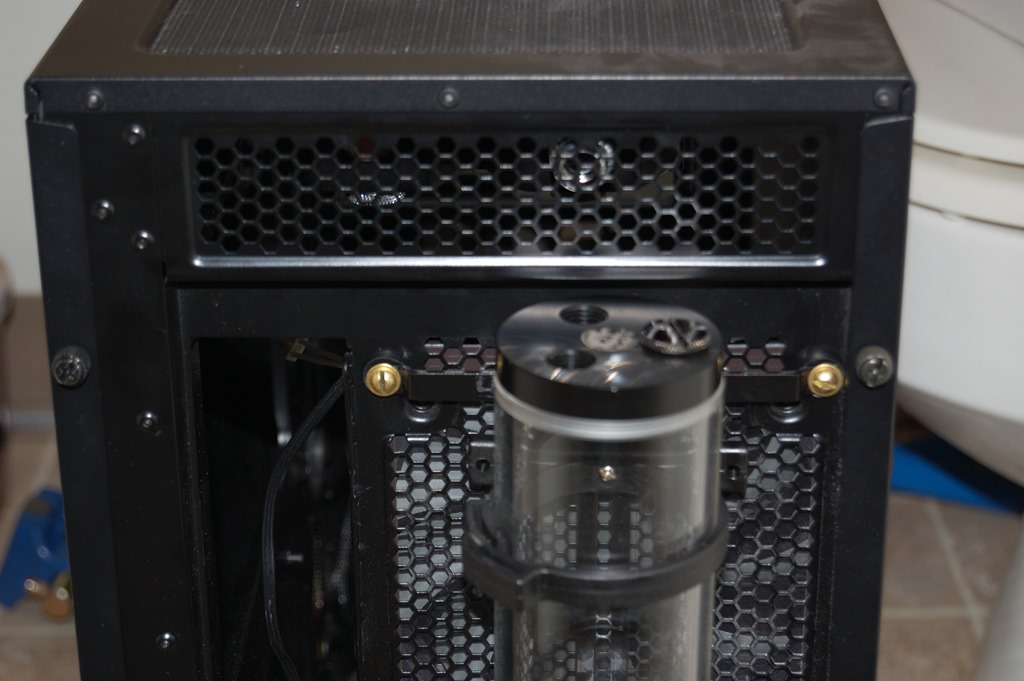
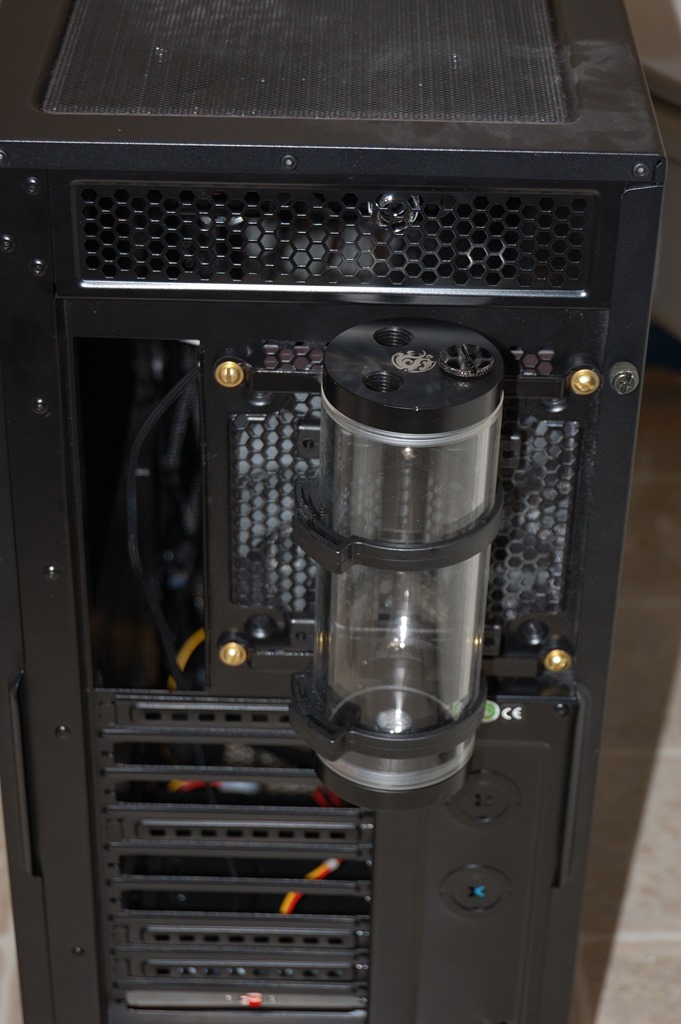
The reservoir is mounted on a UN Designs Z3 bracket. Sidewinder Computers I’ve found has the best price on this, by the way. Even with shipping they’re still less expensive than what everyone else is charging before shipping is included.
I’m using 00 rubber washers to offset the bracket from the back of the case, otherwise it wouldn’t fit the way I wanted to mount it. In hindsight I could actually have used 1/2″ or 3/4″ screws to mount this. The reason for this is the divided mounting holes for the fans. All I’d have to do is get the screw through the inner mounting hole. Not all fans have divided mounting holes, though, and the Spectre Pros fall into that category, having a channel connecting the two mounting holes. I’m not sure if I’ll modify the fans, though, but another option I’m considering is buying 2″ brass screws and use more 00 washers to offset the Z3 mounting bracket just a little more.
Planning it out
The plan is to have the outlet from the 360mm radiator go out the mesh on the upper rear of the case through a bulkhead fitting – you can probably see the Swiftech SLI fitting in the pictures above – and then go down into the reservoir, likely through a 90-degree dual rotary fitting since those provide for a softer radius which provides for less resistance over the hard 90-degree fittings you commonly see in water cooling loops. And having the least amount of resistance at the point in the flow furthest from the pump is always better.
In the lower picture above you can see the two pass-through holes at the back of the 750D. I’m not sure yet how I’m going to get the coolant from the reservoir into the case. I have a Koolance expansion slot pass-through bracket I’m considering using, but I’m also considering using one of the pass-through holes as well. The advantage of using the pass-through holes is a more direct route to where I’m planning to put the pump, allowing the coolant to just drop directly to it rather than having to travel along a horizontal path first.
That red switch down at the bottom is for the cold cathode lights. The little glint of blue you can see behind the lower pass-through is the transformer for the CCFLs. I want to hide that behind the mainboard tray and get it completely out of the way. Extension cables, though can be problematic and the issue well-documented online, and I’m well aware of them myself as I use an extension cable on the CCFLs in my own case. Initially I bought 24″ extension cables and didn’t like the result:
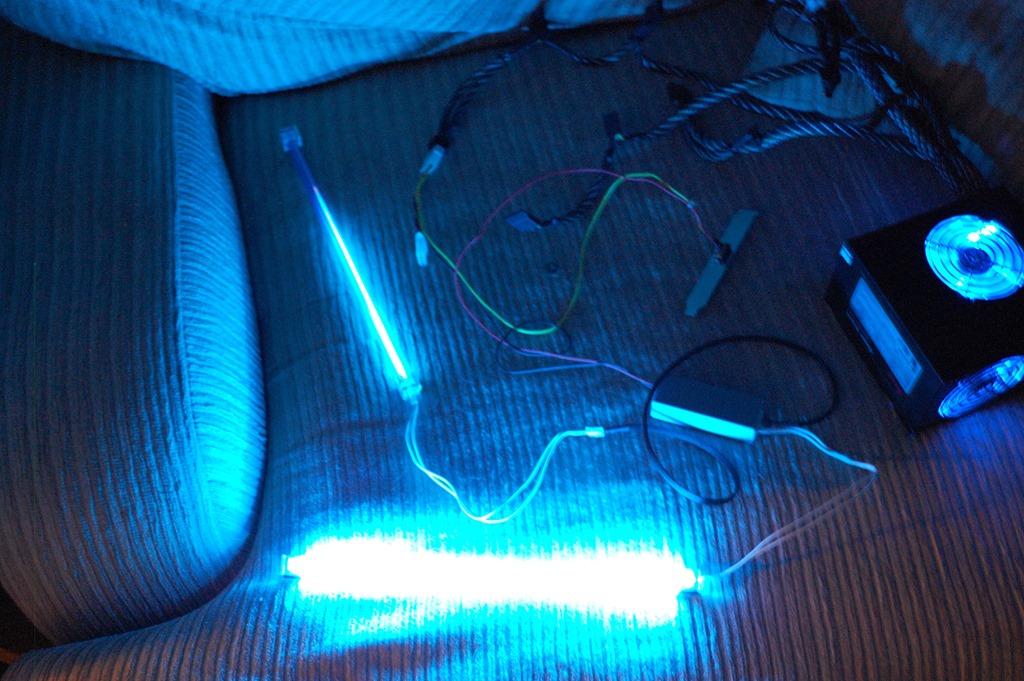
The dimmer light is connected to the extension cable, as you can see, while the brighter light is plugged directly into the inverter. I bought 12″ extension cables, and that is currently what’s in my system. It’s still odd with them, though, because the lights will start out dim when the system is powered on and will take a while to get to near full brightness. It’s nice having the cables because it allowed me to hide the inverter behind the mainboard out of the way, but I’m searching for something better.
And I think I’ve found it: a “stackable” CCFL inverter, which allow you to chain the inverter boxes off one single power point. This allows you to have one inverter toward the roof, another toward the floor, eliminating the need for extension cables on the lights. The question is whether everything could lay flat behind the mainboard tray.
* * * * *
So as I’ve shown herein, there is quite a bit planned for Absinthe. The next order arrives on Wednesday which will have the Primochill fittings, a Koolance bulkhead fitting, and the 140mm Spectre Pro fans. In the mean time, I need to drain the test loop I made with the 240mm radiator and the copper tubing so I can mount that radiator into the case.
I’m going to do another test fit with that radiator onto the floor of the case to see if it will actually fit on the floor adjacent to the power supply and its cables. If it will fit on the floor adjacent to the power supply and its cables, then the reservoir will go inside the case and I’ll figure out a different way to mount up everything else. If it won’t, as I believe it will not, then I’ll be holding to my original plans.