- Beta Orionis
- Beta Orionis – Part II: New fans
- Beta Orionis – Part III
- Beta Orionis – Part IV
- Beta Orionis – Part V
- Beta Orionis – Part VI
- Beta Orionis – Part VII
- Beta Orionis – Part VIII: Delays
- Beta Orionis – Part IX
- Beta Orionis – Part X
- Beta Orionis – Part XI
- Beta Orionis – Part XII
- Beta Orionis – Part XIII
- Beta Orionis – Part XIV
- Beta Orionis – Part XV: Follow-up with Koolance blocks
- Beta Orionis – Part XVI: Overclocking the GPUs (or not)
- Beta Orionis – Part XVII: The AX860
- Beta Orionis – Part XVIII: New power supply and quieting things down
- Beta Orionis – Part XIX: Taking it outside
- Beta Orionis – Part XX: New loop
- Beta Orionis – Part XXI
- Beta Orionis – Part XXII
- Beta Orionis – Part XXIII
- Beta Orionis – Part XXIV
- Radiator box for PC water cooling
- Beta Orionis – Part XXV
- Corsair AX860: A retraction
- Mira
So much hardware in so little time… Four packages in one day with another due later in the week. The loner toward the end of the week were two UN Z2 brackets from Sidewinder Computers. One of the packages on Wednesday was the RMA from ThermalTake, which got set aside and wasn’t going to be used in this build.
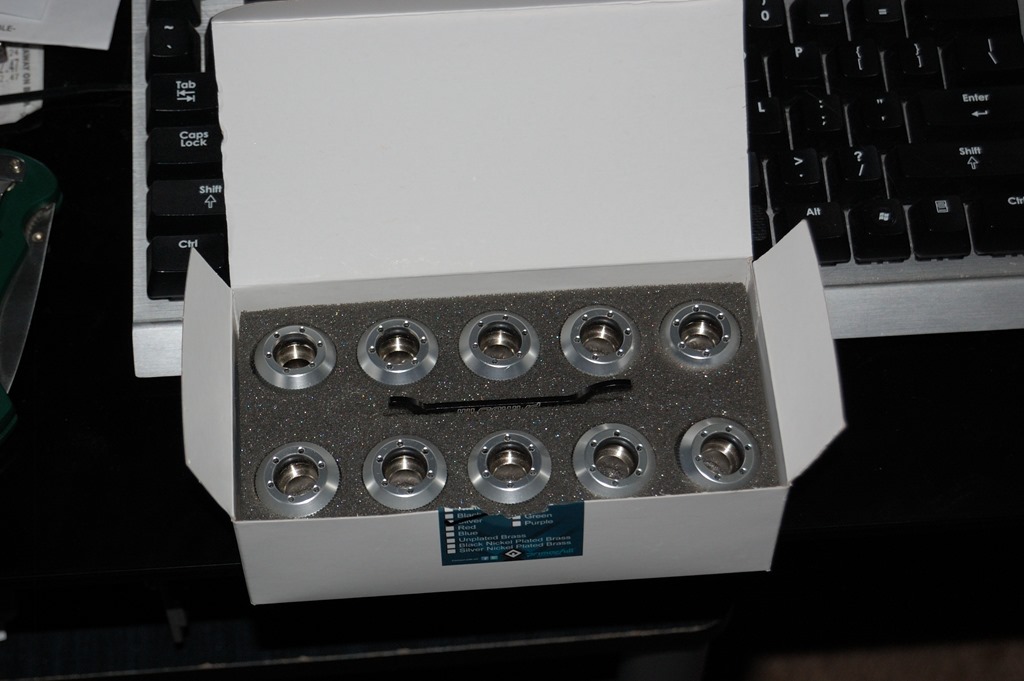
And unfortunately one of the packages contained incorrect items, and this time it was the one from FrozenCPU. Instead of the Swiftech 90-degree single-rotary fittings I ordered, they sent me the dual-rotary fittings. Via e-mail I managed to negotiate with them to have their supplier send me the Koolance 90-degree single-rotary fittings as a substitute – FrozenCPU carries the black fittings but not the silver, hence why I asked if their supplier could send them to me. It actually works out doing that, as well, given I’m using Koolance water blocks.
It just seems that no one has the Swiftech fittings in stock, not even Swiftech has them, while Performance-PCs carries the Koolance fittings for about a dollar less than Koolance’s website.
Speaking of Koolance…
Koolance again
Having two graphics cards means needing two water blocks for water cooling. So when I saw that Koolance had dropped its price on the GTX 680 waterblock, I decided to order one immediately rather than wait. They lowered the price on it by $20, which basically tells me it’s approaching end-of-life for that particular block. But still, a GTX 680 water block for only $90 initially, then $70 the second time around. That’s a pretty decent deal, especially since XS-PC’s block still retails for around $100, and the EK blocks are a little higher.
I also added a bottle of coolant to the order since I know I’ll need it. In filling up Absinthe, I touched into the second bottle I originally bought, meaning I know I’m not going to have enough for my loop. Hopefully having shy of two bottles will do the trick. Each bottle is 700mL.
I’m still not entirely sure what I’m going to do for connecting these two together. I’m thinking about using Bitspower Crystal Link, but I can also just use copper tubing as well with the PrimoChill fittings, provided I have enough. I may also go with Swiftech or Koolance’s SLI fittings.
Actually, I still have some EK 12mm ID acrylic tubing and a pair of 16mm HD fittings back from when I was experimenting before Absinthe started. I’ll order another pair of EK fittings and pick up a hacksaw and jig for cutting the tubing and just use that for SLI. I’ll figure out the lengths I’ll need when the time comes. It does mean the tubing will be going from a 3/8″ ID to 12mm ID, but it shouldn’t create any major flow issues. If it appears to, I can certainly switch over to fittings or copper tubing.
Changing the order
In the previous section, I mentioned that I had a second GTX 770 on order. Installing it introduced a minor complication: the sound card had to be relocated to the first SLI slot, the one located conveniently in front of the northbridge chip, as I didn’t feel comfortable having it between the graphics cards. This basically cut off the back fan mount area from ever being able to have a radiator as the fitting end would be uncomfortably close to the sound card.
So with that in mind, I decided to turn the tanks around on the top 360mm radiator so they are toward the rear I/O side of the case, like they are in Absinthe. It does mean I’m likely going to need more 90-degree fittings than just the five I have on order. I’ll cross that bridge when I come to it.
This also means the order of the loop is changing in that the flow will go from the graphics cards to the top radiator, then the CPU, again like in Absinthe. But differing from Absinthe is that the flow will go from the CPU to the memory water blocks, then back to the reservoir.
The minor concern is that the Koolance 90-degree fittings are 3.5mm shorter than the Swiftech fittings (24.5mm for Koolance, 28mm for the Swiftech) with the center of the thread being a little over 1.5mm lower (18.5mm for Swiftech, 16.8mm for Koolance). This could be a concern with regard to tubing up the radiator to the CPU block in that it may not line up straight enough to avoid a concern.
Placing the reservoir
One of the problems with a purely bottom-fill reservoir like the Phobya Balancer is figuring out where to place it, as you need to get the flow back to the bottom of the reservoir. Since I mentioned that I plan to go from the memory water blocks back to the reservoir, this presents a little bit of a challenge. Looking around for other builds that used the Phobya Balancer reservoir with my case, though, is coming up with a dead end.
There are several ways I can do this. Along with the reservoir, I ordered a set of EK-UNI Holders. One mechanism for mounting it is to use those to hang the reservoir from the 5 1/4″ drive bays, but that puts the reservoir too far toward the window side of the case and too high up. Another option is to mount it to the motherboard tray. The “Gold Rush” build on the Hardware Canucks forum shows the 250 version of the Balancer reservoir in 750D mounted to the motherboard tray. Doing this just requires offsetting the reservoir mounts from the back of the case using nuts or spacers.
Another option that I briefly entertained is mounting the reservoir to the back of the rear 140mm fan outside the case. I also considered mounting it to the rear 140mm fan, but inside the case. The complication there is it could interfere with the fans on the top radiator, which would make it difficult to fill the reservoir for bleeding the system. Plus the initial tubing to get to the pump would cross in front of everything else.
So I’m currently resting on having the reservoir mounted on the motherboard tray. It means I need to plan the loop around that, so we’ll see what happens there.
Flushing radiators
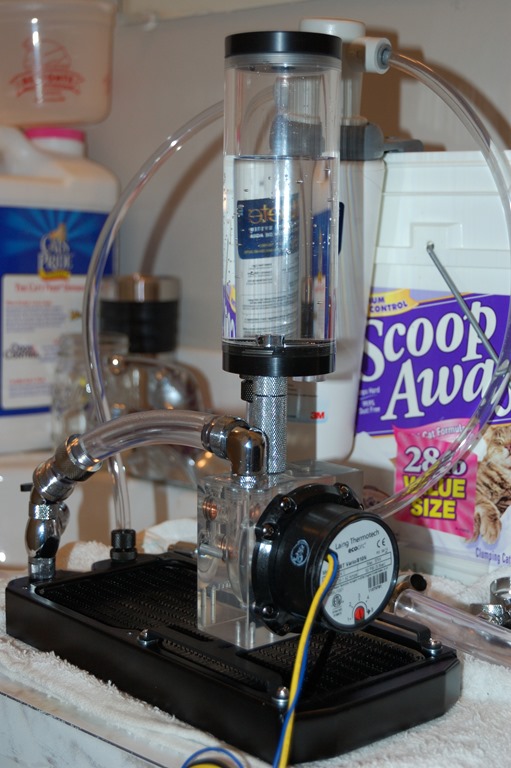
When I initially started a loop in my wife’s computer, I used a technique I saw online with a whole-house water filter to flush the single 360mm radiator that was in my wife’s machine at the time. When I needed to flush the coolant out of that radiator, along with flushing a 240mm radiator that would be added under project Absinthe, I didn’t use a similar technique, initially.
Instead I set things up in a fashion similar to this:
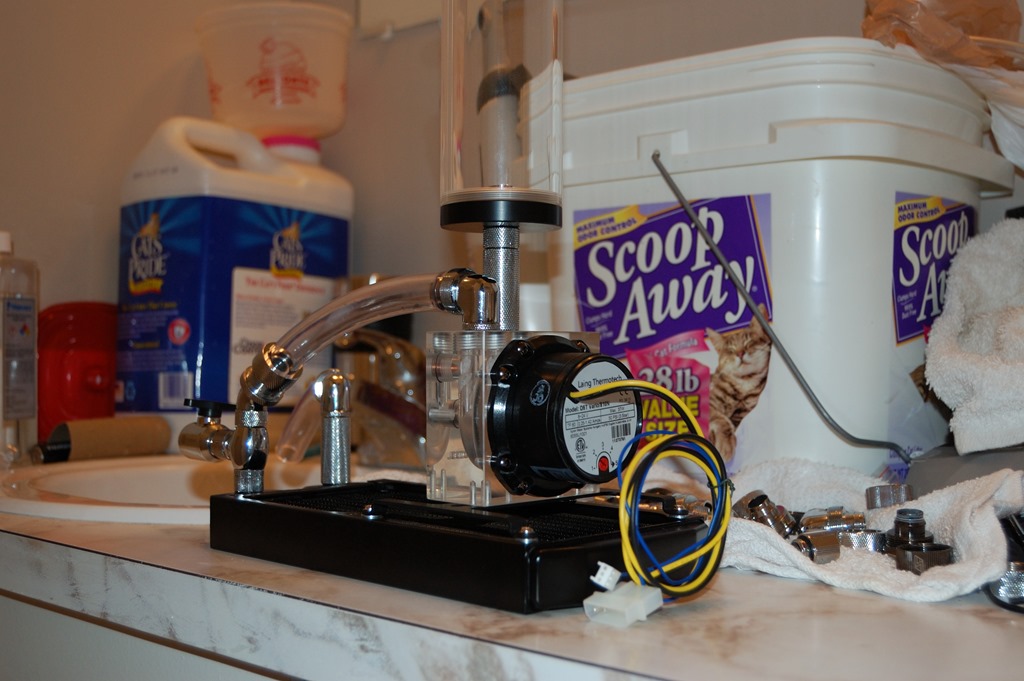
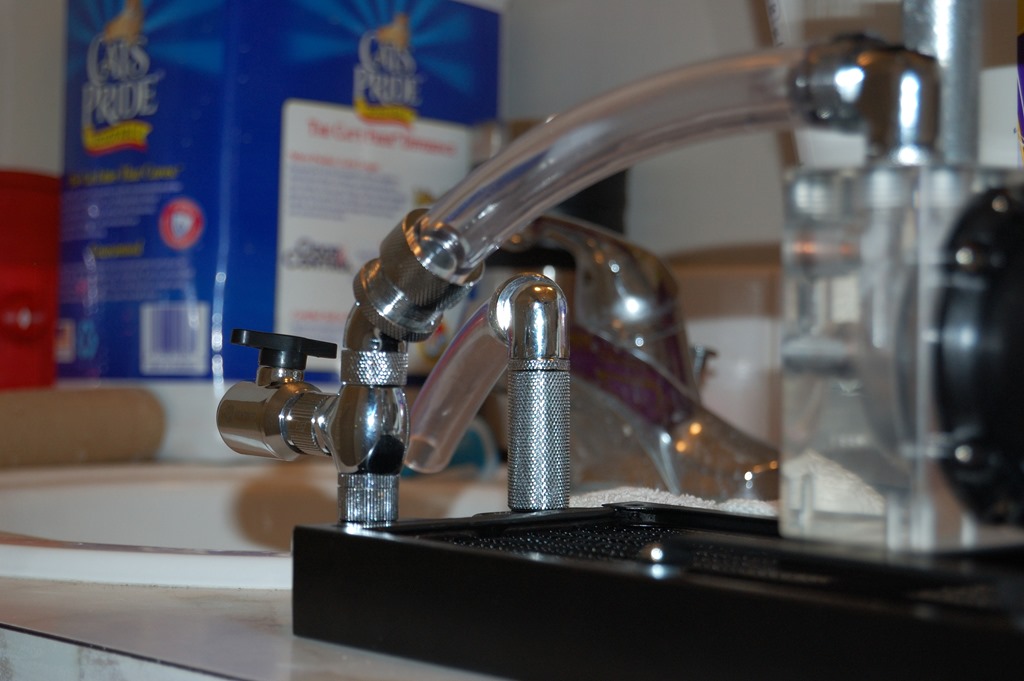
As you can tell, this isn’t a loop. It’s a one-way flow from the reservoir through the pump and through the radiator and into the sink. I used something similar when flushing out the GTX 660 water blocks. So this was the setup I chose to initially flush about a gallon of distilled water through each of the radiators – two through the 360mm radiator. This wasn’t the entirety of the radiator flushing, but only an initial flush. This allowed me to rinse most of the gunk out of the radiators, and the pump was used to push the water through with a pretty good amount of pressure, thus assisting in flushing the radiators out.
The only thing I had to do was keep up with the pump, which is a lot easier than it sounds. There wasn’t a lid on the reservoir so I was pouring directly into it.
After the initial flushing, I gave each radiator about a 15-20 minute run connected through the filter to get the last of whatever is inside them.
I had the line running back to the bottom of the reservoir mainly because trying to push through this filter and through the Bitspower tube was sometimes difficult, and if a large air bubble got in the way, it could completely stop the flow. But this is what could happen if in your loop you went from 1/2″ ID tubing down to 1/4″ ID tubing – the latter is necessary for the water filter, though with some extra plumbing fixtures I might have been able to make it so the run through the 1/4″ tubing wasn’t nearly as long. This is why all the tubing between components should be the same if possible – now if you’re tubing up multiple motherboard blocks, then this may not be possible, but you don’t want to go from 1/2″ to 1/4″ ID, but only a slight deviation, say 1/2″ to 3/8″.
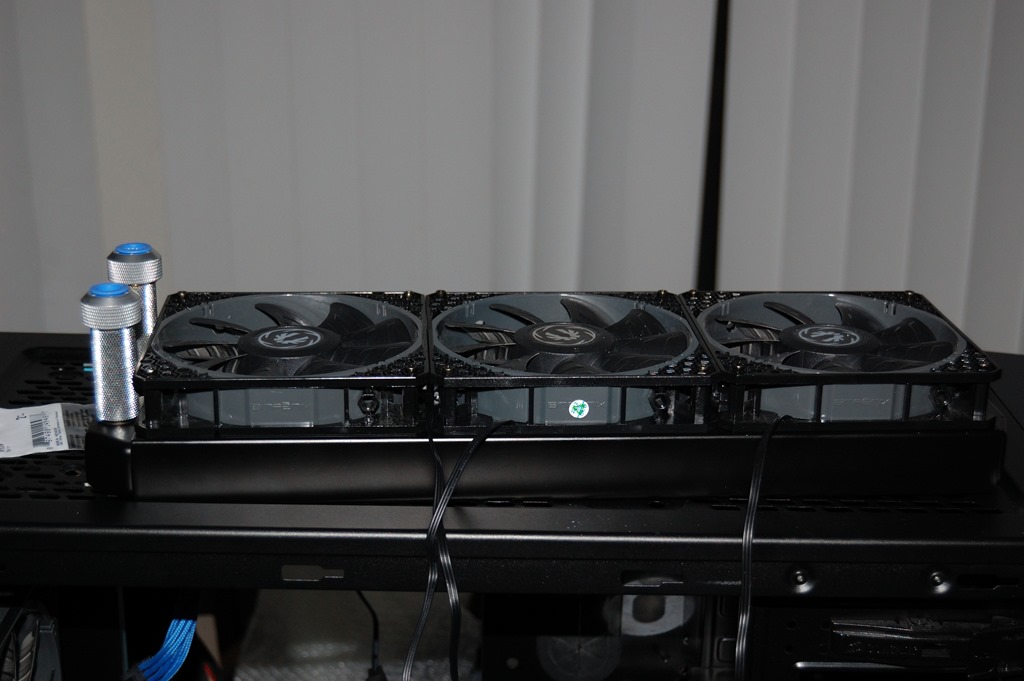
Installing radiators
Once the radiators were flushed, it was time to get the fans and fittings and install them into the case, after testing the new 140mm fans (spoiler: they work fine).
Here’s something about the ST30 radiators that I also learned in the process: if you are using fans like the Spectre Pro, which are 120mm square all around, you will need to use extension fittings to clear the fans in order to use the PrimoChill fittings if you have the fans on the same side as the inlet and outlet. In my case, that is how I have them mounted: push on the top, pull on the bottom. For the front radiator, no extension fittings are necessary as the fans are mounted to the case on the opposite side.
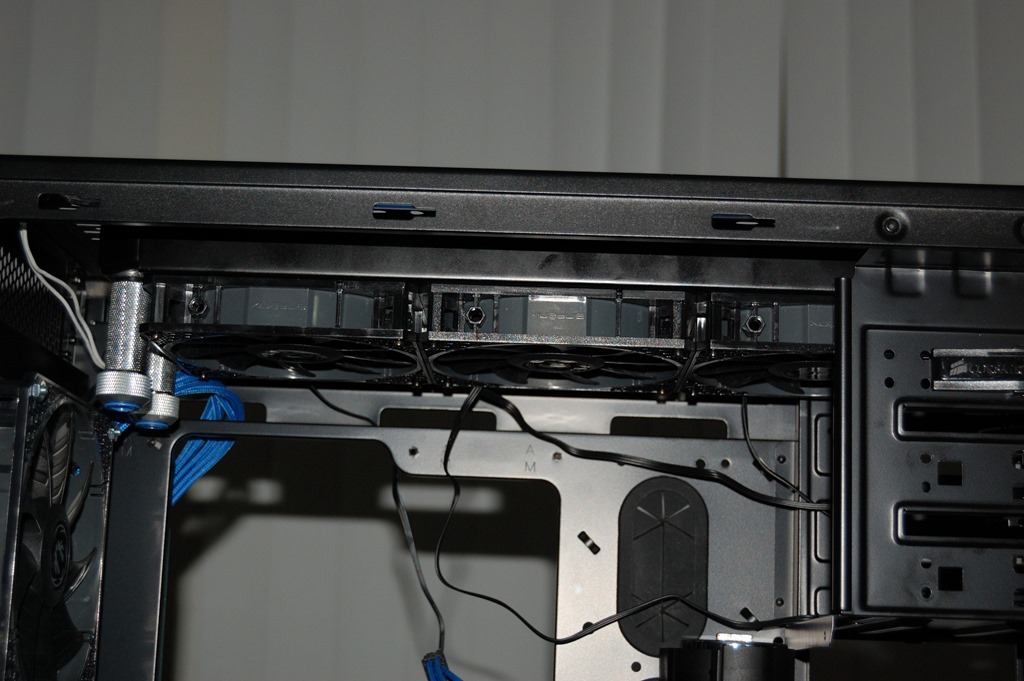
Those are 40mm Bitspower extension fittings. I’m going to swap them for 30mm fittings. On the lower radiator, 40mm fittings are going to be required to clear the fan plus the UN Z2 bracket holding the pump. I have 00 rubber washers not only holding the pump to the bracket, but the bracket to the fan and radiator.
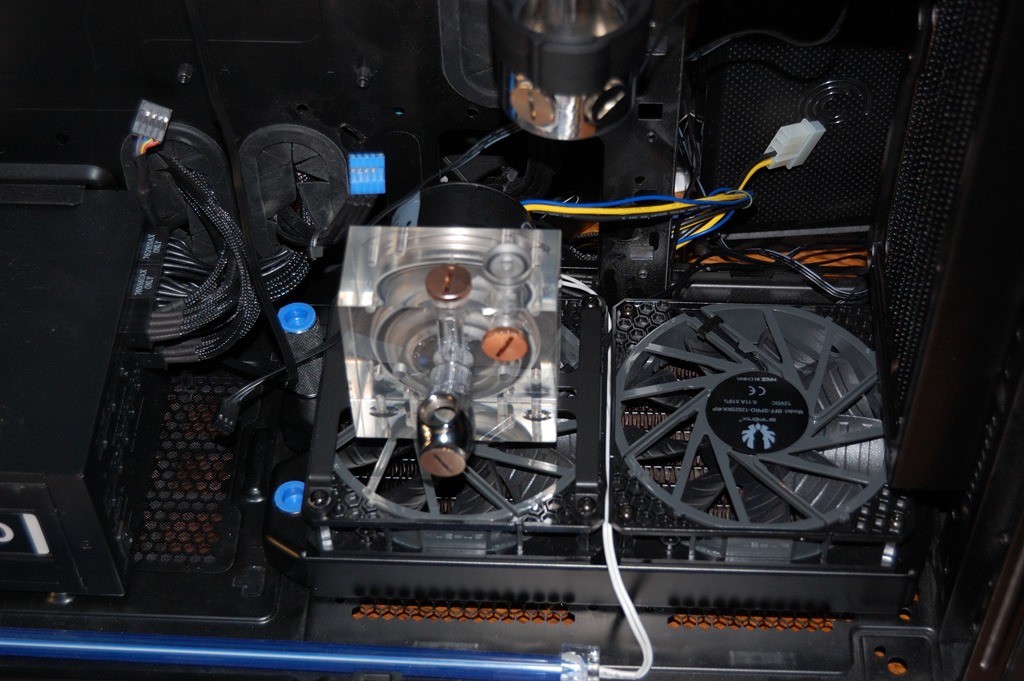
There’s only 1x40mm extension fitting on this radiator because I only had three altogether. The other two are, currently, on the top radiator. This picture also shows the bottom of the reservoir in relation to the pump. The reservoir is going to feed via a 90-degree fitting into the T-fitting on the front of the pump. The T-fitting is going to have the drain valve on it once I get another male-to-male rotary fitting. The outlet on the pump will feed to the bottom radiator to the 40mm fitting currently on it. Then the front-most outlet will feed up to the graphics cards.
The front radiator will feed back to the reservoir.
Next order and next steps
With recent discoveries with the radiator and pump installation, I brought up Performance-PCs and FrozenCPU to compare prices for things I would need. So far the list includes:
- Male-to-male rotary fitting
- 2xEK-HD 12/16mm adapter
- 2xBitspower Shining Silver 30mm extension fittings
- 3xKoolance 90-degree single-rotary fittings
I don’t anticipate needing anything else at this point, and I hope I won’t need much else. Later this week I’ll likely start taking apart everything from the Zalman case. I need to get the mainboard back into the 750D along with the graphics cards so I can see how it’ll all relate to the reservoir and radiators. It means I’m without my primary system while that is going on, but I do have my laptop along with a tablet.
The order from Koolance containing the second GTX 680 water block plus the coolant will be arriving on Wednesday. The new order of the above fittings will likely arrive on Thursday, making the latter part of the week a fun one to anticipate.