- Desert Sapphire
- Desert Sapphire – Part II
- Desert Sapphire – Part III
- Desert Sapphire – Part IV
- Desert Sapphire – Delivered
- Desert Sapphire – one year later
- A few problems to overcome
I mentioned in the previous segment that water cooling parts were on their way. The first order from Performance-PCs arrived the day after Thanksgiving — thank you FedEx for not screwing up this time.
The Performance-PCs order contained two radiators, two bulkhead fittings, and a collection of Koolance quick disconnects:
- AlphaCool ST30 double and triple-120mm radiator
- Koolance QD3-FS10X13 and QD3-FS10X13-BK
- Koolance QD3-MSG4 and QD3-MSG4-BK
- Koolance BKT-PCI-G
- AlphaCool Bulkhead Chrome and Black
One of the items listed is the Koolance L-Bracket with two G¼ pass-through fittings. Provided the quick disconnects could fit, I intended to use this for the pass-through to avoid modding the case. I know I’ve said previously that fittings shouldn’t be ordered early in a build. This was a necessary exception as it would affect planning if this didn’t fit. Plus I knew I’d be using these specific quick disconnects, so there wasn’t any risk ordering these up front.
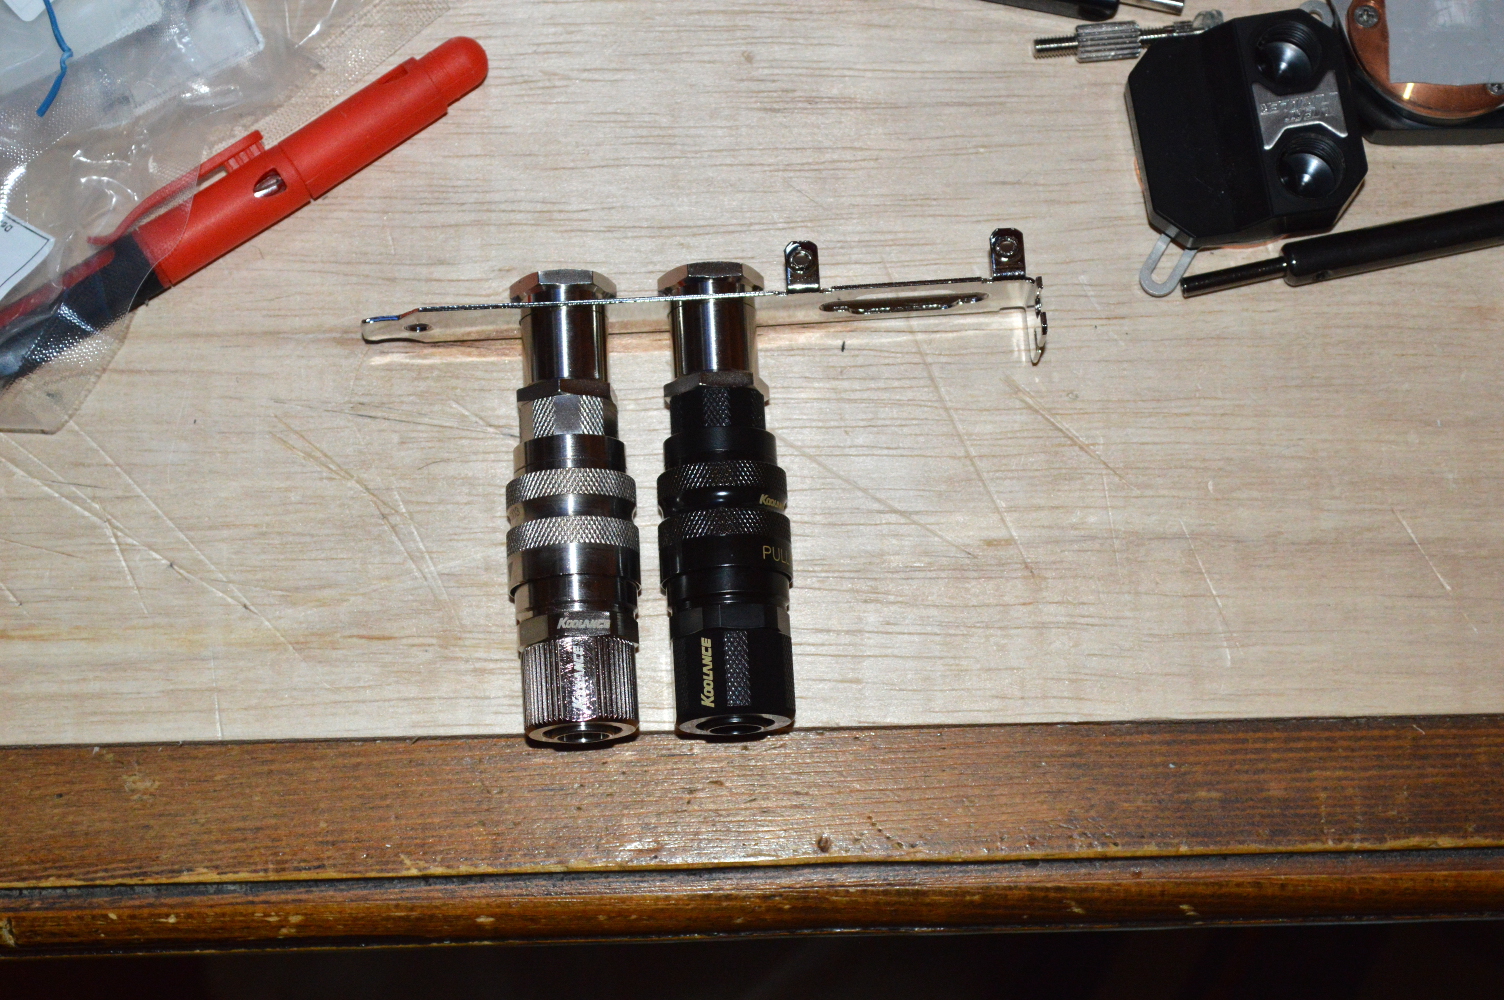
Thankfully it did fit, but really only just. The female side of the quick disconnects have 3/8″x1/2″ compression fittings. Would it have worked if the quick disconnects were the larger 1/2″x3/4″ compression fittings? That’s difficult to say. It certainly would’ve been a tighter fit.
I really wish that Koolance had a second version of this pass-through that didn’t have the DB-15 slot on it and had the G¼” fittings spread out a little more. I’d also like to see a low-profile version of this bracket similar to the one they make for the since-discontinued VL2 line of quick disconnects.
Note as well that I’m using off-colored fittings. And as you can see from the picture above, I’m using one chrome and one black quick disconnect. This is simply to ensure that everything stays coordinated for flow. The flow must go in a particular direction through the CPU block, so this helps ensure that the flow stays coordinated between the cooling box and the blocks.
Second order
The next payday saw another order to Performance PCs, again ordering what I knew I’d need.
- Koolance PMP-420
- EK Supremacy EVO — copper/acetal, solid black
- Swiftech 3/8″x1/2″ compression fittings – 7 chrome and 1 black
- Add2PSU
- PrimoChill PETG tubing – 3/8″x1/2″
- Alphacool HF L-Connector (90-degree rotary fittings)
- Tygon E-3603 3/8″ ID (1/2″ OD) Clear Tubing
- Mayhems X1 Clear Concentrate
Everything in the 750D will use soft tubing, while the water box will use PETG. I have quite a few PrimoChill revolver fittings, so this gives me an opportunity to use those up. Plus it’ll make the water box a little easier to maintain. If there’s any part of this build I want to be able to last a long time, it’s that. I’m considering ordering the ratcheting cutting tool that MNPCTech sells, but I hear that you can use a standard tubing cutter on PETG, so I’ll see how well that works first, and I have a hacksaw if need be.
The AlphaCool 90-degree fittings are new. I typically go with Swiftech or Koolance, but these were 2.50 USD less expensive than the Swiftech fittings, 3 USD less expensive than Koolance, so I decided to try them.
But as you can see, I opted for the PMP-420 from Koolance as the pump. Again I wanted something better than the D5 Vario. The question is noise. I’ll be using this to flush pumps and blocks, so I’ll be able to test it out. If the noise is a bit much, I can see about dampening it. And the Add2PSU is to synchronize the power supplies. The exact cabling I’ll be using to plug everything up is still up in the air, but given how some LP4 to P4 converter cables are wired, I’m heavily leaning toward using a P4 cable.
Otherwise the rest of that inventory is pretty self-explanatory. Really about all that’s left to order is the fans for the radiators — likely going with Cougar CF-V12HPB since I’ve had good luck with them already — and the FlexATX power supply for powering the water box. I have another FlexATX power supply I might re-use for this. I’ll just need to first test it to see how noisy it was, so I’ll likely use it as part of testing the pump for flushing components.
Thankfully the Aquacomputer block and backplate didn’t take too long getting over to the US. Still could’ve been faster, but it would’ve required paying double the shipping rate for UPS. I basically had about everything I’d need when I’d need it.
The beauty of all of this? I can install blocks and tube up the loop in a smaller case before moving it to the 750D, and I won’t have to change a thing when moving it. Whereas with a loop where everything is inside the chassis, you may need to cut new tubing, and you’d certainly need to consider compatibility with your radiators before buying.
The cabinet
The next step really is figuring out what I’m going to do for the cabinet and radiator configuration. I’ve been browsing around for cabinets to see what is available, what might be easily adapted. And more and more I’m leaning more toward building a custom cabinet for this instead of using something off the shelf. I’m having a little difficulty finding cabinets that will fit what I’m wanting to do.
So instead I’m going to buy oak or pine boards and build one. It’ll be 30″ long by 15″ deep, and about 24″ tall. The inside of the cabinet will be only 18″ tall, providing for 6″ beneath the cabinet. This will be good since the radiator side of the cabinet will actually be bottomless, well almost. The radiators will be all but completely exposed, allowing for the most airflow through the fans.
The doors to the cabinet will also be solid, hence why the radiator side needs to be bottomless. If the door is closed, there won’t be any airflow if the cabinet was a typical cabinet. However with a bottomless cabinet, the radiators will still be able to pull air through. And the cabinet door can always be opened to allow for even more airflow if necessary.
The fans will have a controller as well. The Phobya fan controller I previously used in Absinthe will be used here to allow the client to control the fan speeds when desirable. It’ll also serve as an immediate tachometer readout on the fans and pump as well. I forget whether it has an audible alarm, though.
Now in talking about “sides” to the cabinet, there will obviously be a dividing wall in the middle. Currently I’m planning to set it up so the left side of the cabinet has the fan controller and temperature readout for the coolant while the right side has the radiators, pump, and reservoir. The pump has a heatsink and being passively cooled by the fans moving air through to the radiators should suffice.
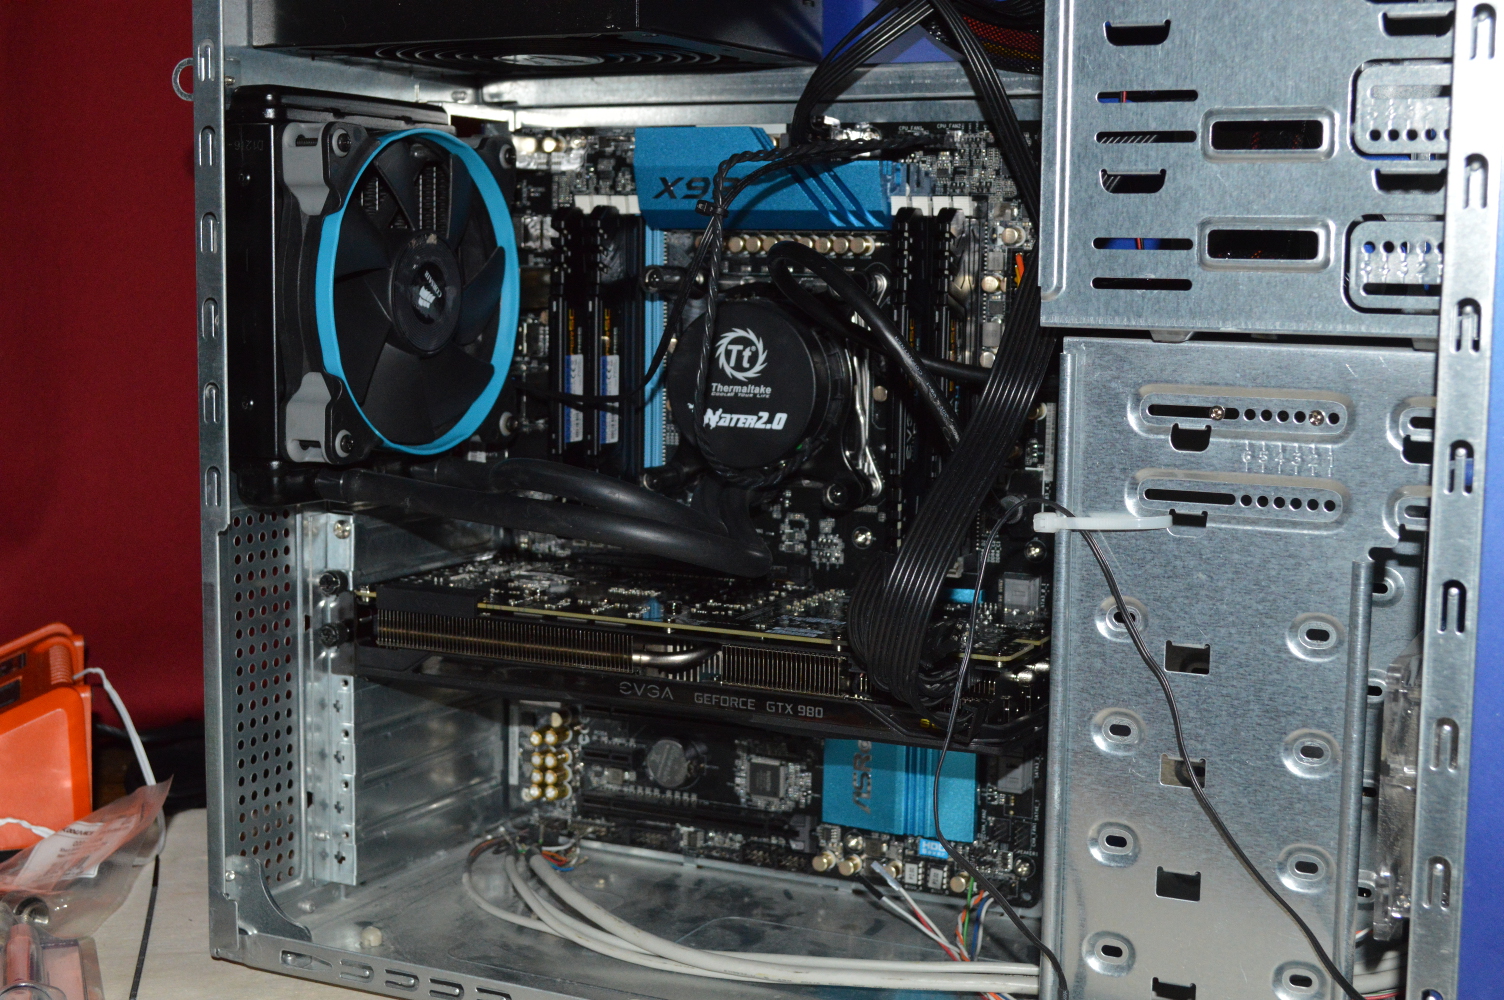
Otherwise, this is how the build currently looks in its temporary chassis: