- Putting older hardware to work
- Colony West Project
- Adding the GT 620
- Follow-up on ASRock BTC Pro and other options
- More proof of concept
- Adding a GTX 680 and water cooling
- Finalizing the graphics host
- ASRock BTC Pro Kit
- No cabinet, yet…
- Finally a cabinet!… frame
- Rack water cooling
- Rack water cooling, cont.
- Follow-up on Colony West
- Revisiting bottlenecking, or why most don’t use the term correctly
- Revisiting the colony
- Running Folding@Home headless on Fedora Server
- Rack 2U GPU compute node
- Volunteer distributed computing is important
First order of business after getting the rack completed was moving everything into it. Three chassis (4U and 2x2U), two radiator panels (3U each), and a surge suppressor (1U). Plus I ordered a keystone panel and RJ45 coupler keystones, and an 8-port rack mountable switch. Total is 19U of space including 2U between the radiator panels which will be occupied by a blanking panel that’ll have a couple holes drilled through it for the fan cables with an NZXT Grid on the back of it for distributing power.
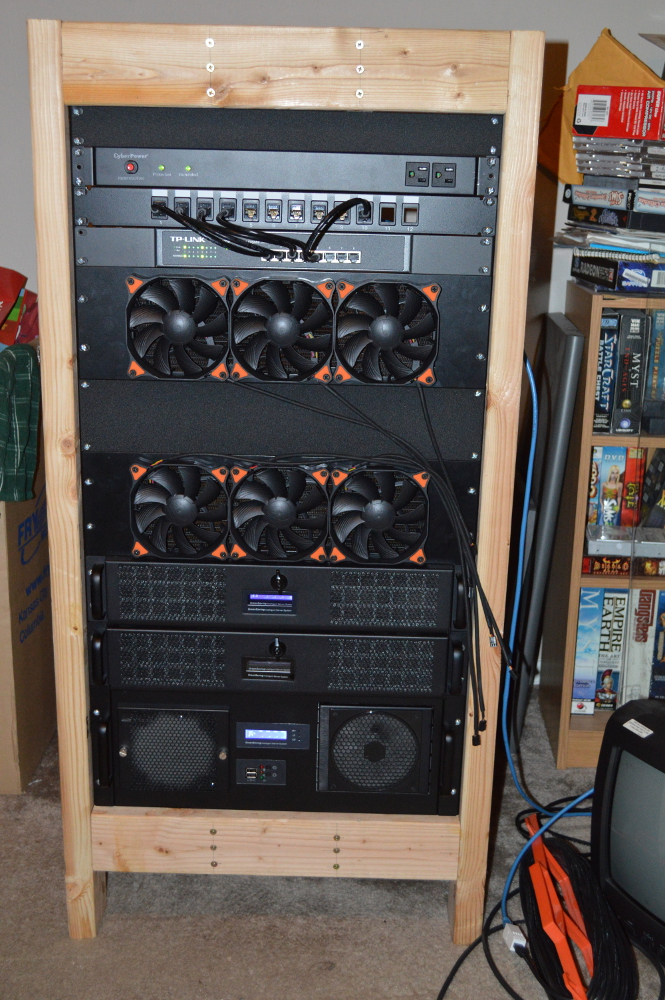
I based the spacing for the rails off the EIA-310 standard. If you don’t want to take measurements and figure the math on this, you’ll want to space the beams onto which you mount the rails at about 19 3/16″ or 19 1/4″, if you order the same rails I used. If you intend to recess the rails, that gap will be narrowed.
So with that out of the way, it was time to order parts:
- 2xAlphaCool chrome bulkhead fittings
- 10xSwiftech ⅜”x½” compression fittings
- 3xKoolance QD3-FS10X13 female with ⅜”x½” compression
- 3xKoolance QD3-MSG4 male G¼” threaded
- D5 Vario pump (Watercool branded)
Two of the male QD3 fittings will be connected to the bulkhead fittings, which will go on the graphics chassis. I ordered a bare D5 pump as well since I do have a spare pump housing I will use for that. Two actually, if I remember correctly, an AlphaCool and Bitspower housing. As my local Micro Center has a decent stock of fittings, I waited till I started building everything out to determine if I needed any additional 90-degree fittings.
Parts arrive
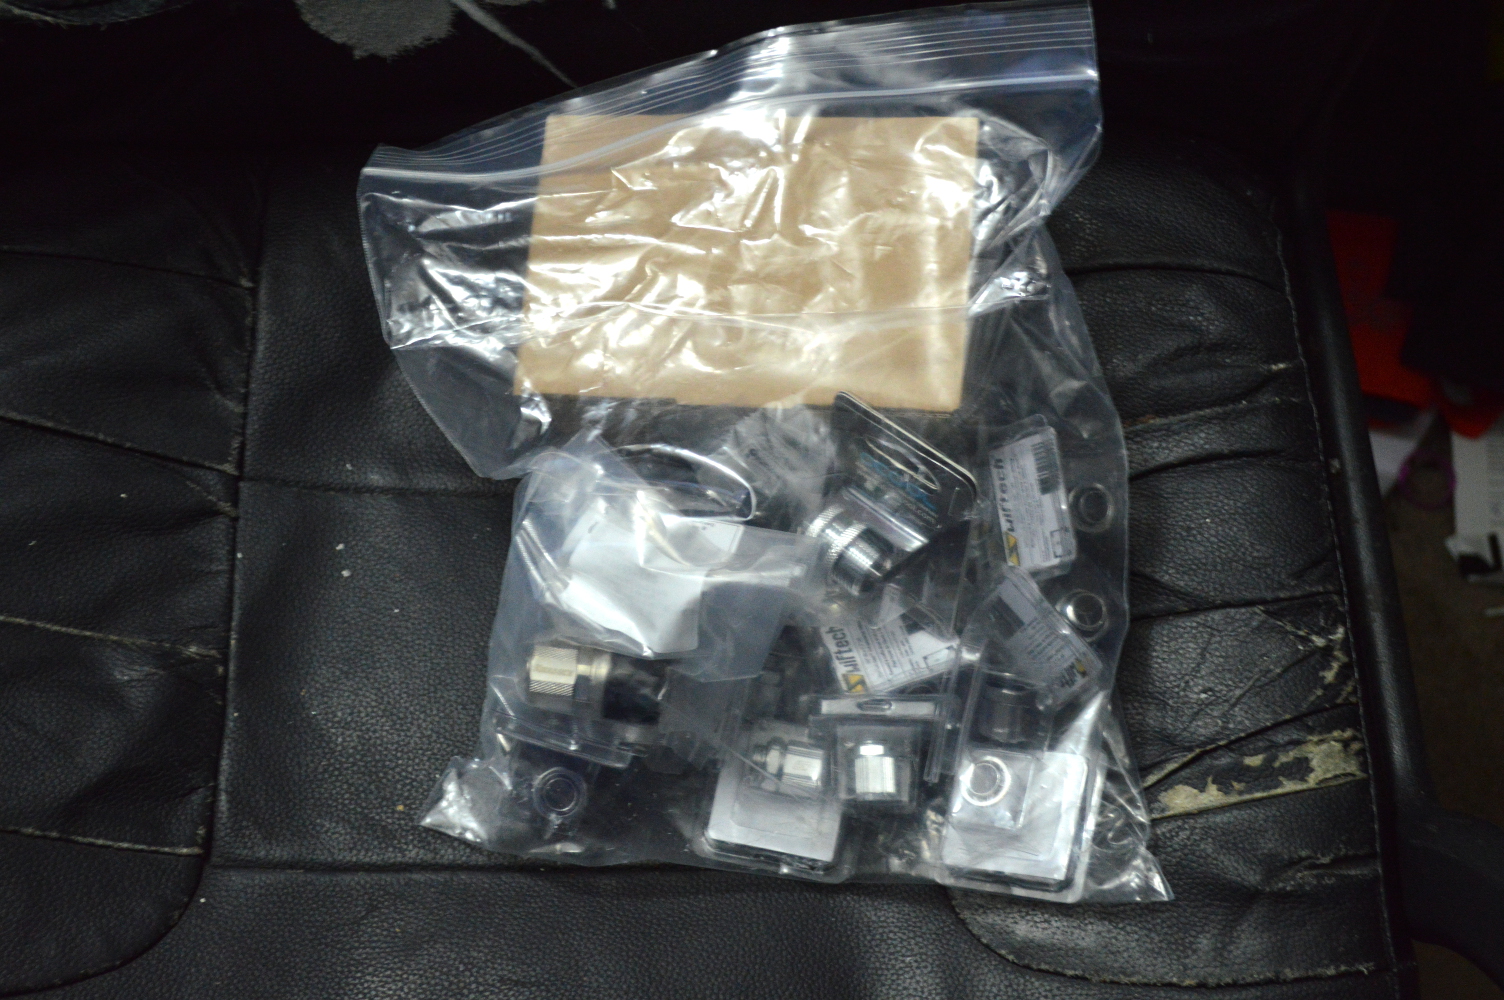
Now this is a Halloween treat for a computer builder. A bag full of water cooling fittings. After accounting for the inventory (listed above), the first thing I assembled was the pump and pump housing. After moving the pump and reservoir on β Ori. external, the pump housing was freed up for another project. This would be used for flushing the radiators and water blocks. All 4 of the blocks.
To that end, I bought 12 gallons of distilled water from my local HyVee. If you have a Harbor Freight in your area, their 8″ jumbo aluminum hooks make carrying all of that water a hell of a lot easier. I was able to hook 4 jugs to it. Still heavy, but it wasn’t awkward.
Thankfully buying a lot of distilled water at once doesn’t get you added to the DEA’s watch lists. Or does it? Well if anyone from the Federal government happens upon this, know that the distilled water will be used for entirely peaceful purposes.
One other acquisition was needed: two blank panels. Specifically I acquired a 1U and 2U panel from my local Guitar Center. The 1U was going to be just a blanking panel. The 2U, on the other hand, was going to be going between the radiators. More on that later.
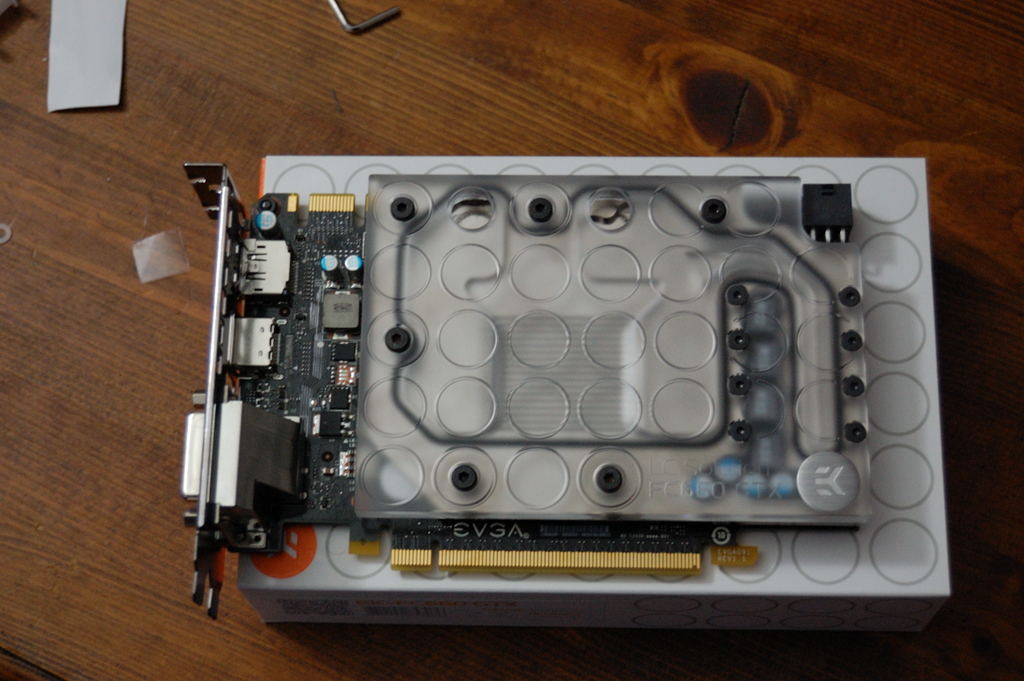
Tearing down the graphics chassis
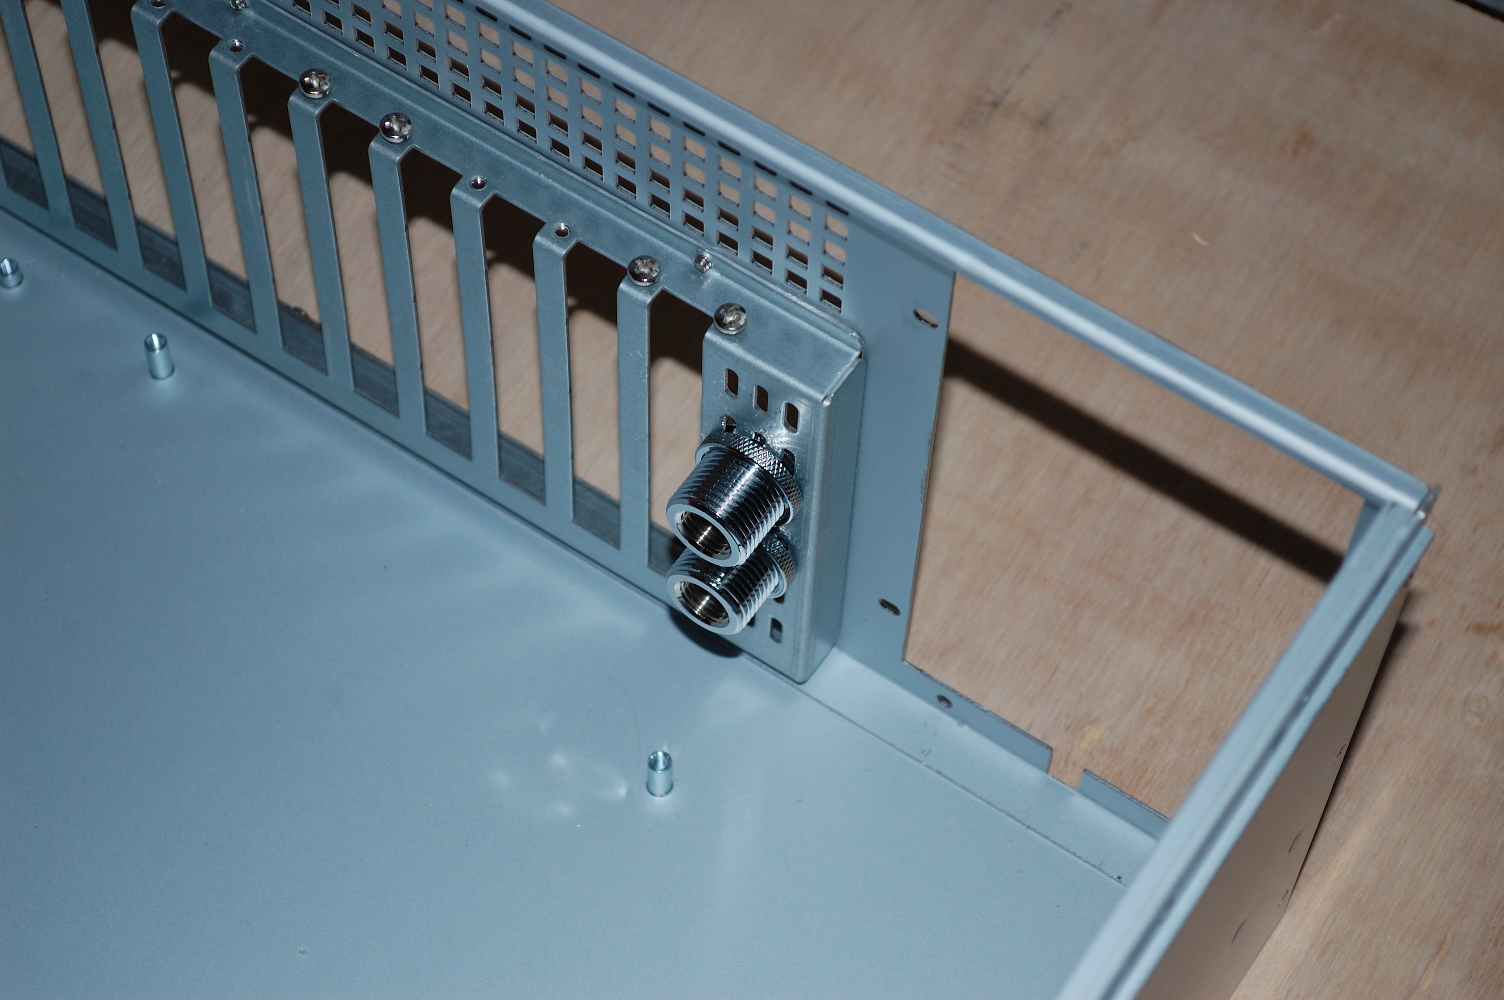
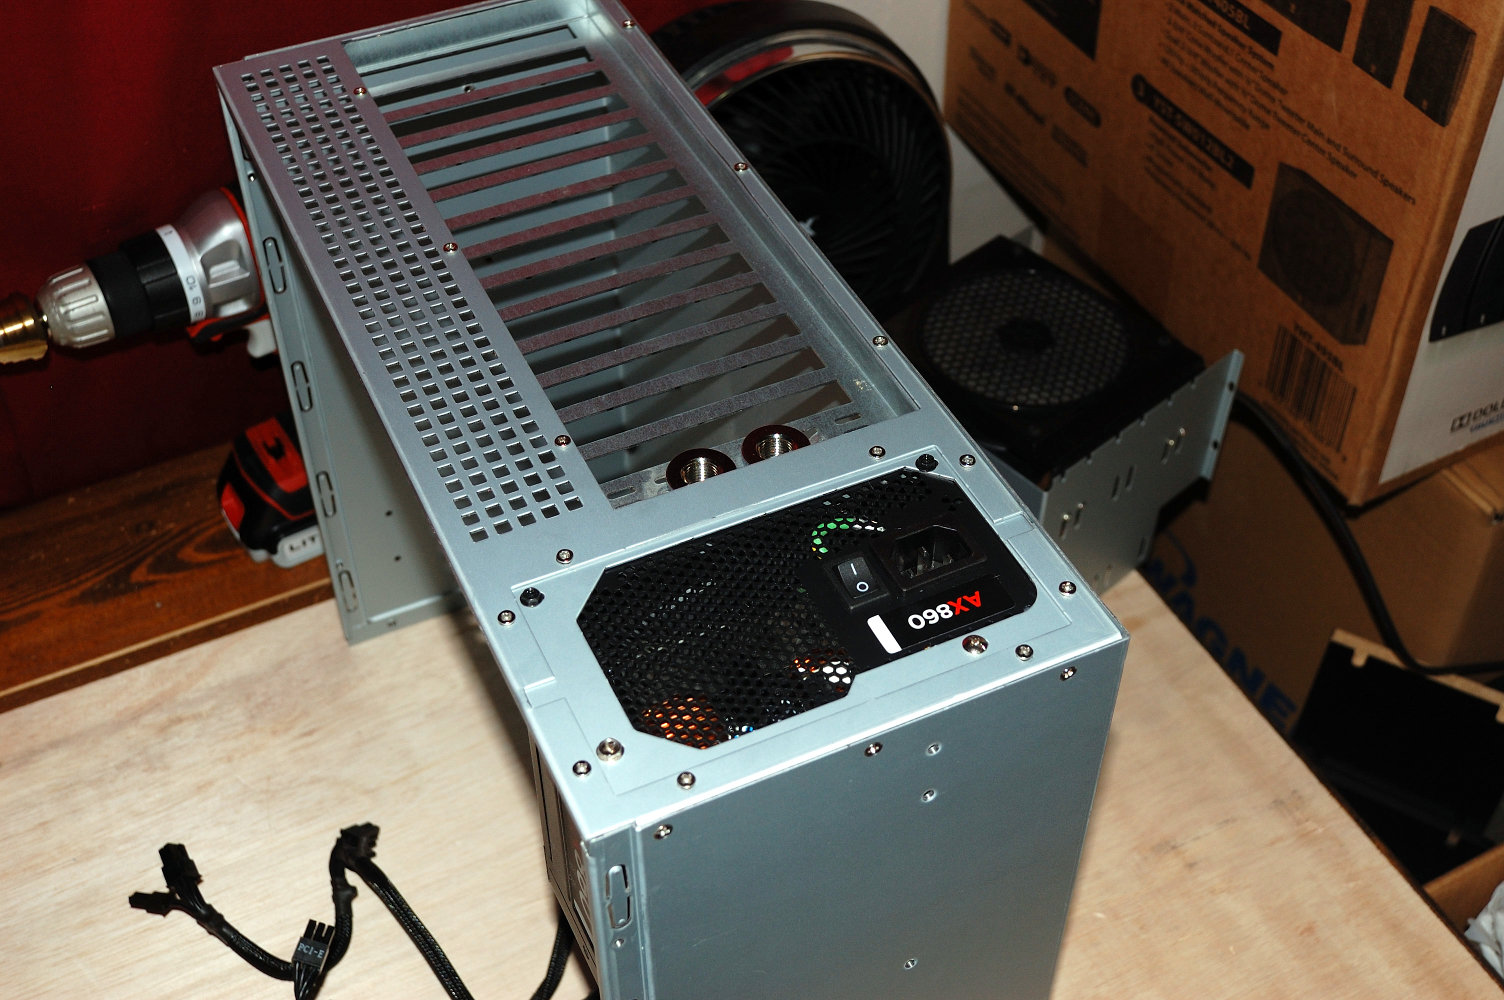
Now for the fun to start. Before flushing the radiators and blocks, I wanted to get everything torn down first as it’d save a lot of time. And the graphics chassis was really the only thing that needed to be taken apart. And I don’t mean the cards just pulled out. I literally mean taken apart.
The front and back panels both had to come off the chassis. The front panel was needed as I’d be redoing the cable management, while the back panel was getting a couple modifications. The graphics cards were set aside — they’d be handled later — and the first order of business was drilling the holes for the bulkhead fittings and attaching the male quick disconnects. At first I thought I was using my carbide bits to drill starter holes, but I’m not sure what bit I was using. Whatever it was, it was able to punch through the steel, though it took a lot of force to do it. The carbide bit would likely have cut through it without issue — I bought it originally for drilling holes into copper.
Then my attention turned to flushing the blocks and radiators. I put two gallons of water through each of the water blocks. I wanted to make sure they were going to be clean and free of any possible obstructions. The radiators each got a gallon straight flush before being connected to the filter together.
The GTX 660 blocks, though, needed a bit more cleaning. The Koolance coolant that had been run through the blocks left some staining behind. There was also some green coloration left behind in the acrylic — no doubt from the copper tubing. So I had to disassemble the blocks and scrub the acrylic and nickel plating. Only disassembling the blocks turned out to be a nice set of challenges. I’d never had a hex screw strip on me. … … Okay I really need to get my mind out of the gutter. Anyway…
In the above picture you can see eight (8) small hex-head countersunk machine screws surrounding the coolant channel for the VRMs. Several of them stripped while I was trying to remove them. Since I’m going to destroy the screws getting them out, I wrote into EK to find out what I need as replacements:
I have two EK-FC660 GTX water blocks that I am attempting to disassemble for cleaning. On the blocks in the lower-right around the channel for the VRMs are 8 small hex-head screws. The hex heads on a few of the screws stripped while trying to remove them, meaning the screws will need to be replaced.
What screws are those so I know to what I need to buy to replace these screws?
As I didn’t yet have a kit for removing stripped screws and I didn’t want to stop progress for another night, I turned to the radiators and getting those flushed using a technique I’ve already detailed on this blog (here and here), with the only difference being that I had both radiators connected together when hooked up to the filter and I let that run overnight. Then I drilled out the holes in the blank panel for the fans to pass through.
The next day, the focus turned to finishing the radiators and getting that remounted onto the panels with their fittings. With the stripped screw kit I bought from Home Depot, I managed to get the last screw out of one of the blocks to take apart. The #1 and #2 extractors both more drilled out the head than engaged it, but the #3 was able to grip into the head and get the screw out.
It was bad.
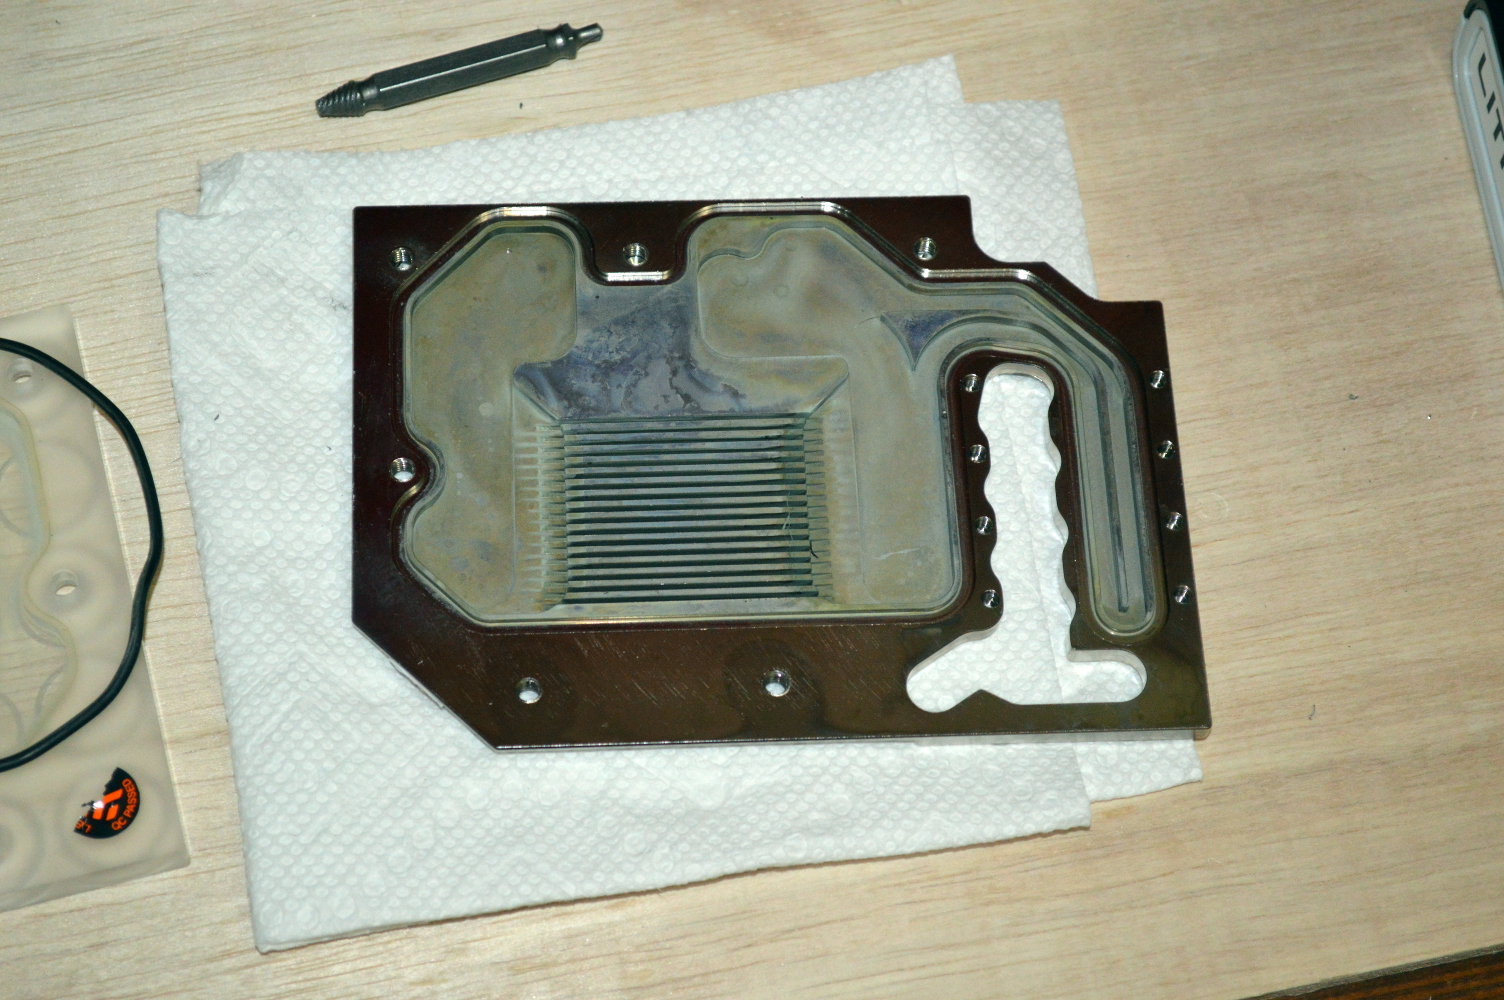
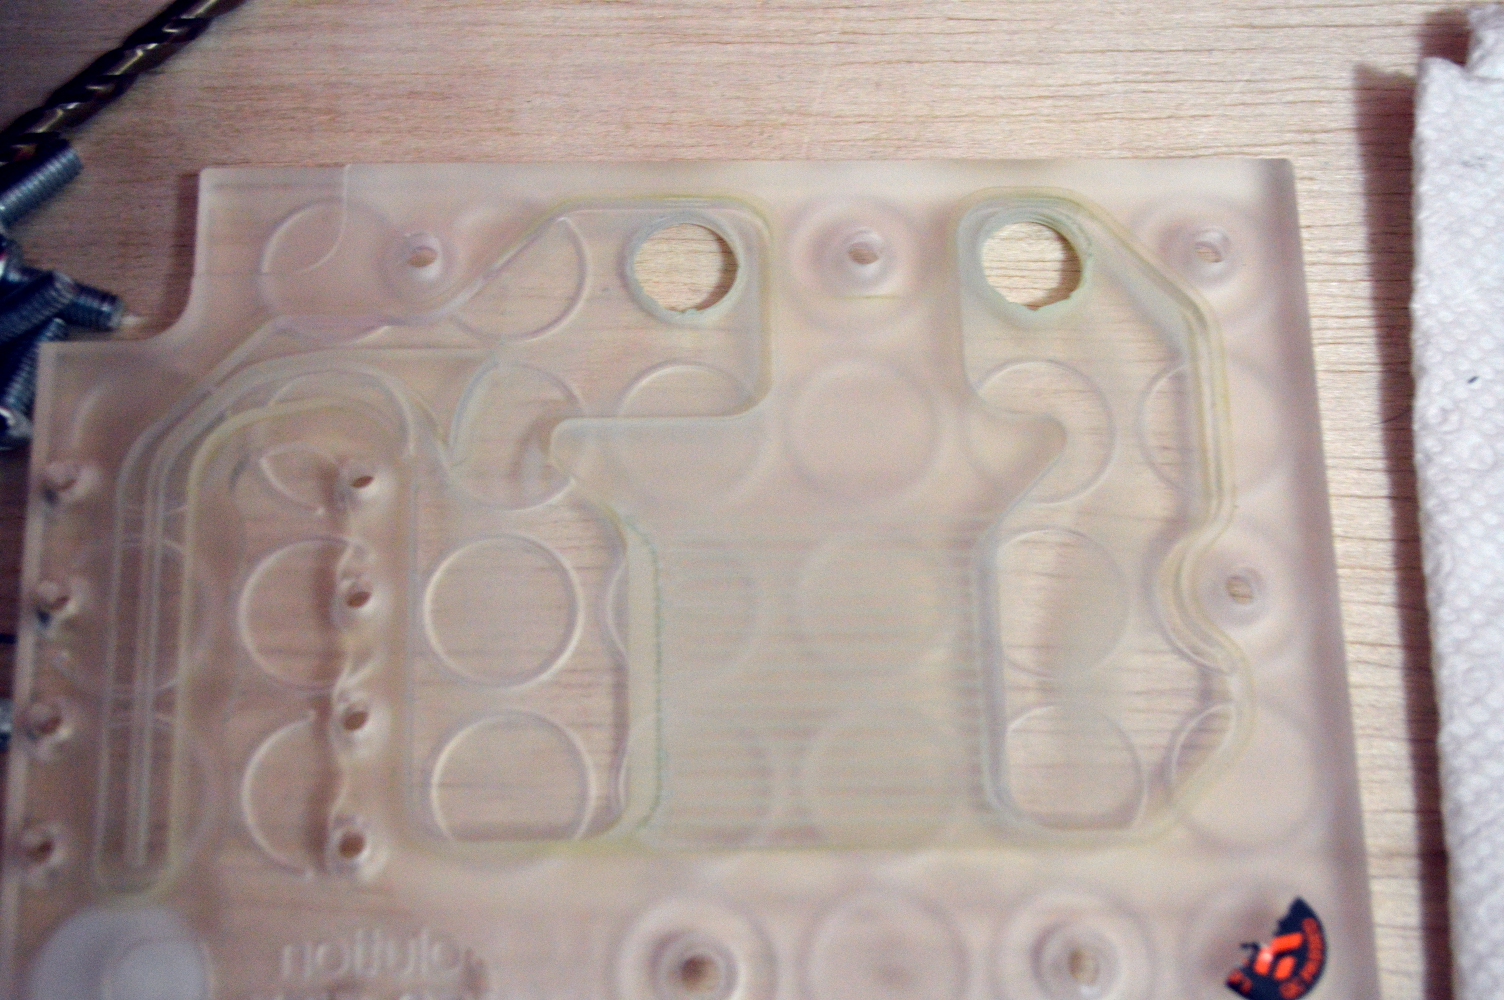
The picture doesn’t quite pick it up entirely, but there was green tinting on the acrylic. That came off with a wet paper towel and not a lot of elbow grease — I had to do the same to the acrylic AlphaCool HF D5 pump top that houses the pump. If necessary I could’ve used dish soap as well, but nothing beyond that. The nickel, on the other hand, had some aggressive deposits. For that EK recommends using a non-abrasive automotive polish, so I left that for later and just decided to not make a lot more progress on the build.
While waiting for EK’s support team to return my e-mail, I decided to look at the screws in question and see if I can figure out what they are. They’re 10mm M3 countersunk machine screws, but I wanted the DIN for them so I could match exactly what EK used. So basically until I can get ahold of a non-abrasive metal or automotive polish and some new screws, I’m about as far as I can get on this, aside from putting the blocks on the GTX 680s, provided what I’m seeing with the GTX 660 blocks doesn’t prompt me to try to disassemble those blocks as well.