In figuring out a portable light wand, I discovered some very small USB type-C power boards, one specifically locked at 12V. And I’ve used them in testing to power a light strip and I’ve got other ideas in mind for using them.
Well one idea I had is using them to power a Milwaukee M12 device. So how to do that? The simplest solution is soldering a couple spade connectors to the power board and just plugging it up that way. And while that would work, it’s obviously far from ideal. Ideal is having an M12 battery shell with some kind of 12V input on the bottom. Or USB type-C, which supports 12V.
So that’s what I’m discussing here.
Bill of materials
- 12V USB-C PD power module (these are almost always sold in multi-packs)
- Milwaukee M12 3-cell replacement battery shell
- USB-C Male to Female panel-mount plug
- 18ga or 20ga wire
Limitations
The USB type-C power boards will do 3A (36W) without issue with any USB type-C charging cable, but needs an “active” USB type-C cable for up 5A (60W). 18650 cells can do 10A typically without issue, making Milwaukee’s M12 capable of over 100W of power delivery. So this adapter is best suited for the lighter M12 devices. It works fine with my borescope, which draws only a couple watts of power. But it definitely should NOT be used with anything with a motor, since they have a surge current when powering on. And absolutely do not use this with the AXIS jacket. Keep to light power devices like lights and the aforementioned borescope and you should be fine.
Preparing the shell
The panel mount plug I linked is keystone size, so you’re going to be drilling a pretty sizeable hole in the bottom of the battery shell. You’ll need a step bit that has a 1″ step. I do not recommend using a 1″ hole saw. Just drill out the bottom through the center divot (see below), though I’d recommend using a 1/4″ drill bit to start the hole. And I highly recommend using a drill press if you have one. Without the lid, the battery shell should sit flat on your drill press platform.
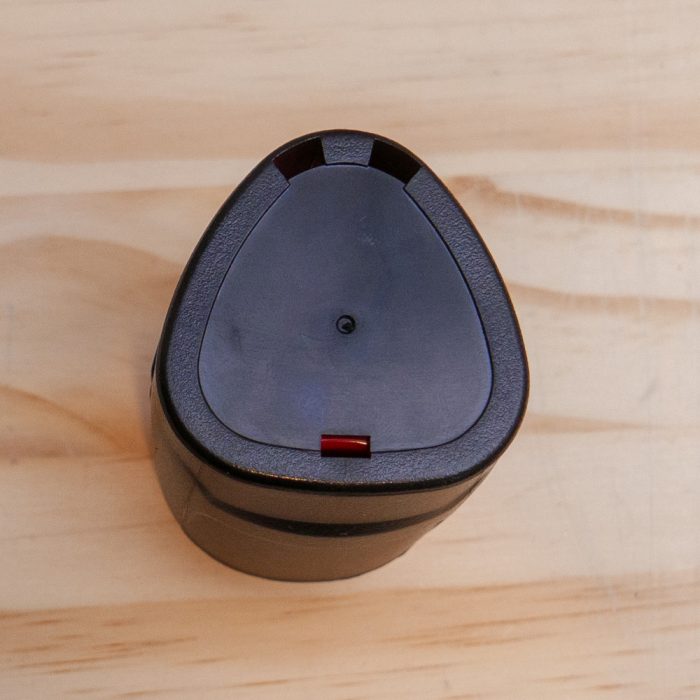
Once the hole is drilled out and cleaned, the panel mount plug should fit, though it’ll be a loose fit. I followed up with a drill and M3 tap for using M3x6mm screws.
Now for the wiring.
Wiring it up
This is pretty straightforward. Positive to battery positive, negative to battery negative. The 4V and 8V connectors are used only with charging the batteries to balance them, so don’t worry about those.
Once you have it wired up, push the battery board into the shell’s lid. Then connect the power board to the USB plug in the shell body – you may need to use a tool to fully seat the plug. Then snap the lid into place and you’re golden.


The portable charger is a 65W portable charger from Baseus. It works reasonably well, though it seems to inexplicably lose its charge. And the USB type-C cable is, obviously, from Anker.
Conclusions
While I built this partly as a curiosity, I can definitely see a use case for this. Since a lot of us have USB type-C portable chargers anymore, and even the Milwaukee Top-Off becomes an option for powering M12 items from an M18 battery.
Though that brings up another idea for which parts are already on the way as I write this: an M18 to M12 battery adapter. I’m surprised Milwaukee doesn’t already already make one, though it does mean selling a lot fewer M12 batteries if they did. But it would mean selling a lot more M18 batteries, though, since they have higher capacities and can handle higher wattage draws.
So how easy is it to build one? You’ll see when I publish the article on it.
But with the limitations listed above about how you should use this only with the lower-power devices, why did I build this? In part as a curiosity, but also in part as an alternate means of powering devices I build using Milwaukee M12 battery adapters. But if you’re wanting a light-power Milwaukee M12 device but don’t want to buy into another battery system, this at least gives you a viable alternative.
You must be logged in to post a comment.