Courtesy of the pandemic, I’ve been a full-time work from home (WHF) software engineer for coming up on 2 years. I previously wrote that I have a pair of 4K televisions I use for desktop monitors. And for my work laptop, I have a universal docking station that supports 4K output. To allow me to use my peripherals between both, I have an audio switch for my headphones and a USB switch for the keyboard, mouse, and microphone.
The USB switch works great! But the audio switch started getting… flaky.
The physical switch is the audio switch’s weakness. It got to the point where getting it to fully actuate onto one of the two inputs with full audio was a bit of a chore. So… what to do? Well as the title suggests, I went DIY.
Sure it’s more expensive than just replacing what I have – the original switch was only 14 USD. But it comes with some exploration! And employing a double throw toggle switch that should give a solid connect or cut-off to either audio input that won’t wear out in the same fashion as what it’s replacing.
Bill of materials
For this I used:
- XURUI XT-32A On/On 3-pole/2-throw switch with spade terminals
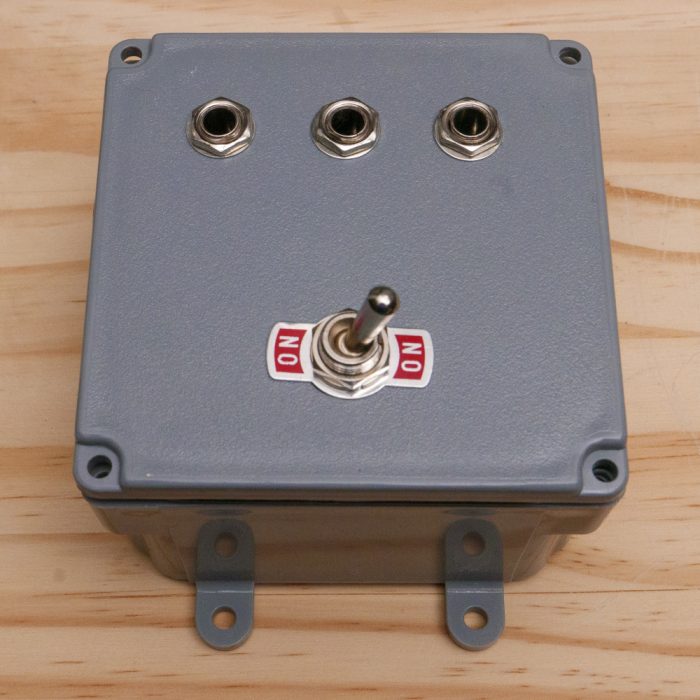
- 3 x 1/4″ female panel-mount stereo phone jack
- 4″x4″x2″ junction box
3 x 1/4″ male to 3.5mm female stereo adapter- 14ga wire
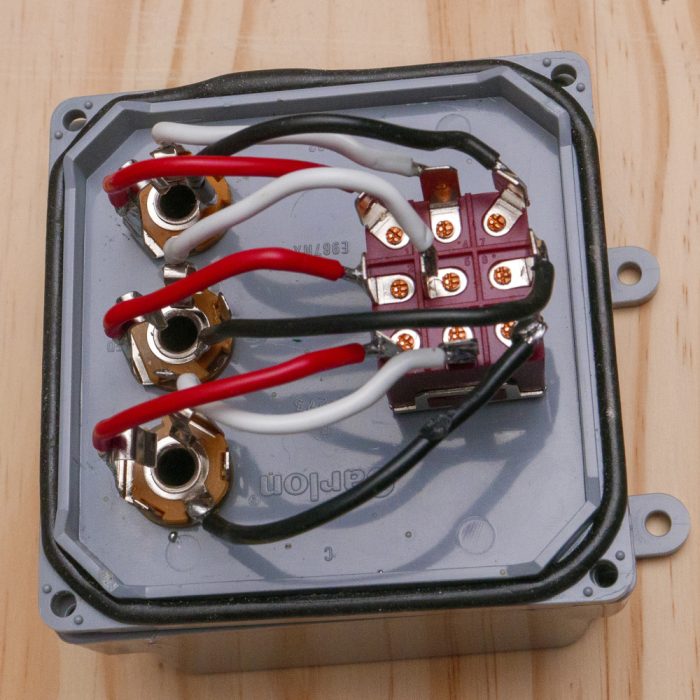
The three-pole switch is what’s important here as a stereo audio jack has three connections: ring, sleeve, and tip. And it’s important to be able to cut off all of them to avoid audio interference. There are versions of this switch with screw terminals. Don’t use them. Get the one with spade terminals since you can also use those terminals as solder lugs, giving you a solid connection.
I used 1/4″ stereo phone jacks instead of the typical 1/8″ (3.5mm) as it seemed finding one of the latter that would latch onto a standard 15mm male plug was going to come down to trial and error. Yes it means I need to use adapters, but it’s more flexible if I decide to repurpose it for something else later. Plus it requires adapting from the smaller to larger connector, not the other way around.
And I went with the open-body connectors as they were most capable of supporting 14ga wire. Larger wire will provide for a better audio connection. And the terminals on the switch and the size of the open connectors could probably allow for even 10ga if you wanted to go absolute overkill. I used stranded core, but solid core would work just as well here.
Note on 1/4″ male to 3.5mm female adapters: I’d actually recommend against using them, since quality can vary a LOT between the adapters you use. Over the years since I built this, I’d encountered some that worked well – such as the one that came with my DAC – and plenty that didn’t.
Now I needed one for my headphones, but for the two sources, I opted instead for a 1/4″ audio cable for the DAC to this switch, and a 3.5mm to 1/4″ audio cable for my work laptop. If you’re going to use adapters, make sure there is zero play in the 3.5mm end.
Wiring it up
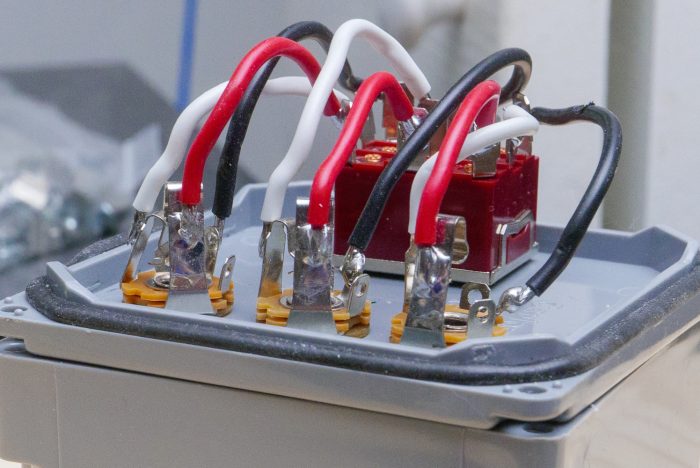
The middle set of terminals on the switch is connected to the output while the outer terminals are connected to each of the inputs. While they are made for spade terminals, I used solder to make sure there would not be any connection issues or a connection that could get just slightly loose and cause problems, such as completely losing one side.
On the jacks, you’re connecting point-to-point: ring to ring, tip to tip, sleeve to sleeve. Basically just make sure all the jacks are wired the same to their specific set of terminals on the switch and you should be golden.
And with the open-body jacks, again they’re capable of supporting 14ga wire. (As already mentioned, they can handle larger without issue.) And I didn’t rely on the solder lugs for the tip and ring connectors. Instead I soldered wire to the connectors directly, which I feel gave a much more solid connection – which is important with the larger-gauge wire. The solder lug was the only option for the sleeve connector.
And with the shallowness of the junction box – it’s less than 1-1/2″ internal depth – get the wires as flat as possible.
I chose the simplest wiring route. This means the center connector is the headphone output while the left and right are the inputs. The downside with the switch as well is the toggle will not point to the active input. But you can wire yours up however you choose. For example in the first image below, the leftward audio connection will be the active input, not the rightward connection.
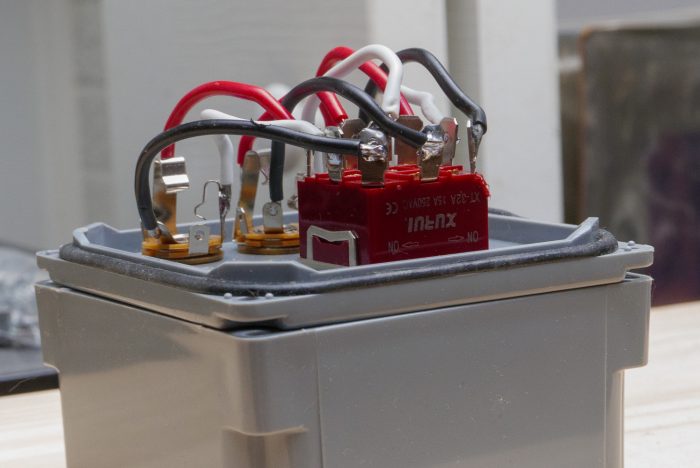
Yeah my soldering and wiring could’ve been a little cleaner… Solder connections give you the most solid connection, though, compared to the aforementioned screw terminal version of this switch. (Yes, I tried using that switch and it was nothing but issues and I could not get solid, reliable audio switching no matter how much I tried.)
Testing and Troubleshooting
When testing this, make sure to test with different types of music and audio. And of course test everything before closing it into the box.
While the audio is playing, I’d recommend tapping the box on your table or desk along with flipping the switch back and forth so the audio goes in and out. If audio channels come in and out doing either, or parts of the audio drop out, check the connections on your switch.
If you lose audio or it drops out plugging and unplugging any of the audio connections, check your solder joints.
You must be logged in to post a comment.