For the last 4 years, I’ve owned an ECM Technika IV Profi, and I’ve been loving having it. And the main reason I bought that machine is the ability to plumb it into the water line. It’s just unfortunate that I haven’t been able to do so until now.
So before going further, let’s go into the bill of materials for this project. Your mileage may vary depending on how you decide to do this.
Bill of materials
Here’s the final set of plumbing parts I used:
- ½”x½”x½” Sharkbite T-fitting
- ½” Sharkbite ball valve
- ½” Sharkbite push-to-connect to ½” MIP elbow
- 2 x ½” Sharkbite push-to-connect to ½” FIP elbow
- ½” Sharkbite push-to-connect to ½” MIP
- Cash Acme ½” NPT EB45 pressure regulator (Amazon, Lowe’s, eBay)
- ½” MIP to ⅜” FIP bushing
- ⅜” MIP nipple
- GE FXUVC Single-stage undersink filter (housing and filter)
- ⅜” MIP to ⅜” compression 90-degree elbow
- 2 x ⅜” compression to ½” FIP braided faucet connector (30in.)
- ½” MIP nipple
- ½” Sharkbite push-to-connect to ¾” MHT ball valve
- ¾” MHT to ½” MIP adapter
- ⅜” BSPT Female to ⅜” NPT compression
- ⅜” BSPT Male to ¼” BSPT male
Tubing/pipe:
- ½” PEX
Yeah, it’s a little… complicated. And yes, I’m using Sharkbite fittings because I don’t want to buy more tools. Speaking of, you’ll also need (if you use the same materials I did):
- PVC/PEX pipe cutters
- Pipe thread tape
- Water pressure test gauge
And obviously your bill of materials may vary based on your circumstance and espresso maker.
Recommendations
A few things to bear in mind when you select parts for this.
1. Have two water shut-off valves
You’ll notice in the bill of materials above I have two valves. The first comes off the cold water supply under the sink. The other is on the counter.
Don’t rely on just one shut-off valve.
2. You don’t need an expensive pressure regulator
Pressure regulators are available through companies that sell espresso makers and parts. They have the upside of typically having a ⅜” or ¼” inlet and outlet – perfect for espresso makers – but at a significant cost.
My local hardware store had a pressure regulator with an output range of 10psi to 70psi (0.68bar to 4.83 bar), fitting my needs, but with ¾” inlets. I didn’t want that large of inlets since that would require adapters coming off the ½” PEX line under my sink.
But I was able to order in the pressure regulator listed above. Initially I found it through Lowe’s for around $40, but I canceled that order and found it through eBay for a little more. I canceled it because three days after the “estimated pick-up date” it still said “Order Received”. The eBay seller took a few days to actually ship the item, but at least they shipped it.
The downside to the regulator I selected is needing to support its weight so it wasn’t just hanging off the plastic filter housing.
Assembly and Discussion
If you’ve done any plumbing work in the past, this should go together pretty easily. Especially since you’ve got my bill of materials as a starting point for figuring things out. Let your specific circumstance determine what parts you buy, but I don’t think yours will be too far off from mine.
I have two ½” PEX tubes coming into the kitchen under the sink. I recently replaced my dishwasher, and replaced some of the fittings under the sink since they looked corroded from hard water – a water conditioner is in the plans for later. So that guided much of my plans on this.
Now I easily could’ve just bought a long-enough braided hose for going behind the dishwasher. That certainly would’ve been easier than trying to snake PEX behind there, and probably less expensive overall as well in terms of fittings. But I wanted to maintain the larger diameter tube going to the pressure regulator. Every braided hose I found has a thinner inner-diameter.
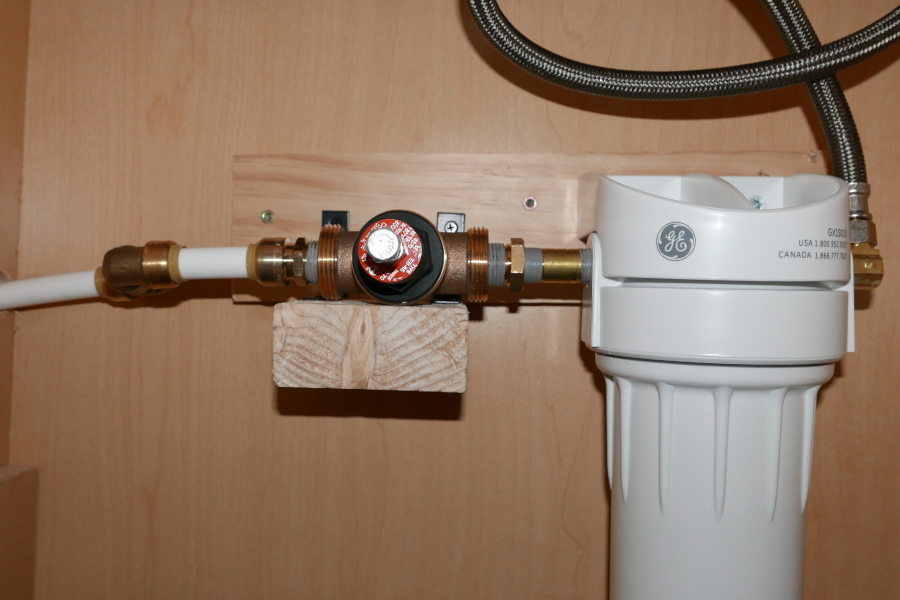
Unfortunately the clearance behind the dishwasher also meant I needed to do some… fitting voodoo to connect to the pressure regulator. A braided hose definitely would’ve been easier here. PEX is flexible, but not enough to reach how I needed it. Everything’s attached to a 1×4, which is ¾” thick, so something like this would still have been necessary even if the filter and regulator were attached to the back of the cabinet directly.
And yes, I have the pressure regulator sitting on a small shelf to support its weight. I already had the angle brackets and scrap 2×4, so this worked out. “I’ll take ‘Ways to give plumbers heart attacks’ for $400, Alex.” Especially since I used a pair of Sharkbite elbow fittings to connect the incoming PEX line to it.
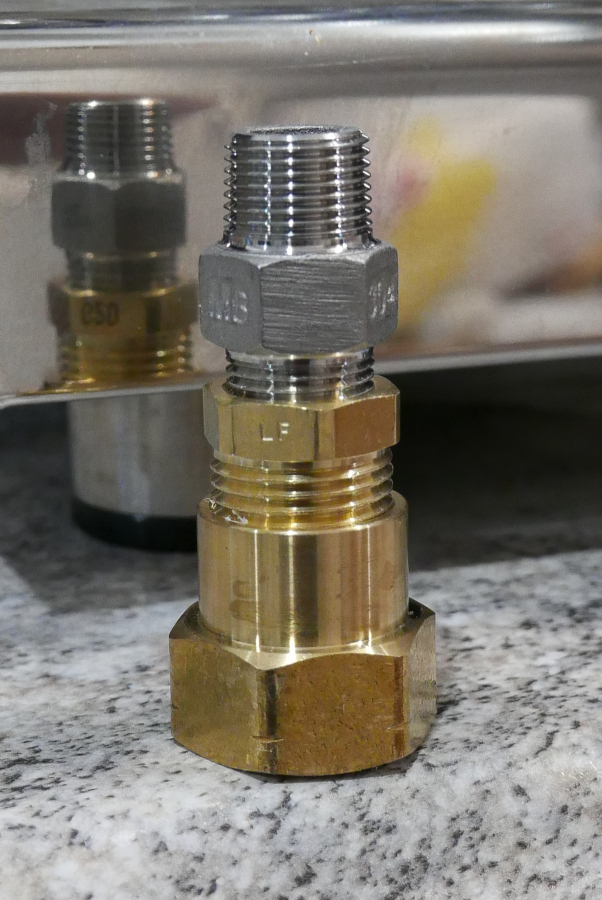
I also intended to connect the pressure regulator directly to the filter housing. Thankfully I only needed the bushing plus the nipple to do that. Coming off the water filter is a ⅜” MIP to ⅜” compression elbow, making this about the same as the water delivery to my dishwasher.
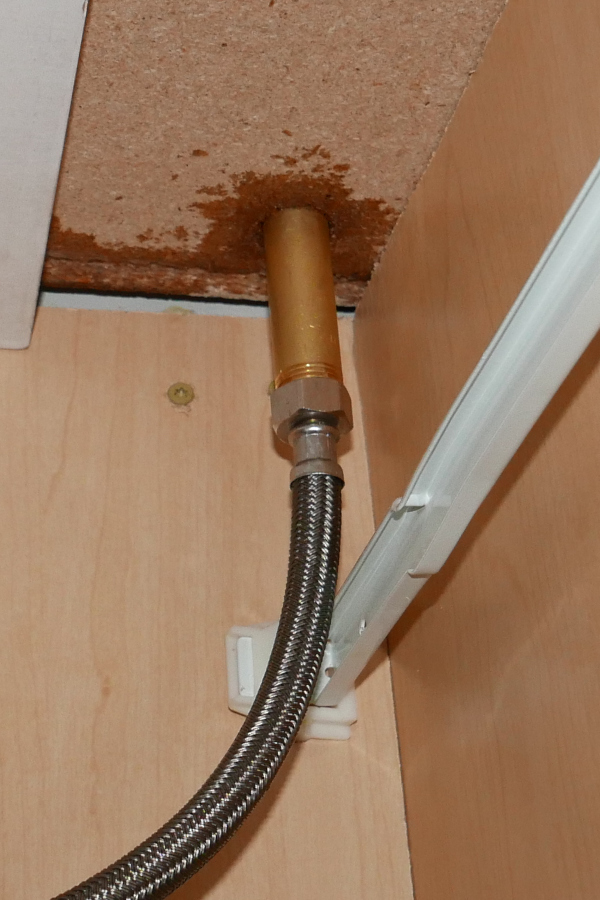
Through the countertop is a ½” MIP nipple. 4″ long, I believe, which is a bit longer than it needed to be, almost a little too long, but fortunate since I was screwing on the hose from inside the cabinet. So definitely don’t get one that’s just “long enough” to get through the counter. Give yourself plenty of room to make sure you can screw down the ½” FIP end of the hose all the way. Probably should’ve had the hole about 1″ more to the left, though.
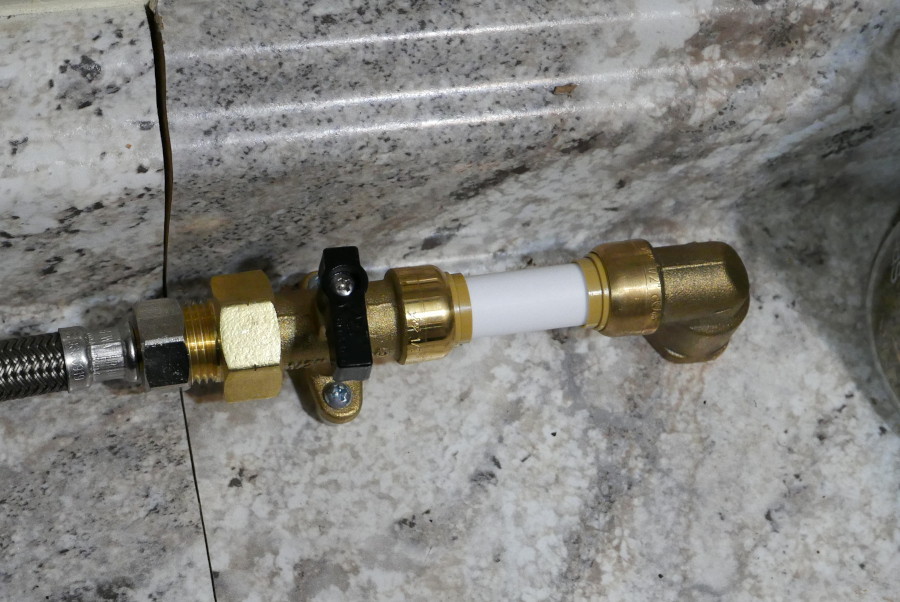
And on top of the counter is where the fun really started. Most washing machine valves are NOT certified lead-free, so can’t be used for this. So to get a setup that can, I used ½” FIP to ½” push-to-connect elbow into a ½” push-to-connect washing machine valve. To secure the valve, I have ¼” spacers underneath with #8 screws going into the countertop.
With that in place, it was a matter of calibrating the pressure regulator to about 20psi.
Connecting the espresso machine
Let me just say this up front: finding the right kind of adapters to make this work was a pain in the ass.
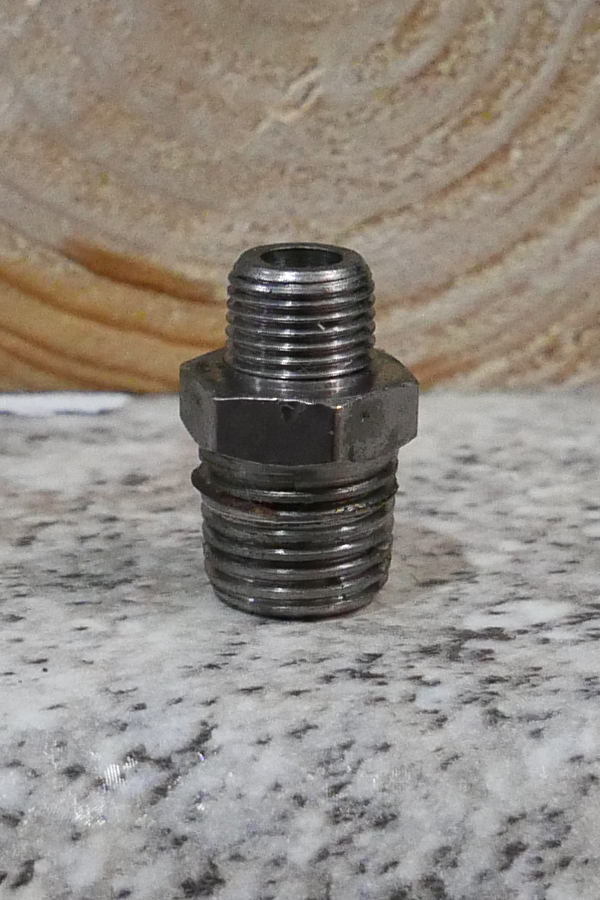
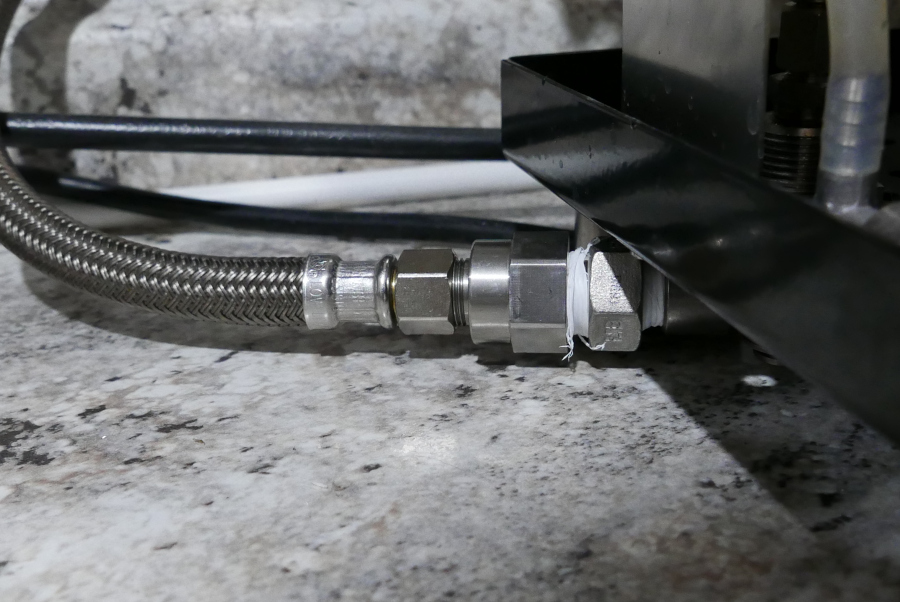
The espresso machine comes with a ⅜” BSP compression to ⅛” BSP braided hose, along with a ⅜” BSP compression male to ⅜” flare adapter. So a bit of fitting voodoo: ¾” MHT to ½” FIP, ½” MIP to ⅜” flare, and ⅜” flare swivel coupler. Except for some reason, I couldn’t get a leak-tight seal.
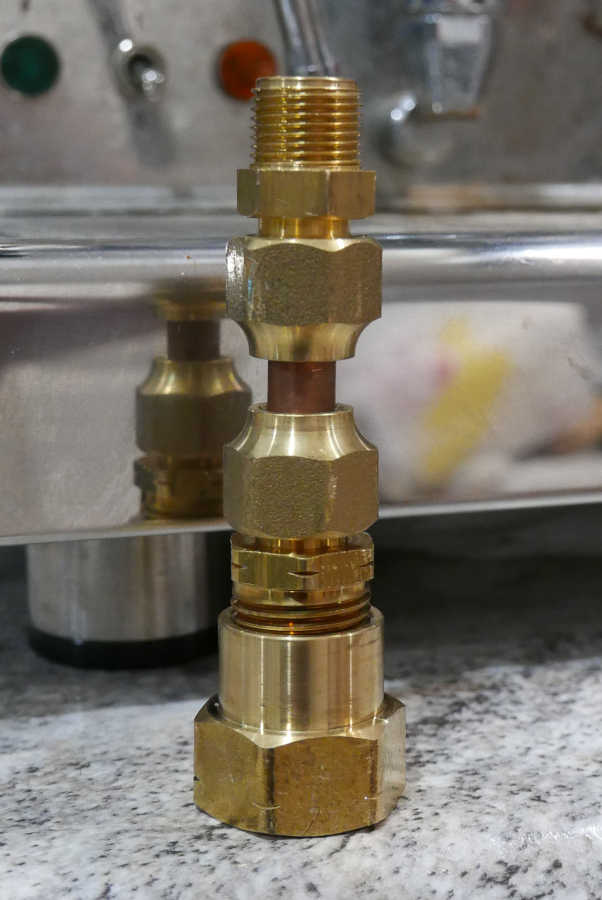
So I thought, “Let’s find an NPT to BSP adapter”. McMaster-Carr to the rescue! Unfortunately finding a ⅜” BSP to NPT adapter in lead-free brass was impossible. So I had to go with 304 stainless steel here. And that combination may be causing you to shout “galvanic corrosion”, except everything I’m finding online said the combination should be perfectly fine. I spent several hours pinning this down before putting in the order.
The adapter, though, is ⅜” BSP to ⅜” MIP. So getting that connected to the valve required two additional fittings: ¾” FHT to ½” FIP, and a ½” MIP to ⅜” FIP bushing. This put things in place for what should’ve been the final conversion. Except I couldn’t find a fitting that could go from ⅜” BSP female to ⅜” BSP compression male. I thought I found one through EspressoParts.com, but it converted to ⅜” NPT compression.
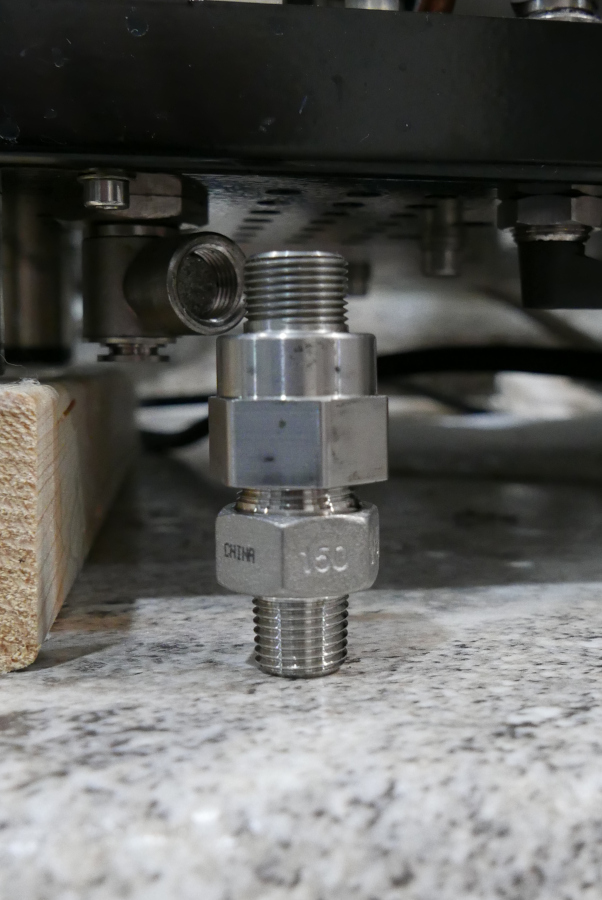
Having overnighted that part in, and realizing the night it shipped that it wouldn’t do what I’d hoped, I had another thought: look at the water inlet on the machine.
I lifted the machine up on a couple short 2x4s. It looked to be an adapter fitting going into a rotary fitting. I figured it was another British thread. And getting it out, I thought its size looked familiar.
It was ¼”-19 BSP, a.k.a. G¼” for those familiar with PC water cooling. Back to McMaster-Carr! Where I found a ⅜” BSP male to ¼” BSP male reducing adapter. Thankfully I didn’t need to pay extra to overnight the part since they’re just up in Omaha. Anyway…
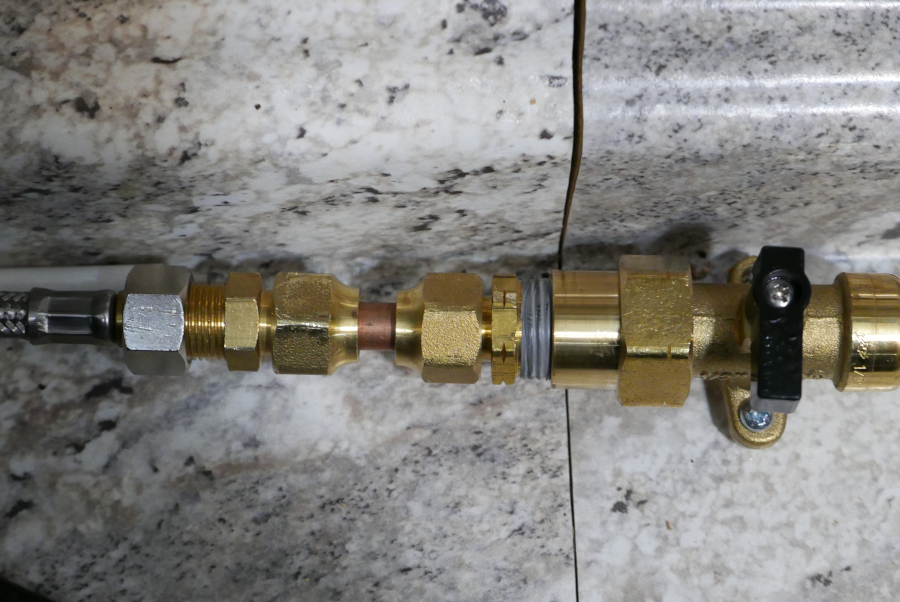
So that adapter along with the ⅜” BSP female to ⅜” NPT compression meant that I could just buy a standard water supply hose from Home Depot. In fact, the same supply hose I have going from the water filter to the ½” MIP nipple going through the counter.
So one last trip to Home Depot, where I bought a ¾” FHT to ½” MIP adapter and another supply hose.
Despite all the expense going with it, the back and forth trying to figure out the right set of adapters, actually worked out for the better in the end. This final setup is simpler compared to… what I could’ve had. And the hose I ended up using in the end is larger in diameter compared to the one supplied by ECM.
But there are two ways this could’ve been simpler still, provided I could’ve sourced these parts:
- ¾” FHT to ⅜” NPT compression hose (for potable water) to eliminate the hose adapter on the valve, or
- ¼” BSP male to ⅜” NPT compression fitting adapter to eliminate the adapter combination on the water intake.
Which Koolance, a computer and systems water cooling company, used to sell the latter, but I’m sure they would’ve told me it was not suitable for potable water.
Afterward
As of when this article goes live, I’ve had the direct water connection for a few days now. So how does it compare? Not much different from before. But I didn’t expect it to be much different.
The pressure gauge was the first thing I noticed. When operating from the boiler, it’ll typically rest at 0 unless you’re pulling a shot. Now it should reflect the line water pressure. In my case it’s about 1 BAR, or about 14.5psi, which is optimal for my machine.
I also noticed it a little higher for pulling shots. About 9.5 BAR instead of 9 BAR, in my instance. So this means you may need to dial-in your grinder again.
Otherwise I’m glad this project is done as it means I don’t need to be hunched over in one of the lower kitchen cabinets for anything anymore. At least until the next time the dishwasher or garbage disposal need replaced, which hopefully won’t be for another decade as both are pretty new.
Oh wait… I will need to replace the filter in about 6 months. Damn it…
You must be logged in to post a comment.