For about a year I’ve been a photography hobbyist. Every photographer, whether you’re a professional or hobbyist, must have a “got home” or “back at the office” routine. So I’ll detail mine here. If you’re trying to establish a “got home” routine, or you don’t have one, you can use this as a guide.
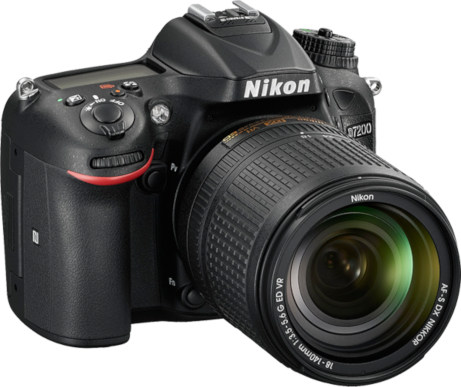
Every weekend for the last several months, weather permitting, I’ve been going to a local park for a nature photo walk. For reference, I use a Nikon D7200. And this is the routine I typically follow when I get home.

1. Copy off the pictures – two copies
I make two copies of all pictures on the card. My system has 4TB secondary HDD storage. All the files get copied there first. Each session has a separate folder.
Once they’re copied, I immediately copy them to my NAS – networked attached storage. If you don’t have a NAS, and even if you do, you can instead (or also) back these up immediately to any cloud storage you have – Google Drive, OneDrive, etc. The point is to have at least two copies of the original files: one you’ll cull and edit on your workstation to make your final photos, and the backup(s).
2. Check the batteries
Do this while the files are copying off to your system, or the NAS or cloud storage. I said this in a comment to a YouTube video by UK photographer James Popsys:
While you’re backing up the photos off your card(s), check your batteries with your camera to determine which ones are still good or decent (50% or more) and which ones need to be charged. Integrate it into your “got home” routine. On site or in the field, segregating the dead from good batteries can save you a little bit of time – that way you’re not wasting about 30s because you grabbed a dead one. But, again, checking and charging your batteries should be part of what you do when you get home. Do it while you’re backing up your card(s).
If you have a separate battery grip for your camera that doesn’t plug directly into the battery compartment, use this as a chance to rotate the batteries as well if they aren’t low enough you feel the need to charge them. I always make sure the battery with the higher charge is the one the camera is configured to use first.
I use the Vello BG-N11 with my D7200, and I love it! It’s a fraction of the price (only about 70 USD as of this writing) of the Nikon MB-D15. Several brands make battery grips for the D7200, but the Vello has very positive reviews at B&H, and is the only off-brand battery grip for the D7200 that B&H sells.
3. Format the cards
Once the photos are copied off, I put the card back into the camera and format both cards. I do this immediately so I don’t have to worry later about whether I got everything off the cards. Since I format the card immediately afterward, I know I got everything.
4. Review and cull the photos – Nikon ViewNX-i
This step I actually only recently started using, and I’m glad I did as it’s been a significant efficiency boost to my workflow.
Nikon ViewNX-i (with Capture NX-D) is Nikon’s RAW viewing and editing software. (Obviously use the proper software for your camera.) It comes in very handy for culling through the initial set of RAW files from the camera since it just reads files straight off the file system. I can quickly look through the files and delete any that are out of focus or missed focus. I also normally take multiple exposures of a scene, sometimes with differing settings, so this allows me to easily determine the best of those sets.
Lightroom CC is very slow in this regard, since you need to import them first, for one. And deleting a file locally means it must also delete it from the cloud, which… isn’t quick, even with my gigabit Internet connection.
I used to use ViewNX-i to bulk-rotate all of the images as well prior to import into Lightroom, but ViewNX-i no longer saves those settings to the RAW file directly. Lightroom can bulk rotate images – you need to be in one of the grid views to do so – so it isn’t much of a pain having to do that twice. But I still use ViewNX-i to review and cull the files before importing, with its bulk rotate coming in handy for that. In case you’re wondering, I’ve had issues with in-camera auto-rotate in the past on my D40 and D3200, so I just don’t bother with it.
I don’t determine all of the keepers in this step, only the ones that absolutely are not keepers – missed focus, out of focus, unintentional shutter presses, etc. I also don’t typically try to do this all at once unless I’m working with a small initial set.
5. Adobe Lightroom
Once I’ve culled through the set, I import that set into Adobe Lightroom. Since I’m now working with a much, much smaller set compared to the initial set, the time for import is negligible compared to how long it would’ve taken to import everything from the card. And bulk rotating the files is the first thing I do after importing them into a new album for the shoot.
Concluding…
So that’s my “got home” routine in a nutshell. It’s working out well for me so far, and if I ever change it for whatever reason, I’ll hopefully remember to come back and update this article with the specifics.

You must be logged in to post a comment.