As I mentioned in a previous article, I decided to co-opt the original game server to use for distributed computing projects. This will actually work out for the better. The co-opted computer has a slightly faster processor at a lower wattage, but less memory on the mainboard.
But I still had my wife’s original X2 mainboard and processor sitting around unused, so I built her a Minecraft server using that instead.
Specifications:
- AMD Athlon 64 X2 3800+
- Abit KN9 Ultra
- 4 GB DDR2 memory
- SeaSonic SS-250SU power supply
- ADATA Premier SP600 64GB solid state drive (Model no. ASP600S3-64GM-C)
- Radeon HD5430 graphics card
It’s a slower processor, but the memory will be more important than the processor speed for this. It’s still only a dual core processor, but the machine will be single purpose. In the Minecraft server testing that my wife did before I co-opted the original for experimentation, she didn’t see any performance concerns — no lag or anything of that sort. But given that her friends will be using this as well, the memory will become the concern on this, so I want to eliminate it as a potential problem.
It’ll be a 64-bit version of Linux with a 64-bit Java runtime environment going onto this, so it should be able to make use of all of 4GB.
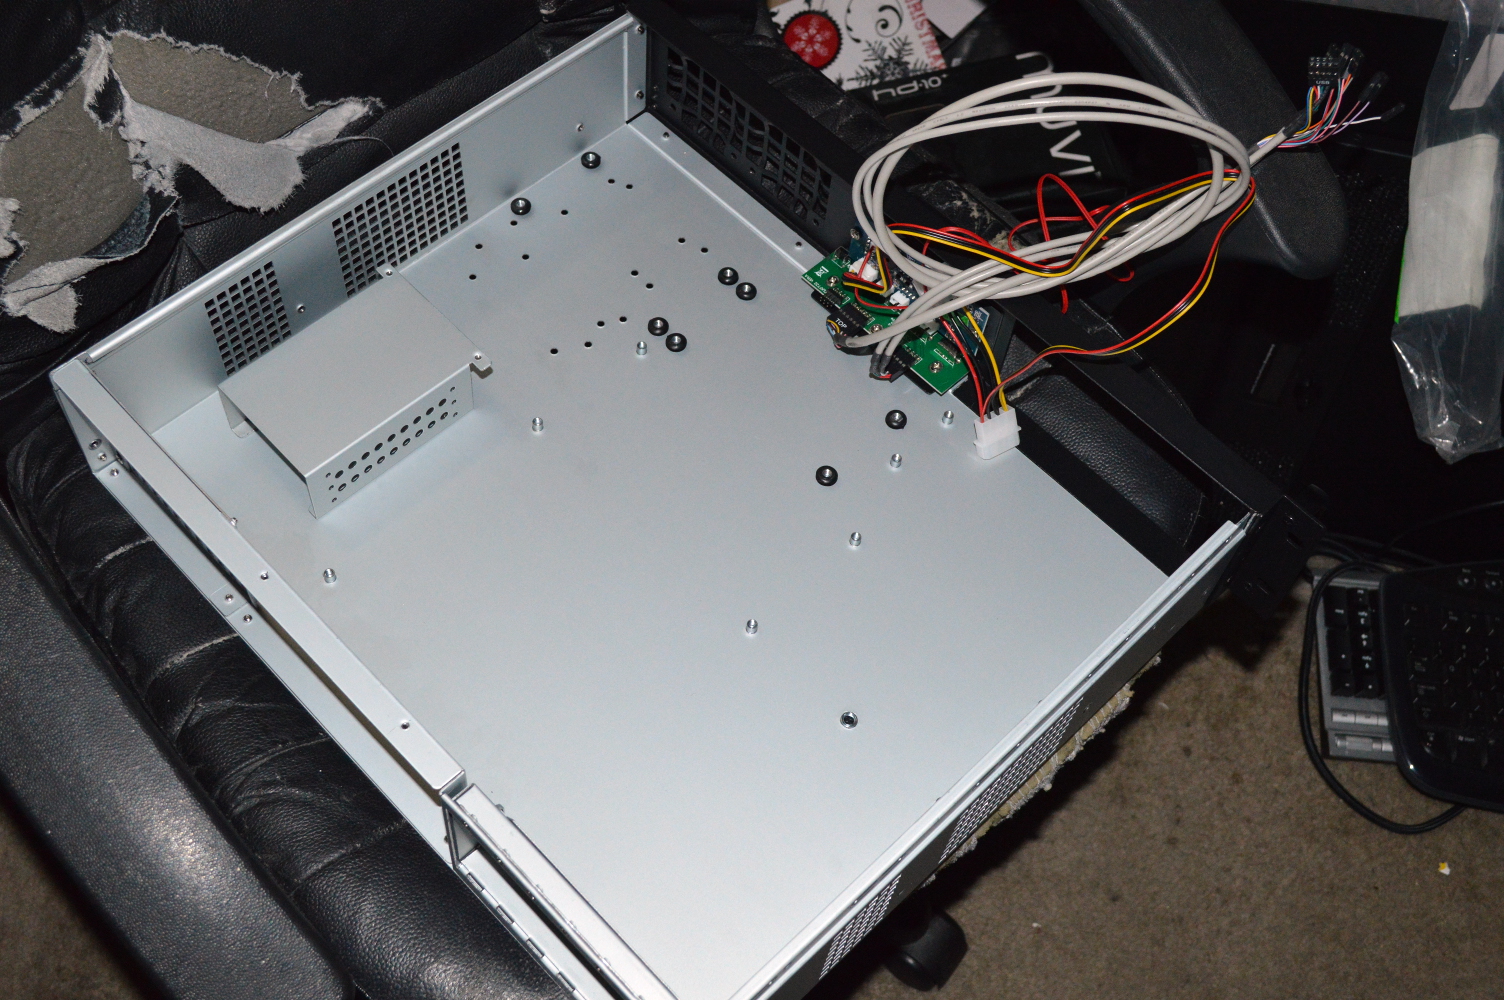
The chassis is the same as before: PlinkUSA IPC-G252S 2U chassis. I didn’t see a compelling reason to go with anything else. It can support a full-size ATX mainboard, and I like the internal temperature monitoring — I’m not going to be using its “intelligent” fan controller though as I may want to undervolt the fans to keep them quiet.
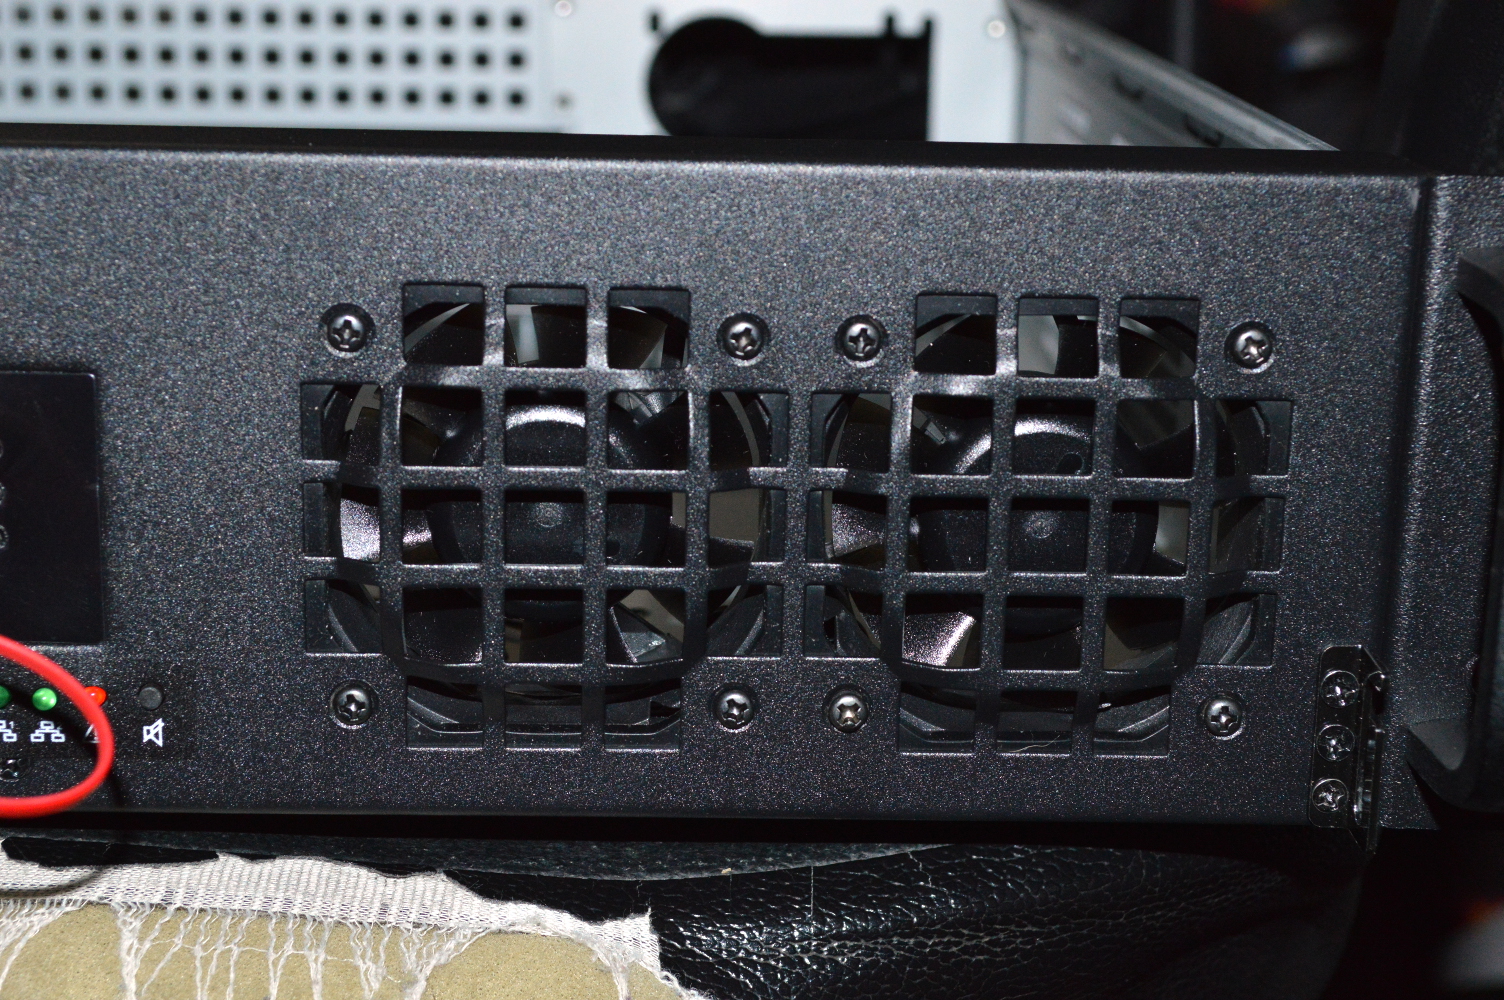
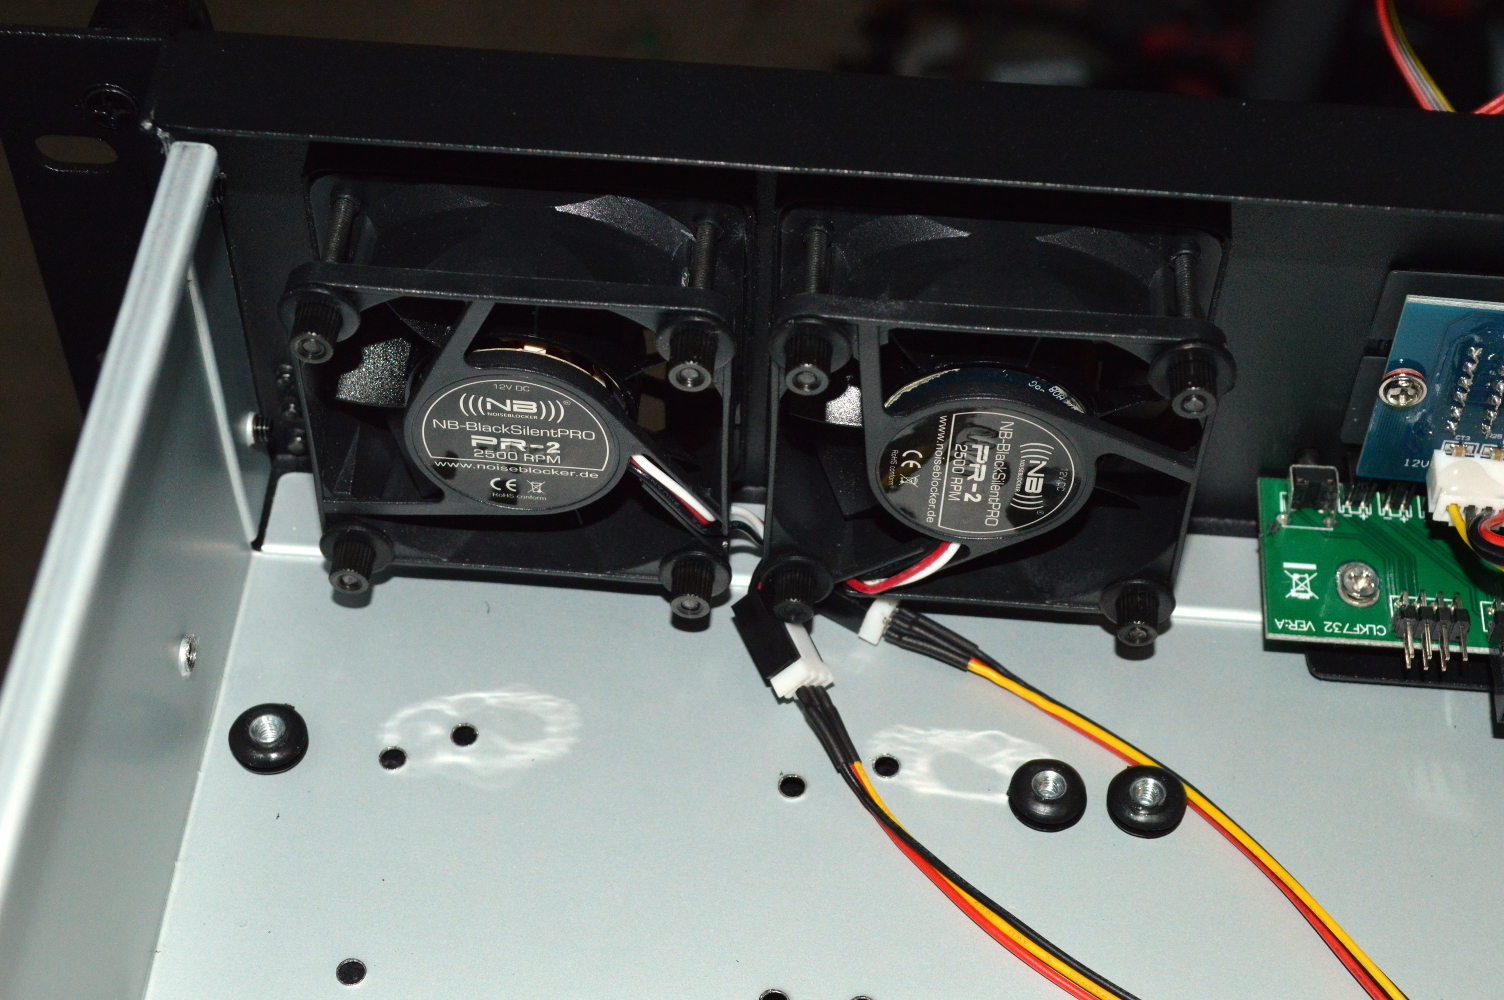
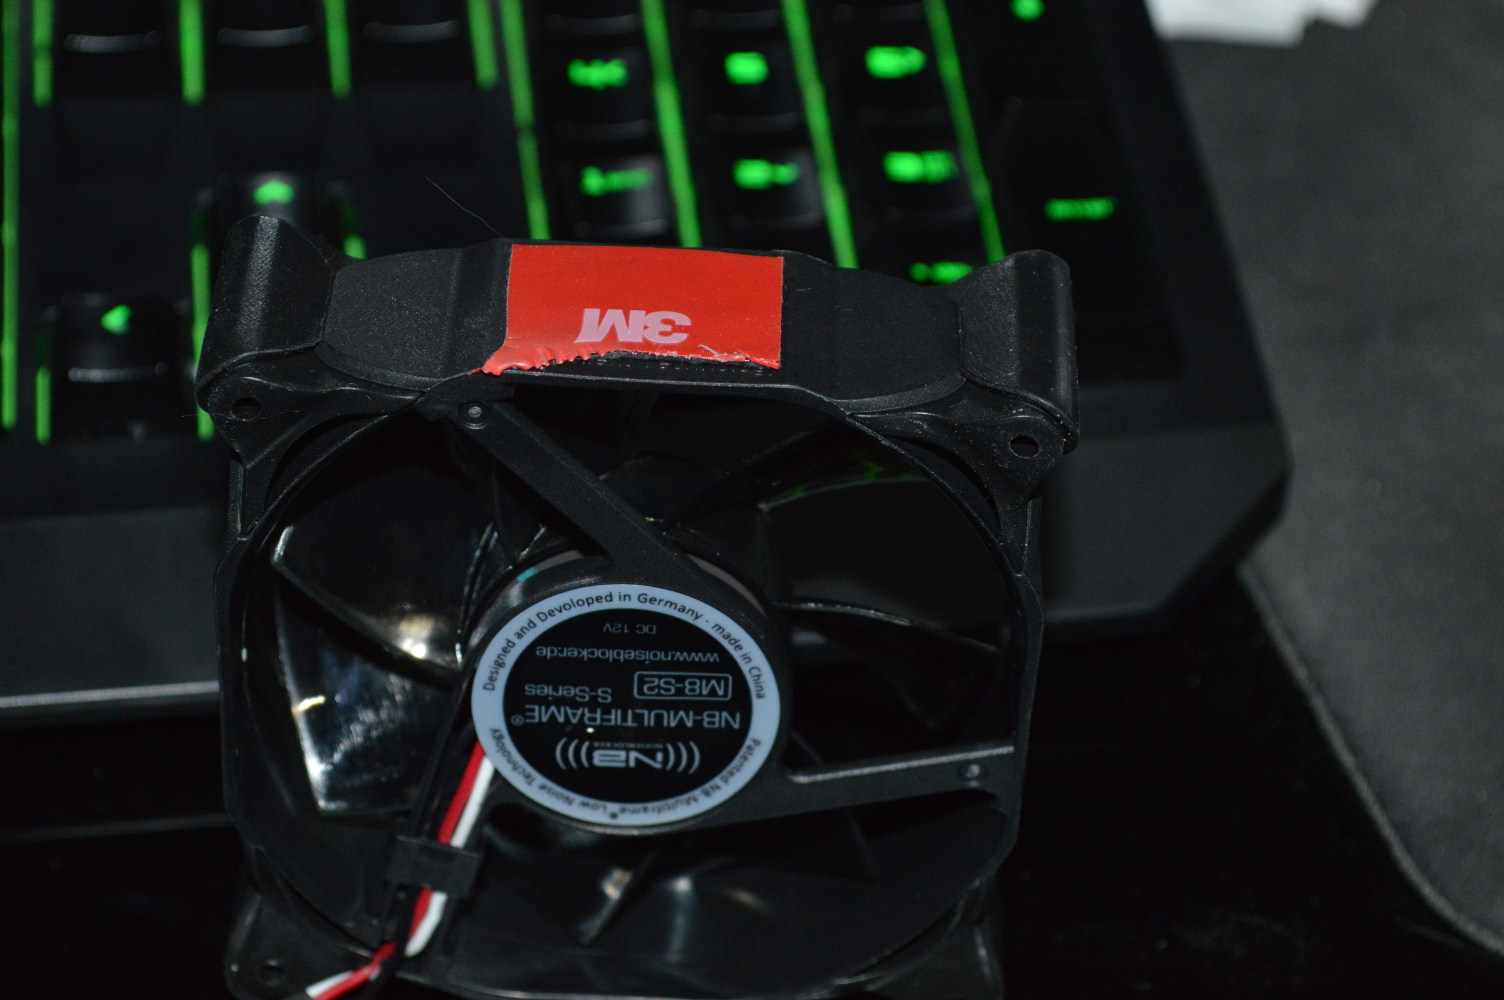
Speaking of the fans, I went with NoiseBlocker on this instead of Noctua. The two 60mm fans that came with the chassis were replaced with NoiseBlocker BlackSilent Pro PR-2 fans while adding an M8-S2 for the 5¼” drive bays.
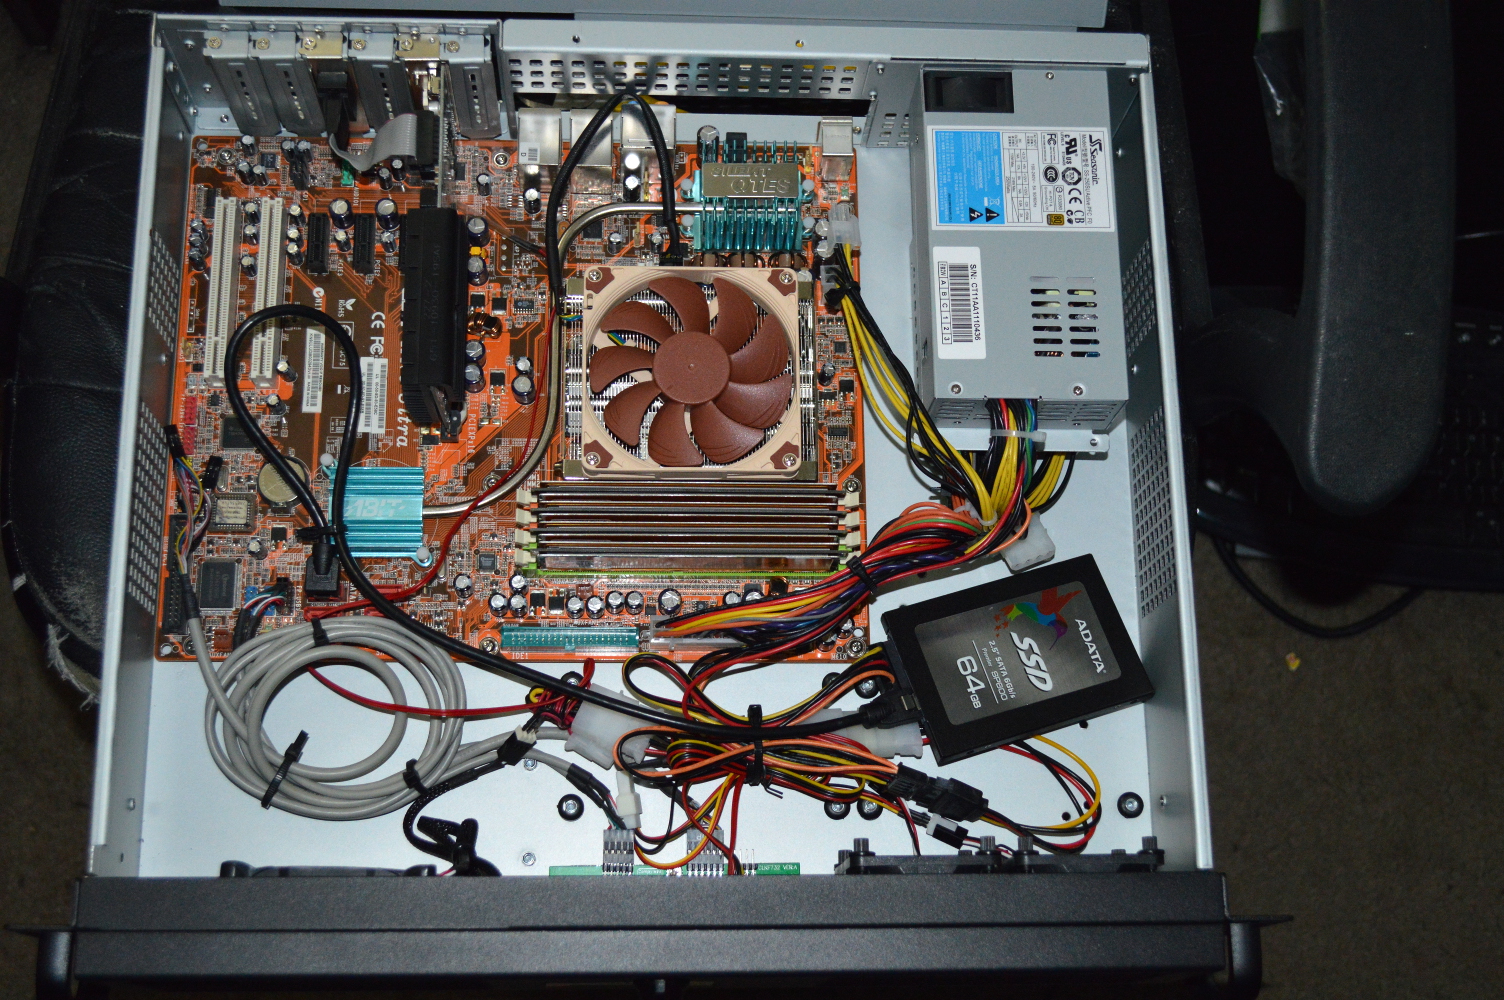
For CPU cooling, I’m again using the Noctua NH-L9A since I love how it’s performing with the distributed computing machine. Sure the processor is rated at a higher wattage, but it won’t be under nearly the same stress levels, and the case will have plenty of incoming airflow to keep temperatures under control. And I’m using the better performing IC Diamond thermal compound.
And yes, I’m putting a SATA III solid-state drive into a computer with a SATA II controller. But given the specifications of the drive, this won’t be much of a constriction on its performance: it’s listed with a sequential read speed of 360 MB/s (2.8Gb/s), and a sequential write speed of 130 MB/s (1 Gb/s). Not exactly top-of-the-market here, but it’ll still be better than any platter drive in both read and write speeds, and I won’t have to worry about heat — I’ll just tape it to the side of the chassis and be done with it.
Building the system
If you’re going to build into this chassis, or really any rack mount chassis, the first thing you should do is strip it. Strip it down to the bare essentials, to where there is nothing in it except whatever is not going to be in your way. If you’re replacing the fans — which I’d highly recommend for this chassis — then take those out as well.
In this case, I replaced the front 60mm fans with NoiseBlocker BlackSilent Pro PR-2 fans. And these were a great choice as these fans are quiet fans at full speed.
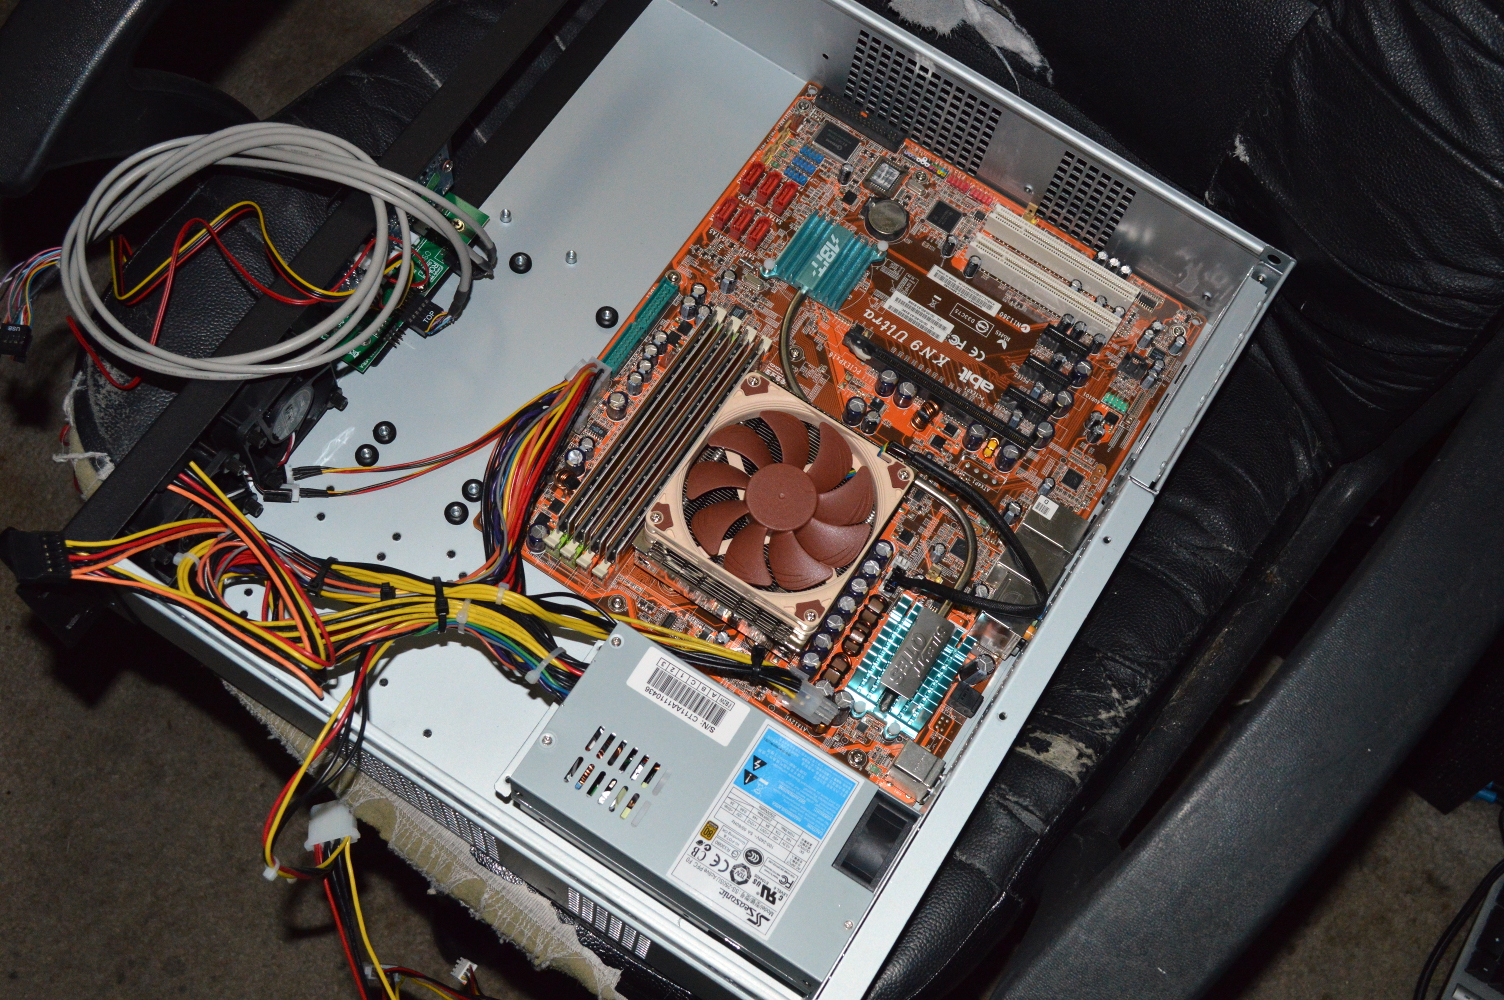
This is the mainboard with the new Noctua CPU cooler already pre-installed. I’m still not sure what to do about the Silent OTES thing that Abit introduced back when. I’m considering replacing it with heatsinks and fans, especially since this system was intended to be cooled by the CPU fan, but the low profile cooler isn’t going to be able to do that.
I went with the Radeon card as I mentioned previously. This is mainly because two other cards I tried in the riser had noisy coolers on them. And I want this to be a quiet system, so I went with the card without active cooling on it.
The 80mm fan proved interesting, mainly because I forgot to order another of the 2-bay HDD cages like I used in the other X2 machine. So instead I just used a small piece of 3M VHB double-sided tape.
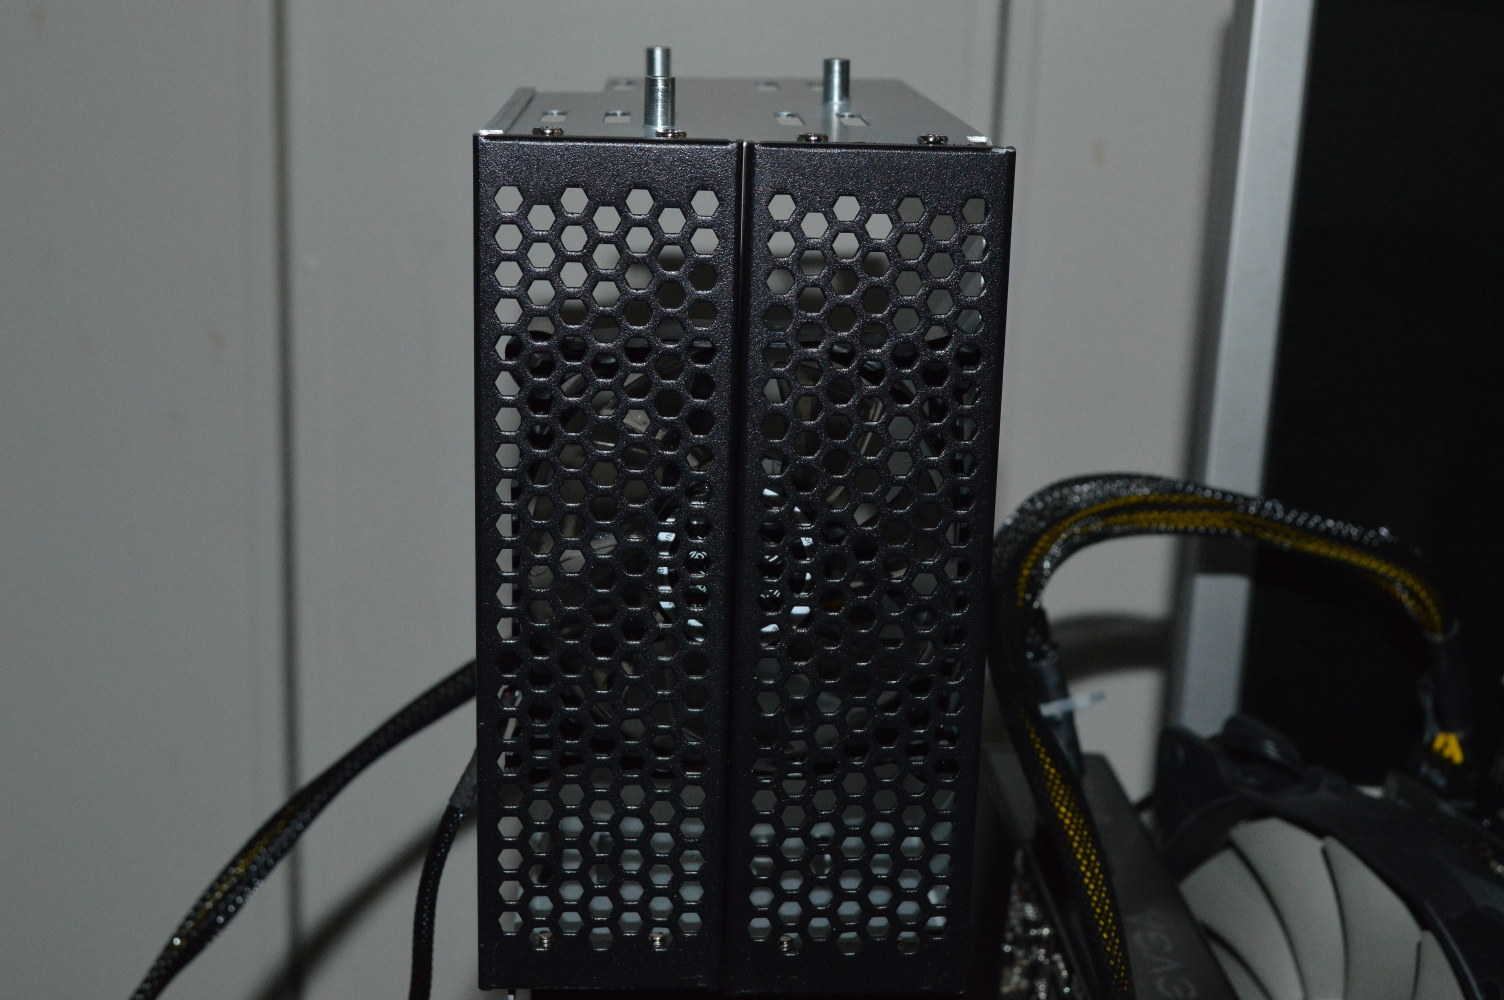
This is holding it pretty well. Not an ideal solution since it’s probably not pulling a lot of air into the chassis — instead likely recirculating more than intake. But it’s a good temporary solution until I can get something more permanent, preferably without having to buy a hard drive cage. To that end, I inquired with Mountain Mods about their dual drive bay cover to see if they could modify two of them for an 80mm fan cutout:
On your website for sale you have a triple 5 1/4″ drive bay cover for mounting a 120mm fan. You also have full cover panels for a dual 5 1/4″ drive bay. I’m looking for a dual drive bay cover panel for mounting an 80mm fan. How much would be the cost to modify your dual drive bay cover — specifically item 2BAY_BA — for an 80mm fan cutout? I’d be interested in acquiring two of them.
I said two because I’d want to use this on the other 2U system as well. For two other rack chassis builds I have in mind, I’d be using the triple drive bay 120mm fan mount Mountain Mods already has available, since those builds are slated to be in 4U chassis.
The next day, though, I had a bit of a realization: since I’m using double-sided tape to stick the fan to the 5¼” drive bay cage, why not pull out the cage and just tape the fan to the chassis itself? At the same time, I redid the cable management around the power supply and 60mm intake fans, tucking the spare power supply cables down under the power supply and drastically opening up the airflow in the chassis.
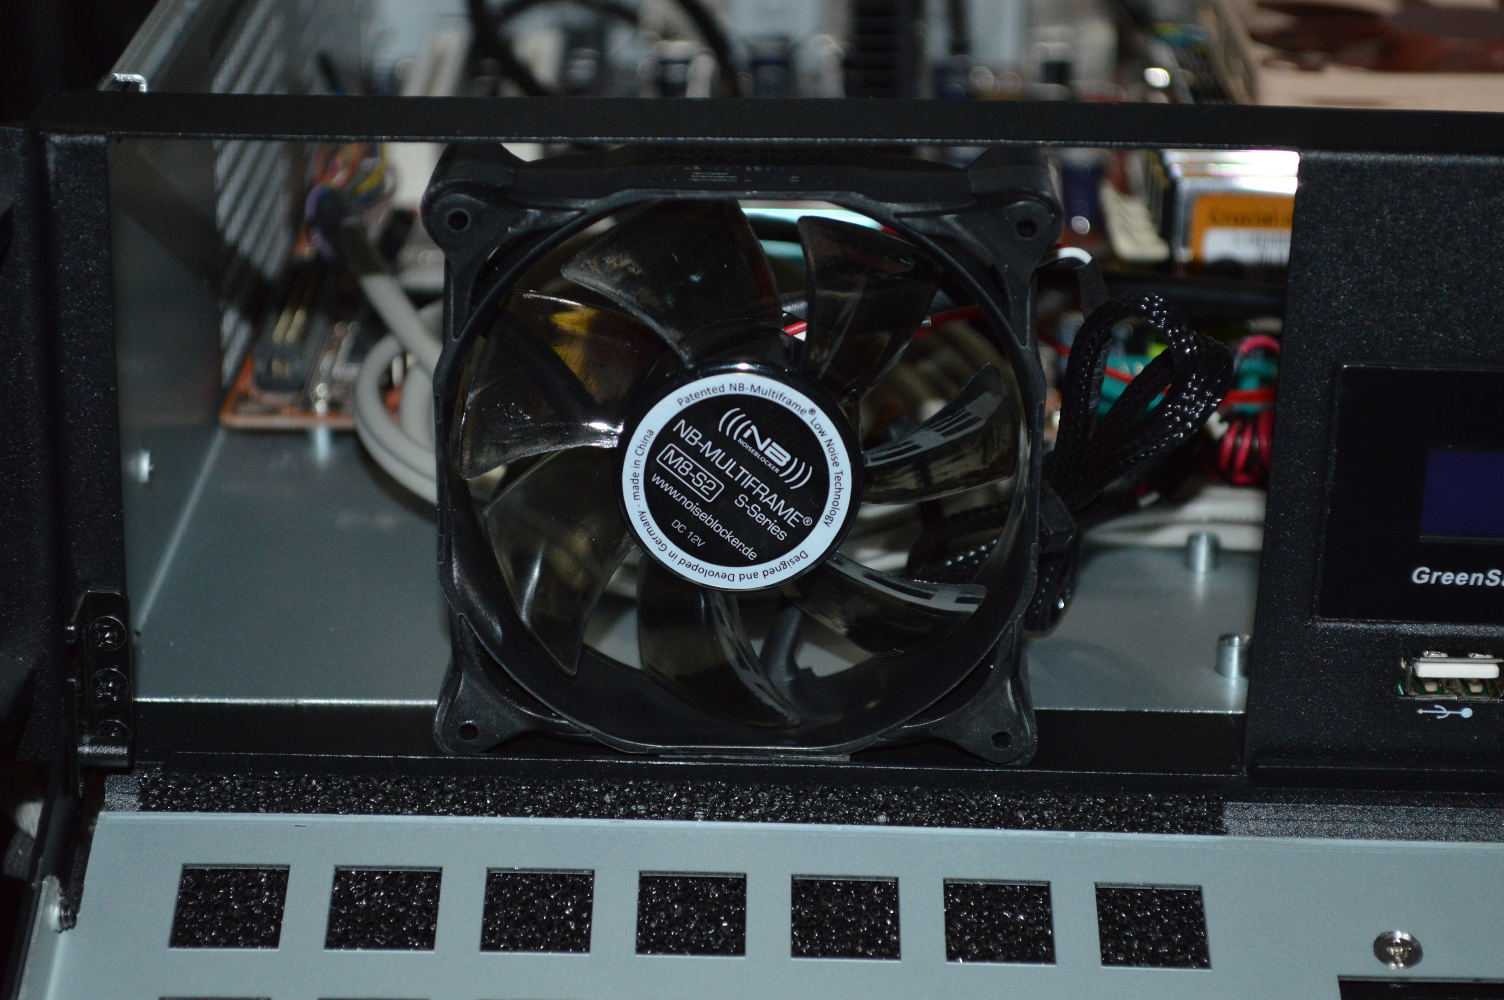
This dropped the internal chassis temperature substantially. With just the Minecraft server running, the internal chassis temperature would approach 40C. Now it sits down in the lower 30s.
Setting up the Minecraft server
This system is running Fedora 22 Server. Regardless of what Linux distribution you’re running, these instructions will apply.
First make sure to create a separate, unprivileged user under which the Minecraft server will be run. This will keep it contained within a strict space. This becomes especially important given the server runs on Java.
Download and install the latest Java runtime environment (JRE) for Linux x64. Some Linux distributions will install a product called the OpenJDK instead of Oracle’s JRE, so if that is already installed, you can use that instead, or delete it in favor of the Oracle JRE. Install GNU Screen if not already installed.
As the Minecraft user, create a subfolder called “Minecraft” in the home directory and download the Minecraft server jar into it. The server will create several files, so it helps to have all of that in one subfolder rather than in the home directory. Plus it makes backups a little easier. Launch the server by running “java -jar [minecraft-server.jar]” where [minecraft-server.jar] is the full name of the jar file.
One of the files that is created is “eula.txt”. You will need to edit that file to change the “eula” parameter in it from “false” to “true”. Next, edit the server.properties file. The one line I highly suggest you change is the “level-seed” parameter — change it to some random string generated through random.org (check all options to get a good random string). All other options are up to you to configure, though I’d also suggest enabling the white-list.
You will also need to add the port to the firewall. Follow the instructions based on the distribution you have. For Fedora 22, you would use “firewall-cmd” from the command line to permanently add the port (default: 25565) to the zone for your network adapter, otherwise you won’t be able to access it.
Create a shell script as well for starting the server. Here’s what I use:
#!/bin/bash
screen -S 'Minecraft' java -Xms1G -Xmx3G -jar minecraft_server.jar nogui
The “-Xms1G” parameter sets the minimum memory consumption at 1 GB while “-Xmx3G” sets the maximum memory consumption at 3 GB. The minimum consumption should always be kept at 1G, but you can set the maximum to whatever you need. Since this system will only be running the Minecraft server, 3G is a safe ceiling on this system, though I could set it a little higher if I feel the need, or adjust the minimum if my wife and her friends start complaining of lag.
Once the server is started, press Ctrl+A,D to get out of screen. This will leave the server running in the background, and you can even log out and the server will still be running. When you log back into the server, use “screen -r” from the command line to get back into the administrator console.
Backing up a running server
Periodically you will want to back up your Minecraft server for numerous reasons. For one, if you open the server up for public consumption (though I don’t know why you’d want to) and have a “griefer” come through, it helps to have a snapshot you can revert to. If something else happens or the system up and dies on you, it pays to have a save point.
One suggestion I saw was to use the Linux Dropbox client and basically have your Minecraft server residing in the Dropbox folder so it is always synchronized and continuously backed up. Despite the fact that Dropbox does have a versioning feature, I still wouldn’t call this a good idea. It’s always better to take a full snapshot of the server as it stands at a given moment, even if you ultimately use Dropbox as the backup target, which is what I do.
Below is the script I have set to run hourly. It is run from the home folder and copies the running Minecraft instance, except the jar and lock files, to a temporary folder to be compressed into a tarball and copied to my Dropbox. To use this script, you will need the inotify-tools installed.
#!/bin/bash
_tilde=~
eval _home=$_tilde
_now=$(date +'%Y%m%d_%H%M')
_file='minecraft-backup_$_now.tar'
_gzfile='minecraft-backup_$_now.tar.gz'
_log='$_home/Dropbox/Minecraft backup/backuplog-$_now.txt'

mkdir backup
printf 'Waiting till next level flush before taking snapshot\n\n' >> '$_log'
inotifywait -e open Minecraft/world/session.lock >> '$_log' 2>&1

printf '\n\nCopying Minecraft files to temporary folder\n\n' >> '$_log'
cp -R -v Minecraft backup >> '$_log'
cd backup

printf '\nCreating gzipped tarball\n\n' >> '$_log'

tar cvf '$_file' Minecraft/ --exclude='*.jar' --exclude '*.lock' >> '$_log'
gzip -9 '$_file'
mv '$_gzfile' '$_home/Dropbox/Minecraft backup'

cd ..
rm -r backup
And it also creates a log file for the backup instance so you can look at it to determine if anything went wrong, allowing you to see if you have a good backup or not. As I said I run this hourly, but you can choose to run it at a lesser or greater interval if you desire depending on what you feel are your requirements.
The script will wait until the session.lock file in the world folder is re-opened before copying the data off to a separate folder. In my observation, the server software will close the session.lock file before writing out all of its data to disk, then re-open session.lock. That sequence occurs once every minute. Once that event is detected — the script may wait up to about 60 seconds for it to happen — the script will copy off the entire Minecraft folder knowing it has everything that is vital in a known good state.