- Desert Sapphire
- Desert Sapphire – Part II
- Desert Sapphire – Part III
- Desert Sapphire – Part IV
- Desert Sapphire – Delivered
- Desert Sapphire – one year later
- A few problems to overcome
So the build continues…
The day after Christmas, my wife and I drove out into Kansas to visit family. Given the weather forecast for the next day compared to the weather while we were driving back, I decided to run to Micro Center instead of going directly home. This was to pick up the SLI fitting plus a couple other things to finish the build.
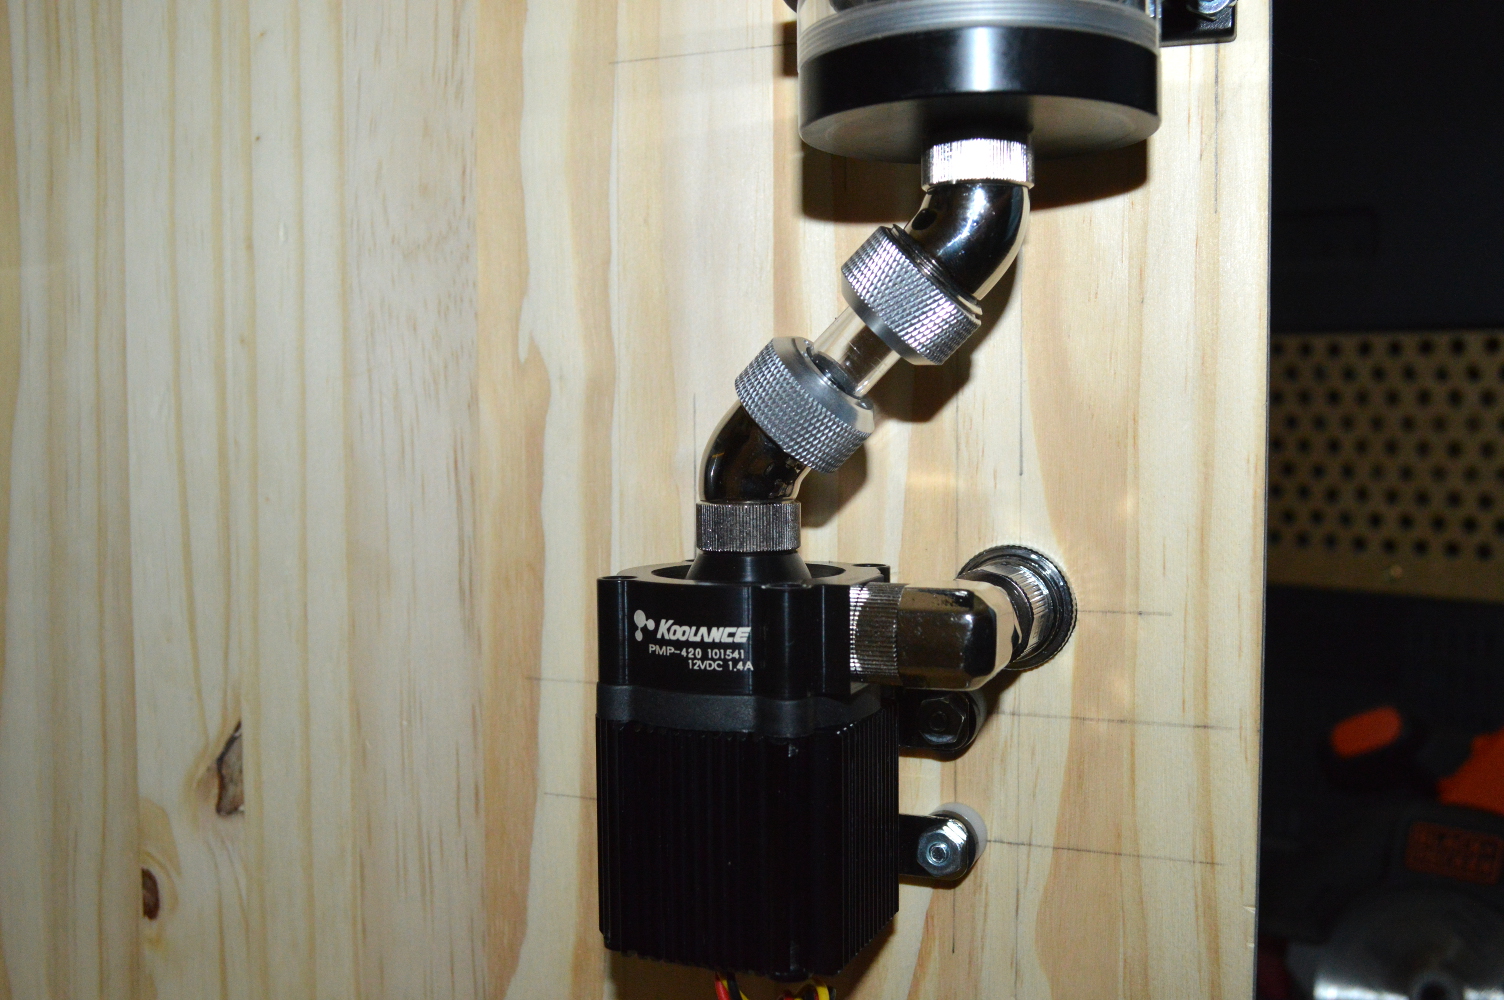
When I got home, after unloading from Christmas, I took the SLI fitting and put it into place. This basically demonstrated conclusively that all of my measurements regarding the pump were spot in.
With almost every fit confirmed, the only other thing to do was glue and screw the cabinet together. The glue is Titebond No-Run No-Drip, which is perfect for end grain applications such as what I’m doing here, but requires that I leave everything for about 24 hours to cure. Since I was doing this on a Sunday afternoon, that would mean I couldn’t touch it till I got home from work the next day. Even though I also screwed the boards into the end, I decided to leave it all clamped overnight.
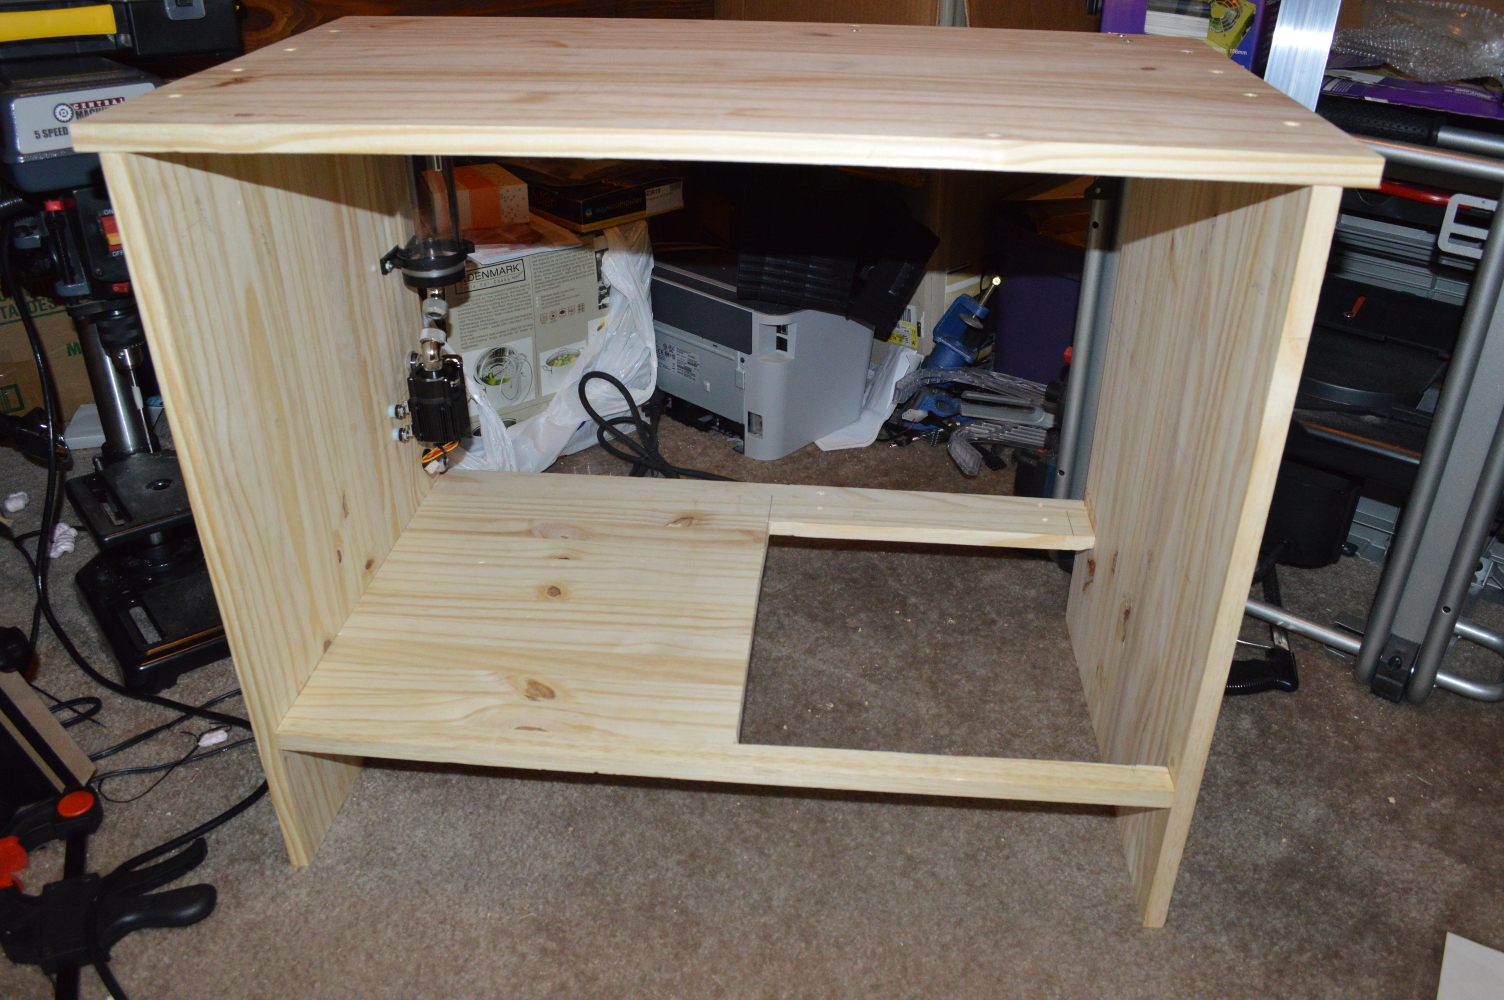
One thing I will say about this: nothing really prepares you for assembling it all together. When everything you’re seeing in your head or on paper actually meets the wood to demonstrate whether your idea has merit. So seeing this all come together seeing everything line up… it was such a relief to see it all work out.
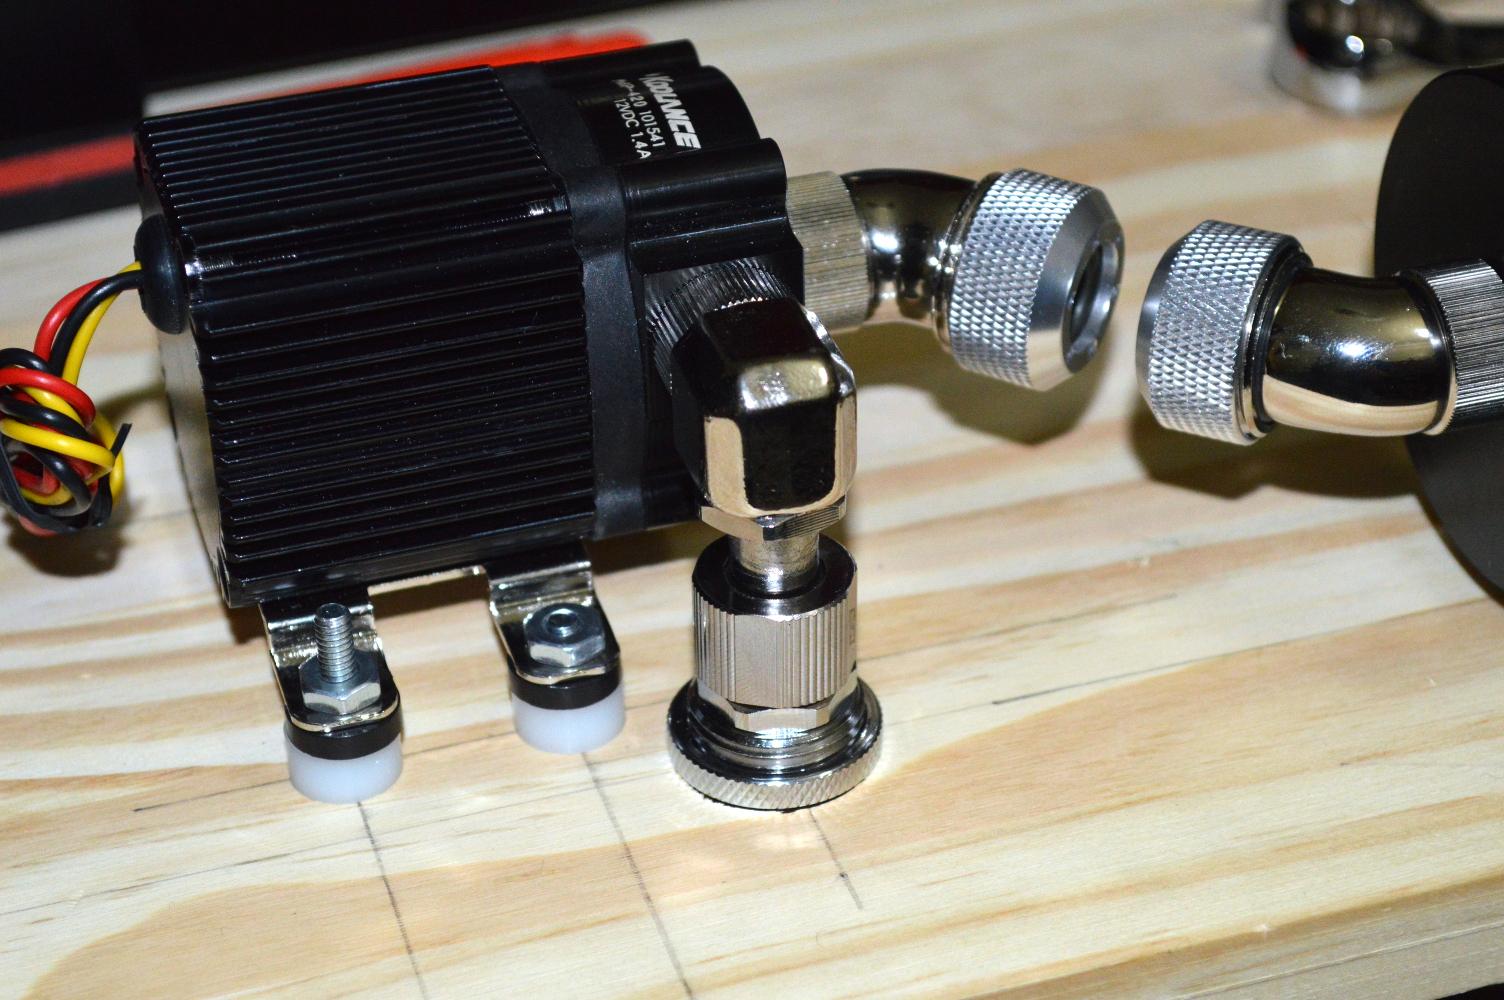
Revisiting the pump
The noise level on the pump was not promising. The initial testing with the pump doing a 2-gallon push flush on the new radiator showed the noise to be concerning. I’m not sure if it was noise from air — wherein if I had it mounted in some fashion and let all air bleed the noise would’ve died away — or just the noise to expect from the pump.
I preemptively purchased a DDC pump from my local Micro Center — specifically the Swiftech MCP35X. They also had the MCP355, but I chose the MCP35X to hopefully retain fitting options. We’ll see if I will need it. I won’t know until I have at least the radiators mounted so I can do an isolated leak test on just those.
Swapping the pump isn’t out of the question — though it’ll be interesting given the cabinet is already prepared for the PMP-420. So if I can adapt for the noise, that’ll be great. Perhaps it’ll run quiet when the pump is mounted to the cabinet on vibration isolation with it pushing fluid for a while.
The power supply I was considering, however, will work just fine. It’s just a matter now of where to mount it.
Mounting and joining the radiators
You know the old saying of “measure twice, cut once”. Well sometimes it doesn’t keep you getting something wrong. In my case it was the holes in the table top for holding the radiator.
So after leaving the cabinet clamped and upside down all night, I took off the clamps…. and it promptly fell apart. Just kidding… I re-measured for the holes on the top and drilled and counter-sunk new holes. Then I mounted the bottom radiator and the top brackets.
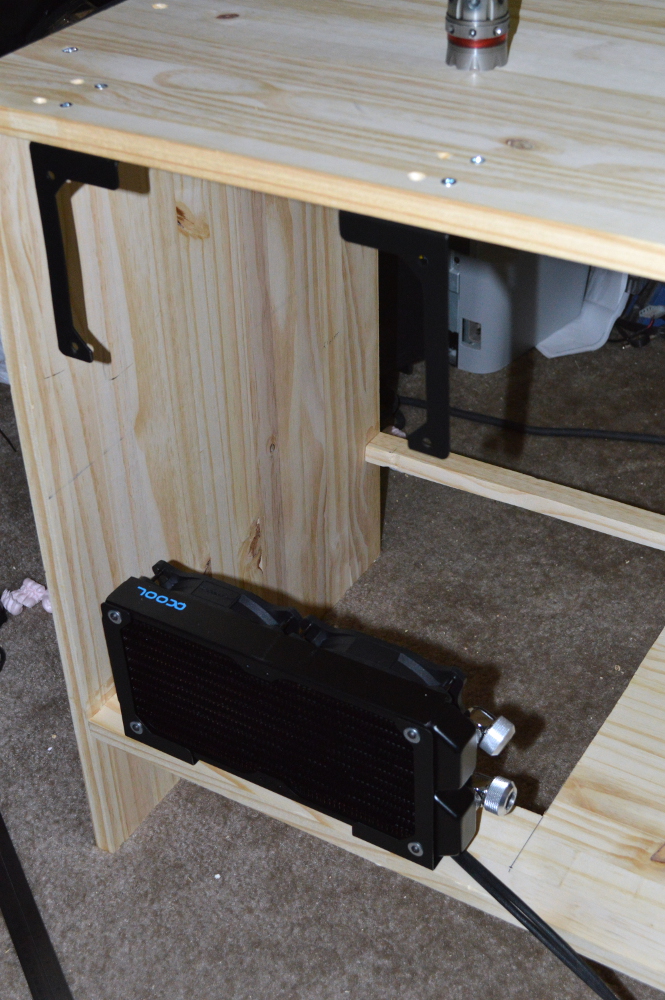
One of the radiators would be hanging from the cabinet top directly above and — hopefully — directly lined up with the one mounted to the floor. The one in the middle would require a little ingenuity in the form of 1/8″ aluminum from Home Depot and a jigsaw. To figure out where to hang it, I needed to do a little math. Feel free to check this if you think it’s wrong. I based these numbers off the diagrams for the XS-PC bracket and AlphaCool radiator.
The AlphaCool radiator is 124mm wide, with a 9.5mm distance between the center of the fan screw and the edge. Hanging on the bracket gives a total radiator height of about 132mm for the top and bottom radiators, 264mm between. The third radiator is out in the open for another 124mm. This gives a total radiator width of 388mm. The gap between the top and bottom boards on the cabinet is 450mm.
This leaves a total space of 62mm around the middle radiator, or 31mm between the radiators. Adding 19mm to this means it will be 50mm between the screws. This is just shy of 2″. The widest piece of aluminum that Home Depot sells in any store near me is 2″.
But all is not lost. I ordered a couple pieces of 3″ wide 6061 aluminum from Grainger (item no. 2EYU9) for pickup… the day before we leave for delivery. In the mean time I can use the 2″x36″ aluminum I did buy to make a temporary solution for holding the radiator.
I cut a 2-1/2″ long piece of aluminum and drilled four 1/8″ holes that formed a rectangle about 2″ long and 15mm wide. Two of these should be enough to hold the center radiator and allow me to finish the loop.
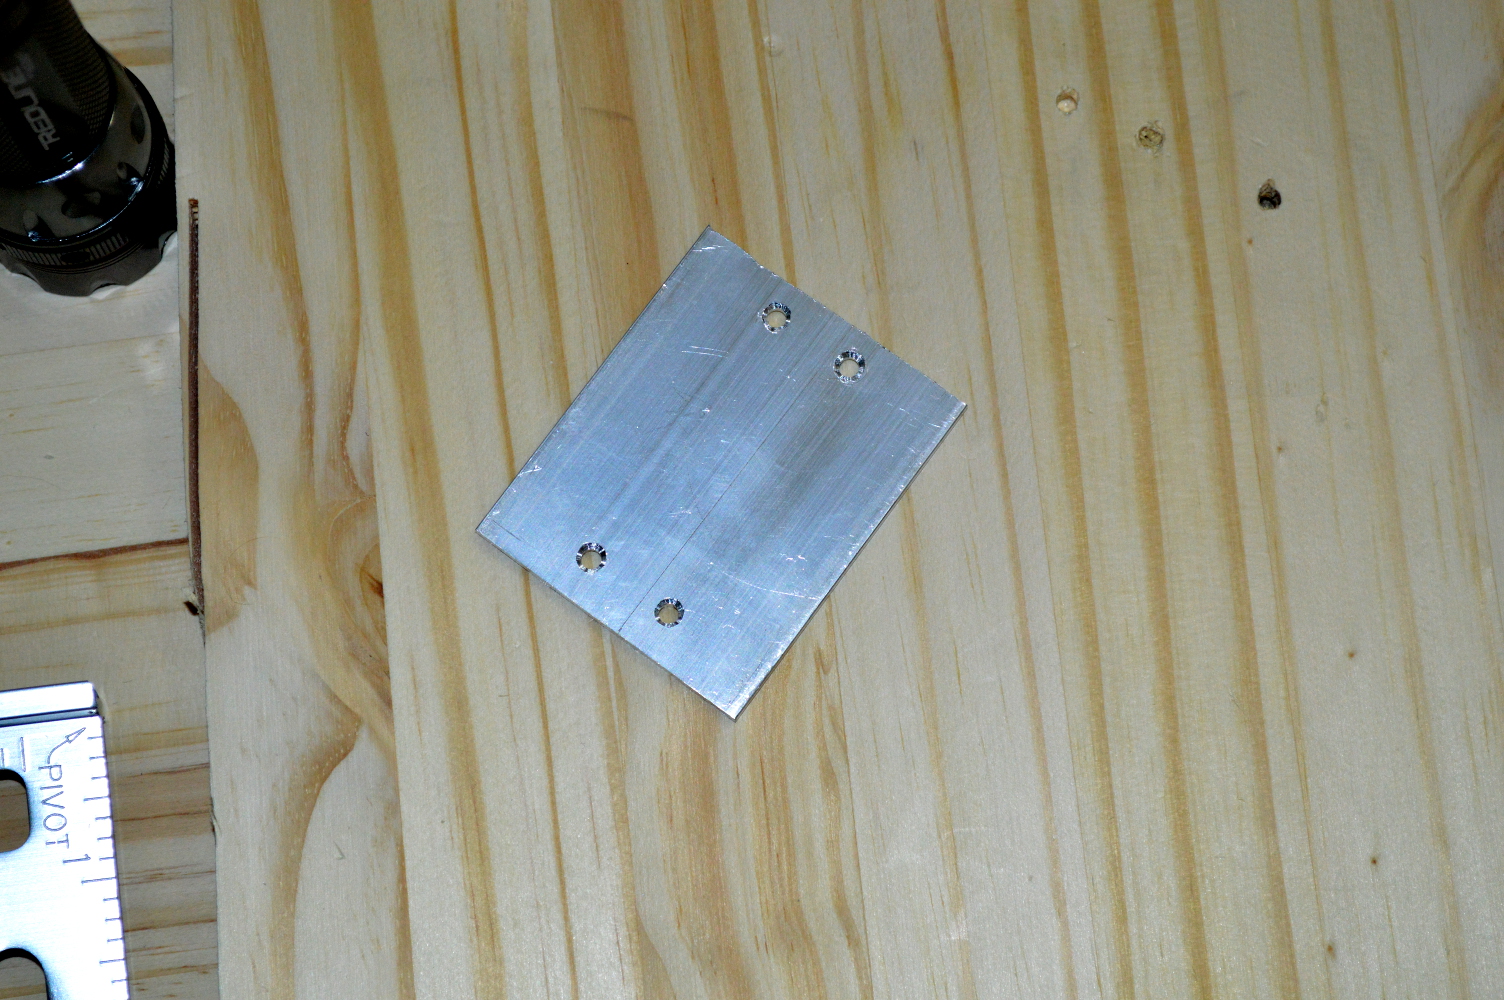
My jigsaw is actually the MATRIX Jigsaw attachment from Black and Decker for the 20V MATRIX cordless drill. The blades are I used are Bosch T121AF3 jigsaw blades. This combination could make it through the 1/8″ aluminum. For drilling the holes, I used a 1/8″ cobalt drill bit. Make sure to keep your vacuum handy for the aluminum shards.
I wanted to get as far as I could before I had no choice but to take down Beta Orionis to get the other two radiators from that system. I mentioned in the first segment of the build log that the chassis for this build will be the Corsair 750D that I used for β Ori. I think what I failed to mention was that the other two double-120mm radiators, along with some of the fittings, would also be coming out of that build.
But first, I started laying some pipe in the cabinet. And the first run was mildly nerve-wracking since it, again, would tell me if I was spot-on with my measurements and mathematics. The first tubing ran from the cabinet’s inlet to the bottom radiator. It’s a straight run, straight line to the radiator from the bulkhead fitting. Or that’s how I measured it.
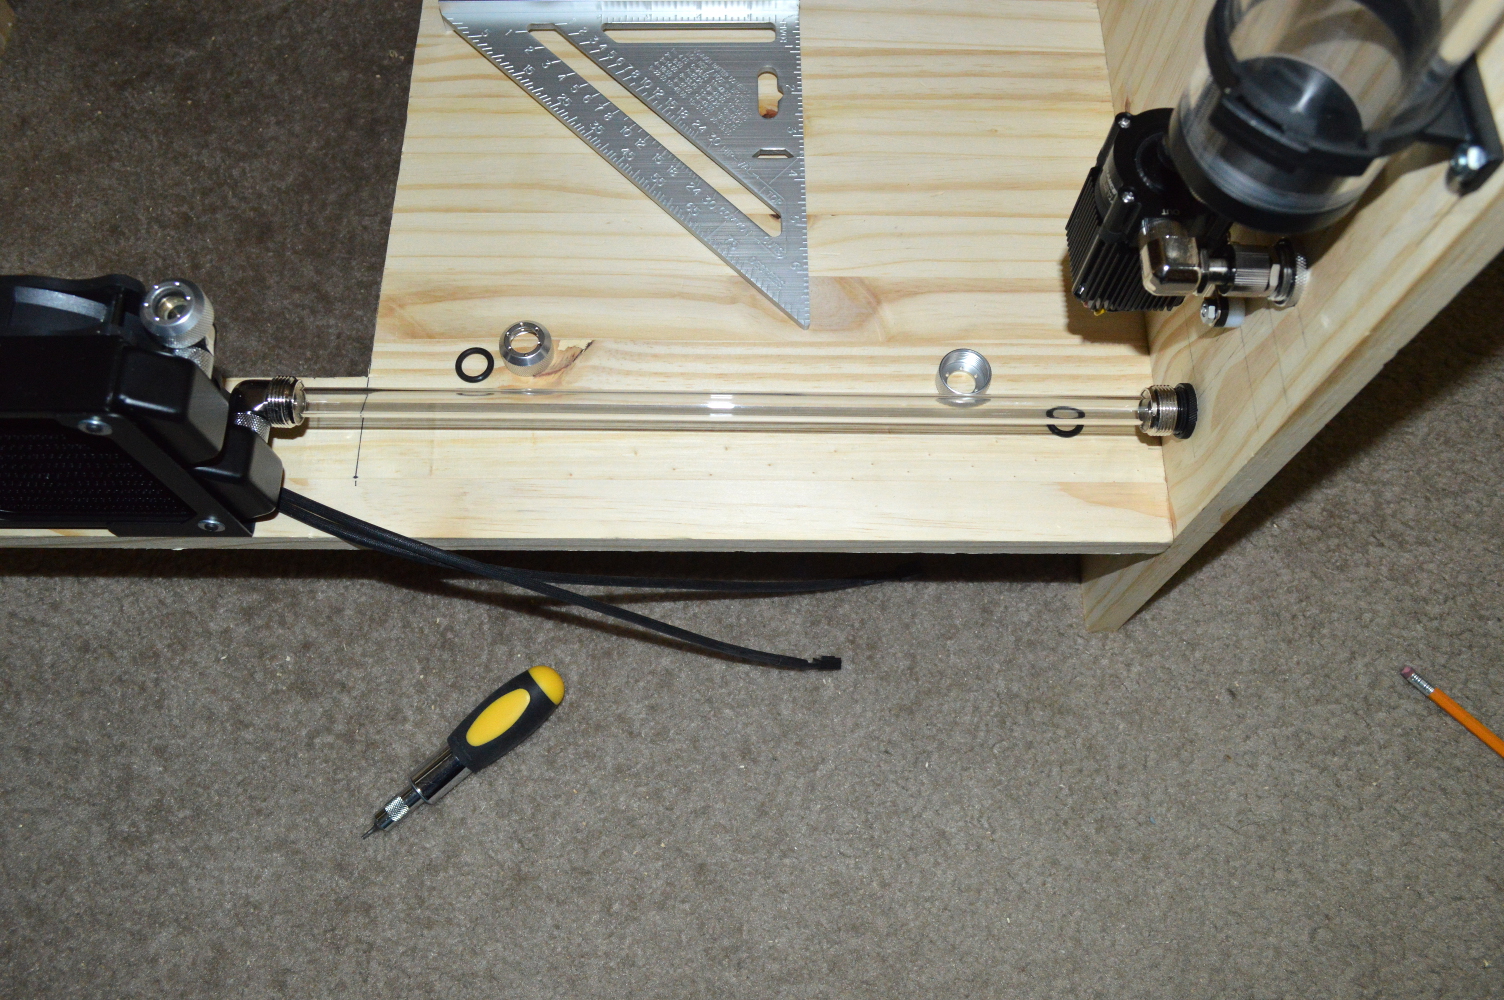
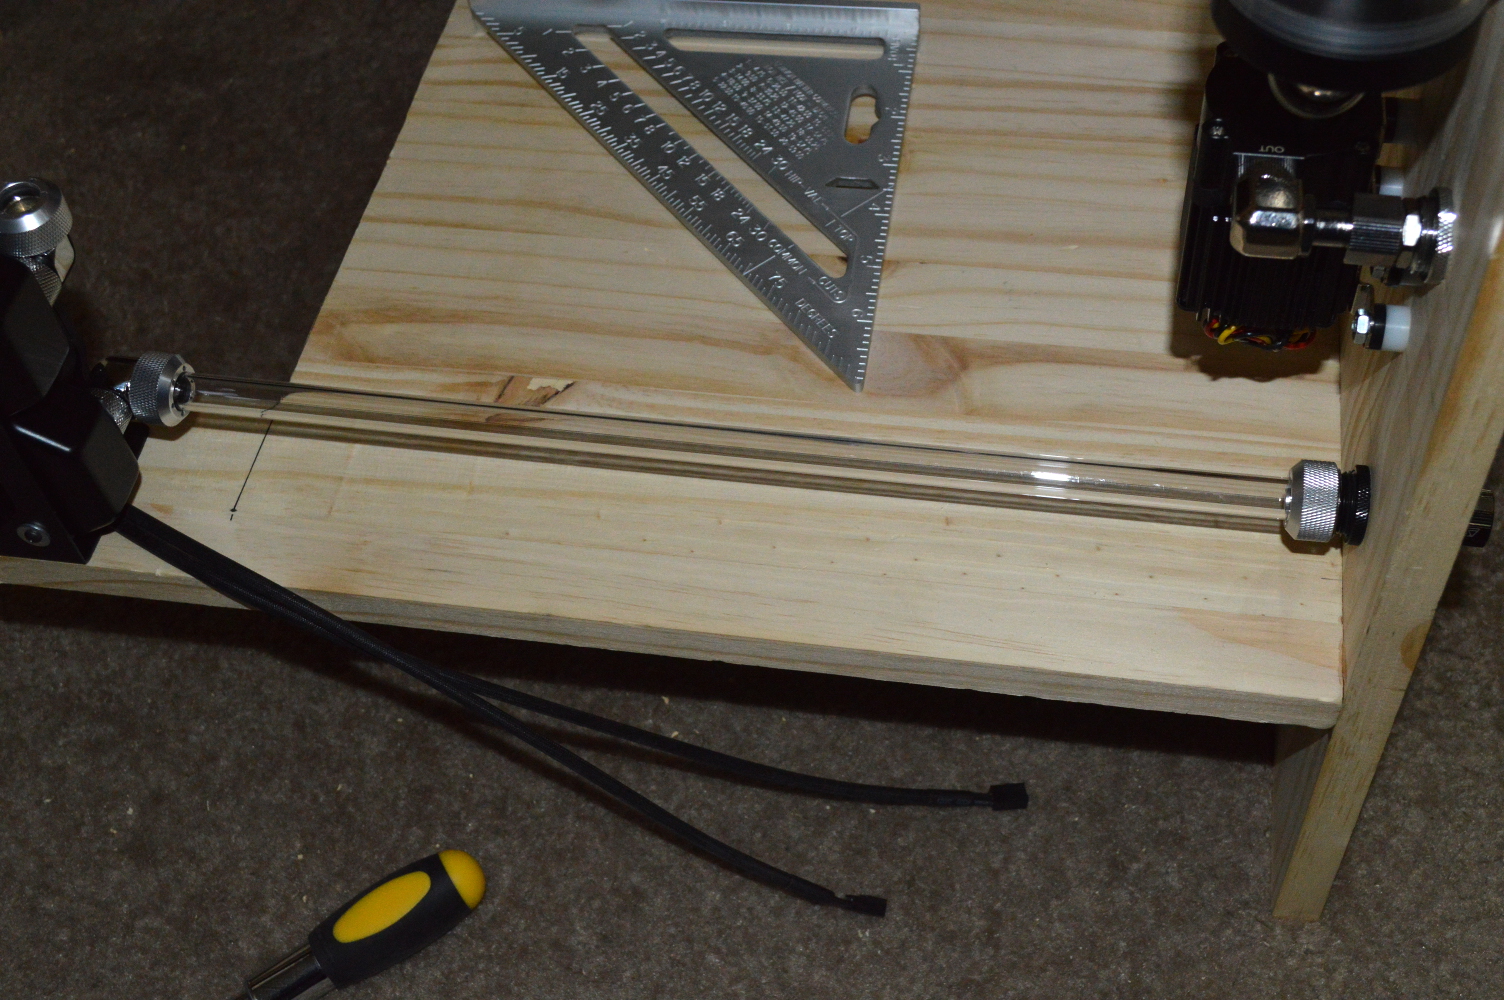
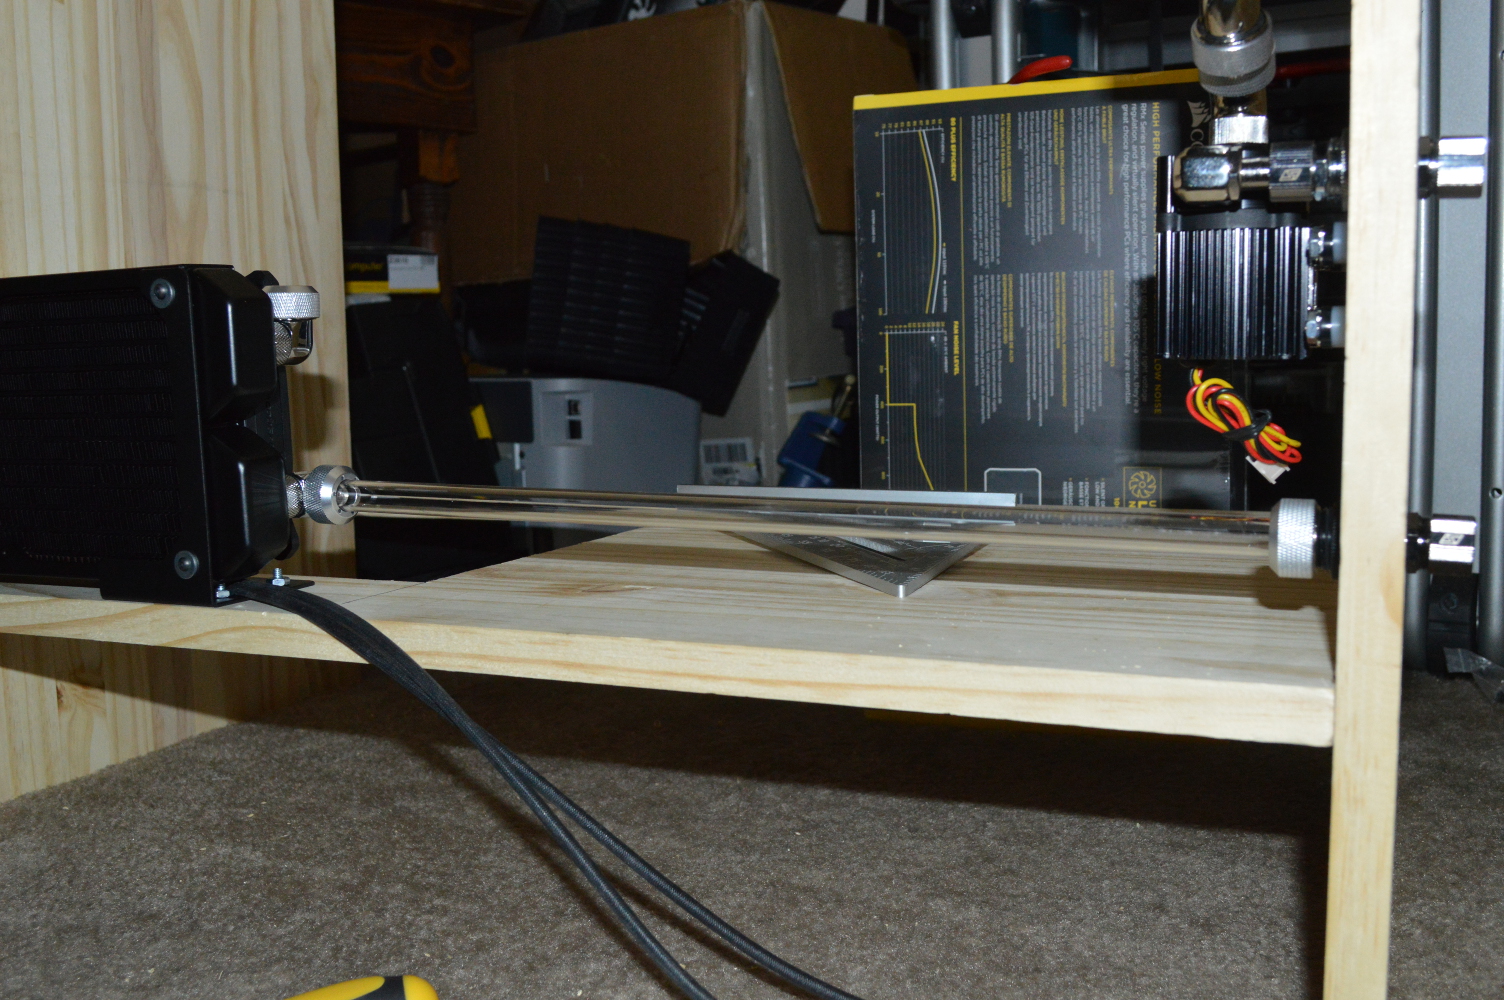
And that’s how it turned out. About 14-1/2″. I love it when things come together like this. This also tells me that the line going from the top radiator back to the reservoir should work as I expect. The next piece of pipe was from the reservoir to the pump. Straight line again, but this one much shorter.
By the way, one little trick about cutting PETG: use the same kind of cutters you would for soft tubing. You’ll get a very clean cut.
With this piece in place, it was time.