- Water cooling build in my wife’s computer – Introduction
- Water cooling build in my wife’s computer – Part I
- Water cooling build in my wife’s computer – Part II
- Water cooling build in my wife’s computer – Part III
- Water cooling build in my wife’s computer – Part IV
- Water cooling build in my wife’s computer – Part V
- Water cooling build in my wife’s computer – Part VI
- Water cooling build in my wife’s computer – Part VII
- Water cooling build in my wife’s computer – Part VIII
- Water cooling build in my wife’s computer – Part IX
- Follow-up on AquaTuning
- Defending AlphaCool and the risks of water cooling
- Kyle’s catastrophic failure
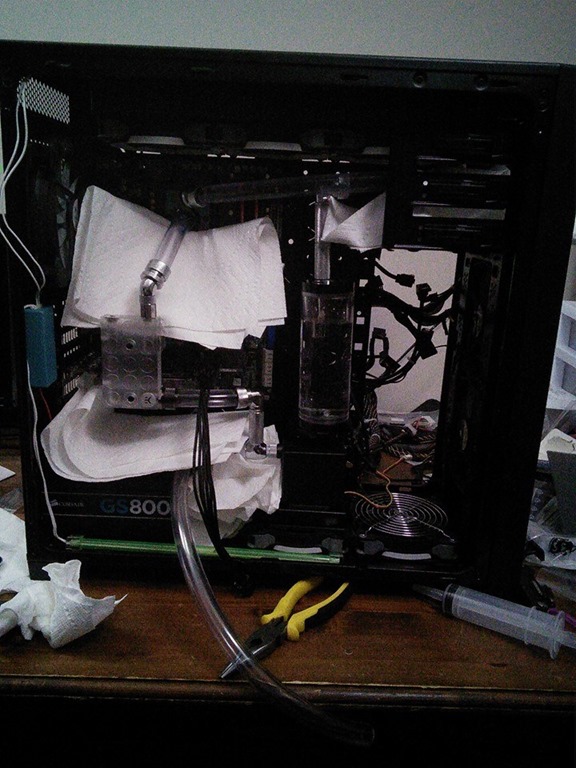
I used the time between the order and the time I picked up the overnight shipment at my local FedEx Office to make sure I had everything I needed. One thing I made sure to pick up was a pair of 8″ needle-nose pliers. What for? To double check all the little rotary fittings around what was left of the loop and ensure everything was going to be nice and tight. Now you can’t go too tight on those, but you can definitely give it a couple more turns, helping to make sure everything is snug and won’t leak.
The overnight order had the EK SLI bridge and three 40mm Bitspower extension fittings. As soon as I got it home, I went right to work on the loop, starting with the SLI bridge. Once the SLI bridge was put together and the graphics cards installed back into the system, I put a single compression fitting on the intake of the SLI bridge and set to tube it up to the pump.
That’s where one of the 40mm extension fittings comes in.
I changed the section of the loop coming from the pump with regard to the T-fitting. Coming straight out of the pump went to the Bitspower valve, while the 90-degree turn went up through the 40mm fitting and into a 90-degree single rotary. The 90-degree rotary tubed into the single compression fitting on the SLI bridge. I measured that to within a couple millimeters and it came out pretty spot on.
The other two 40mm extension fittings linked up to another 90-degree single rotary that was fed from the outlet on the radiator. It dropped down into the reservoir so the reservoir is part of the loop as I had always intended.
Once everything was tubed up and all the fittings double, triple and quadruple checked, it was time for another leak test.
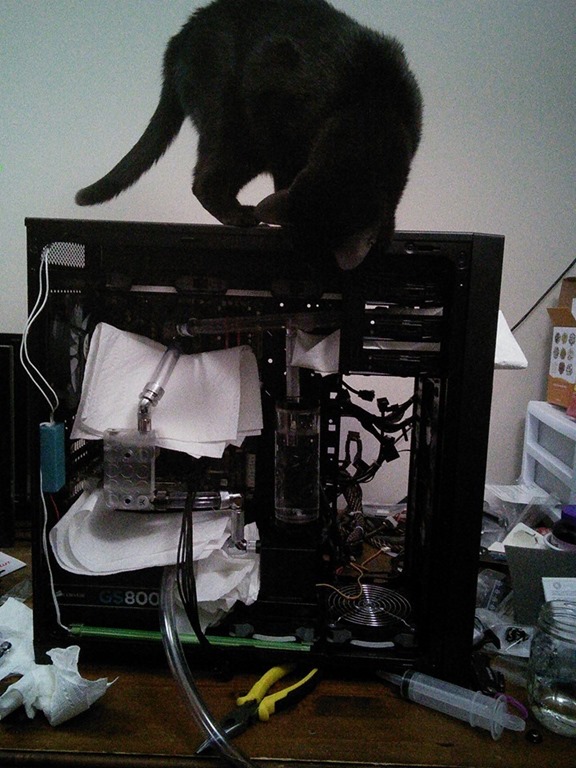
And I think I should mention that my cat was certainly interested in what was going on, once he started hearing the water flowing through the loop and remaining so.
Yes, this leak test went smoothly, thankfully. And to ensure it remained such, I left the loop running for several hours before draining it and filling it back up and continuing the leak test – recall from Part 3 that I said that not only should have a drain in your loop – something continually asserted by Singularity Computers – but it should be tested as well. That’s why I did the leak testing with plain distilled water. For the duration of the leak test, the distilled water was not going to be in contact with the components anywhere near long enough to cause harm, and at under $1 per gallon for the water versus $12 for a 150mL concentrate for the coolant, doing a leak and drain test with the water just made sense.
But as the leak tests were occurring late into the night, I would have to save the coolant for the next day.
And getting home from work that Wednesday night, knowing what I would be finishing up when I got home – it made for an interesting day. I was eager to get underway and get this finished up.
As the loop had been sitting all night very nearly completely empty, my first task was to flush it again with new distilled water and drain it. While the loop was running with the fresh distilled water, I took the chance to finish out any wiring that needed it such that when the loop was filled, all I needed to do was plug the pump into the power supply for the computer and let it go.
For the coolant, I poured about half the bottle into a pint mason jar and splash mixed it with distilled water. Using a syringe, I filled the reservoir with the coolant, and did the same routine as before with the distilled water. Only this time it was definitely for real. For the next round, I used the last of the coolant and more distilled water. I didn’t really mix everything all that well because I knew the concentration would equalize within the loop as the coolant flowed through.
And after everything was filled and as much of the air out as I could manage and maneuver on my own, I disconnected the pump from the external power supply and connected it to the power supply inside the case. The moment of truth. I closed up the back of the case and plugged up everything external the way it needed.
Several days of work culminating in one press of the button on her Corsair 750D case. It gave me a sense of awe and an enormous sense of relief at the same time watching everything come to life.
After letting it just sit running idle for about an hour, I put it through a couple stress tests for initial benchmarking.
Running Prime95 small FFT, the CPU struggled to make 52C, which is an improvement over the ThermalTake. Running the Valley Benchmark on the GTX 660 SLI pair, the temperature never went above 50C and stayed around 45C on both cards for much of the test, maybe topping out at 46C or 47C. So those were significant improvements in temperatures over the stock cooler – and that is what I was after.
One thing to note, with the SLI serial bridge I used, there was a stubborn bubble under the plug that just did not want to go away and took several days to finally disappear. The same with a bubble in the fitting coming out of the CPU.
But because the loop has only been running for a couple weeks, and I have two graphics cards plus the CPU all on a single 360mm radiator, currently we’re not doing any overclocking. All of that will come later when I get a 240mm radiator to put in the floor of her case, which will require some extra fittings and a slight redesign of the loop, but that will come several months down the road, probably about the time I look at replicating my success in my own computer, hopefully minus the monumental failure I talked about in the previous part.
The computer has been running steadily since that initial press of the power button. All the air is out of the loop – no bubbles at all in any of the tubing – and the system appears stable. My wife has been able to run her games on it without issue and everything is staying nice and cool.
So that concludes this retrospective on my attempt at a custom water loop, so I’ll leave you with some pictures of the build. Enjoy!


* * * * *
Since many often ask those who’ve built water cooling loops what parts and fittings were used, here’s a complete parts list:
| Components: | Loop components:
Fans:
Note: Corsair Obsidian 750D comes with 3x140mm fans Tubing: Watts 1/2″ x 3/4″ PVC tubing Accessory: Bitspower X-Station I (green) |
| Fittings: | Note: All fittings to connect tubing are for 1/2″x3/4″From pump:
Drain from 3-way:
Graphics cards from 3-way:
Graphics cards to CPU:
CPU to radiator:
Radiator to reservoir:
|
You must be logged in to post a comment.