- Water cooling build in my wife’s computer – Introduction
- Water cooling build in my wife’s computer – Part I
- Water cooling build in my wife’s computer – Part II
- Water cooling build in my wife’s computer – Part III
- Water cooling build in my wife’s computer – Part IV
- Water cooling build in my wife’s computer – Part V
- Water cooling build in my wife’s computer – Part VI
- Water cooling build in my wife’s computer – Part VII
- Water cooling build in my wife’s computer – Part VIII
- Water cooling build in my wife’s computer – Part IX
- Follow-up on AquaTuning
- Defending AlphaCool and the risks of water cooling
- Kyle’s catastrophic failure
Before constructing a loop, it’s typically recommended to rinse out all of the components you will be using – the water blocks, radiators, pump and reservoir – with distilled water. While it’s good to rinse out everything, it’s only necessary to rinse out the radiators. And if you Google around, you’ll find a lot of interesting ways to go about doing that – dilute acid mixtures, the “shake and drain” method, and so on.
But one of the more interesting methods of preparing the radiator came from a video I saw on YouTube:
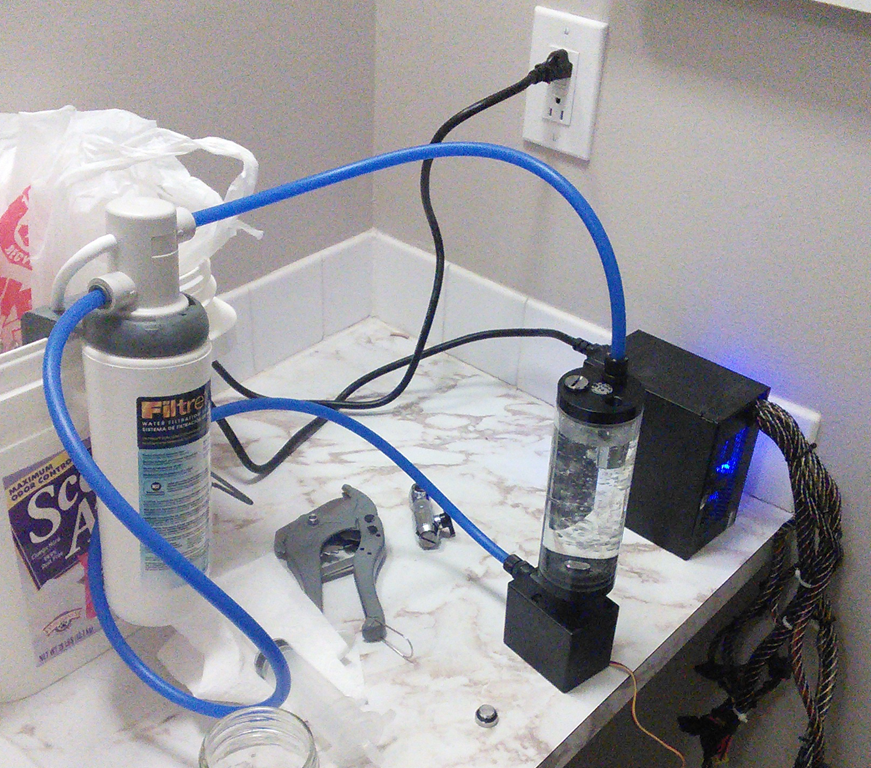
So that got me thinking. I didn’t need something as large as what he used, which is a whole-house water filter. So I looked at under-sink water filters instead. We’re still talking a decent expense, but with the right fittings, I could use the pump and reservoir to set up a makeshift loop to get distilled water flowing through the radiator and flushing it out.
Water filter: 3M Filtrete 3US-AS01
The tubing that comes with the water filter is 1/4″ ID, 3/8″ OD. Talk about some thin tubing. And it’s also very rigid, so finding some more flexible tubing might be worth your while. But Bitspower makes fittings that will work with this tubing, and I managed to find a couple at my local Microcenter – actually they had only two in stock when I bought them, so I got lucky on that mark.
Before flushing the radiator, the filter still needs to be primed. And you need to prime it with distilled water, not tap water. So I built a small loop to run from the pump to the filter back to the reservoir, which fed directly to the pump. I let this run for about 15 minutes.
Then came the loop to flush the radiator. In building the loop, I used a length of 1/2″x3/4″ tubing to run from the pump to the radiator. The fitting that in the previous loop ran from the pump to the filter now feeds out of the radiator. The purpose of this, as the above video shows, is to filter out the crap and gunk in the radiator that results from the manufacturing. And it’s a much easier – okay, lazier – way of getting that gunk out.
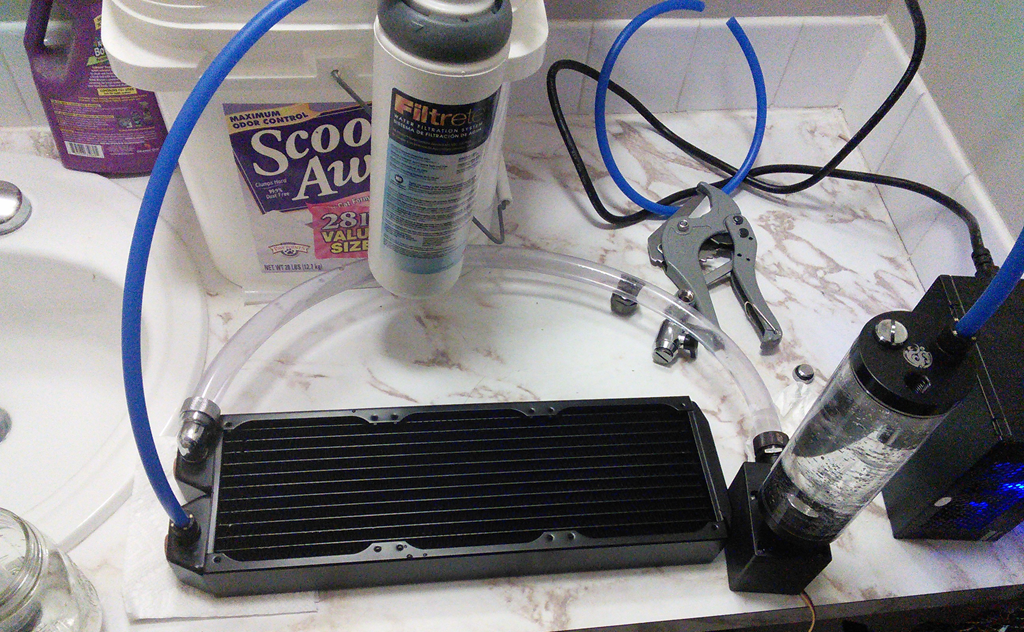
I let this loop run for actually several hours while I tore apart my wife’s machine to get the mainboard out and prepare her CPU for the new water block. Now because of how little resistance the loop provides, there was a lot of cavitation in the reservoir, meaning there was no way to get all the air out of the loop. Had I used a small bucket as the “reservoir”, there probably wouldn’t have been nearly as much cavitation and air churning in the reservoir, so I later put a small towel under the pump so it wasn’t making nearly as much noise.
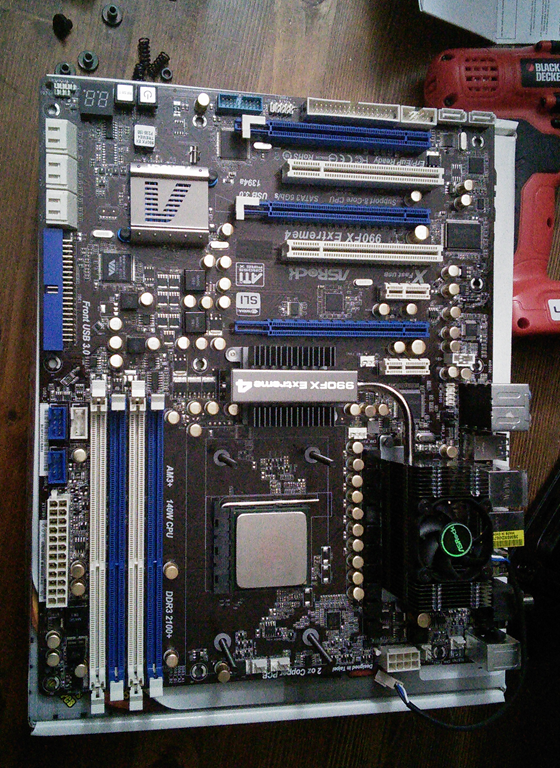
As I said, I let this loop run while I tore apart the computer and got the mainboard and graphics cards out of the machine and turned my attention to mounting the water block to the CPU.
Recall from the introduction that her CPU cooler was previously the ThermalTake Water 2.0 Performer. The ThermalTake CPU coolers have a bracket for under the mainboard, and that bracket has an adhesive foam on it that sticks to the mainboard. Needless to say, that was a pain to try to remove, as it required going slow and steady to separate the bracket from the mainboard. And I didn’t exactly get it all off there, but I’m not concerned as it’s not exactly in view. I actually debated on just cutting the bloody thing instead of messing with the adhesive foam.
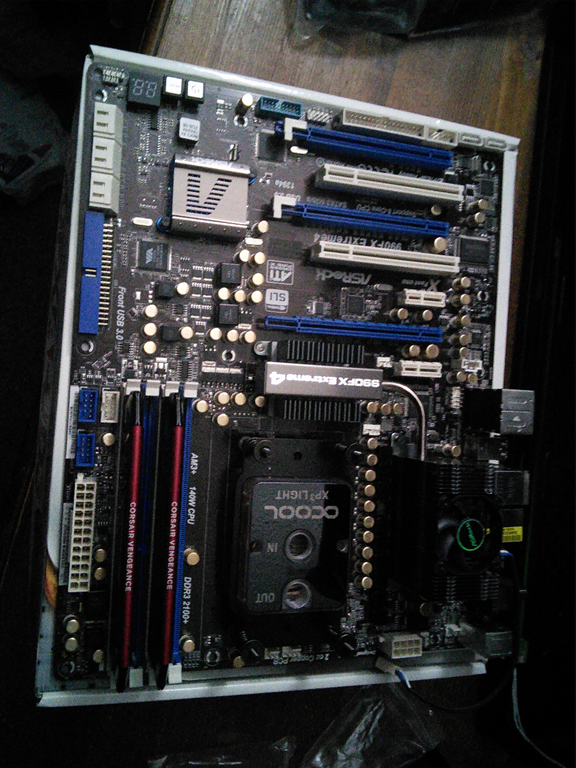
Once the bracket was off, I got the mounting screws through the holes on the mainboard.
And mounted the CPU cooler to the CPU. For the thermal compound, I didn’t use what came with the CPU block. My go-to thermal compound has been Innovation Cooling‘s IC Diamond compound. It’s worked quite well for me in the past and I see no reason to think it won’t work well here.
And that’s where I’ll leave this iteration. In the next part, I’ll discuss the start of building out the loop, mounting the radiator and figuring out what fittings to use.
You must be logged in to post a comment.