A NAS to readily serve up media content combined with the Plex Media Server or other DLNA platform provides a powerful entertainment setup for the home when combined with a media player. Some smart televisions have DLNA players built in, but alternatives exist if you don’t have one.
And the Raspberry Pi is a very cost-effective option, with plenty of software options available out there. I’ve used OpenELEC in the past. But it has limitations in my current media setup.
My home setup is a FreeNAS server (“Nasira“) combined with a VMware virtual machine running the Plex Media Server. The FreeNAS Plex plugin kept giving me problems, so I just set up a separate Plex VM and haven’t looked back. Everything is on a 10GbE network as well.
Some movies are in multiple parts I never joined together — e.g. Lord of the Rings Extended editions — and the DLNA service with Plex does not show them as one entry through a client such as Kodi. Plus I have playlists on my Plex server for movie series — e.g. Lord of the Rings, Resident Evil, Harry Potter, etc. — and playlists aren’t propagated through DLNA.
So for this setup, the Plex Media Player is pretty much needed. I tried the Plex app for the Playstation 3 but found it to be very sluggish. I don’t have a Playstation 4, yet. The interface and controls were much more responsive on a Raspberry Pi 2 with the slight 1GHz overclock (a little sluggish on the stock clock). So for this project, I opted for the Raspberry Pi 3 so I could use my Raspberry Pi 2 for a Kodi touchscreen project — more on that in another article.
Enclosure
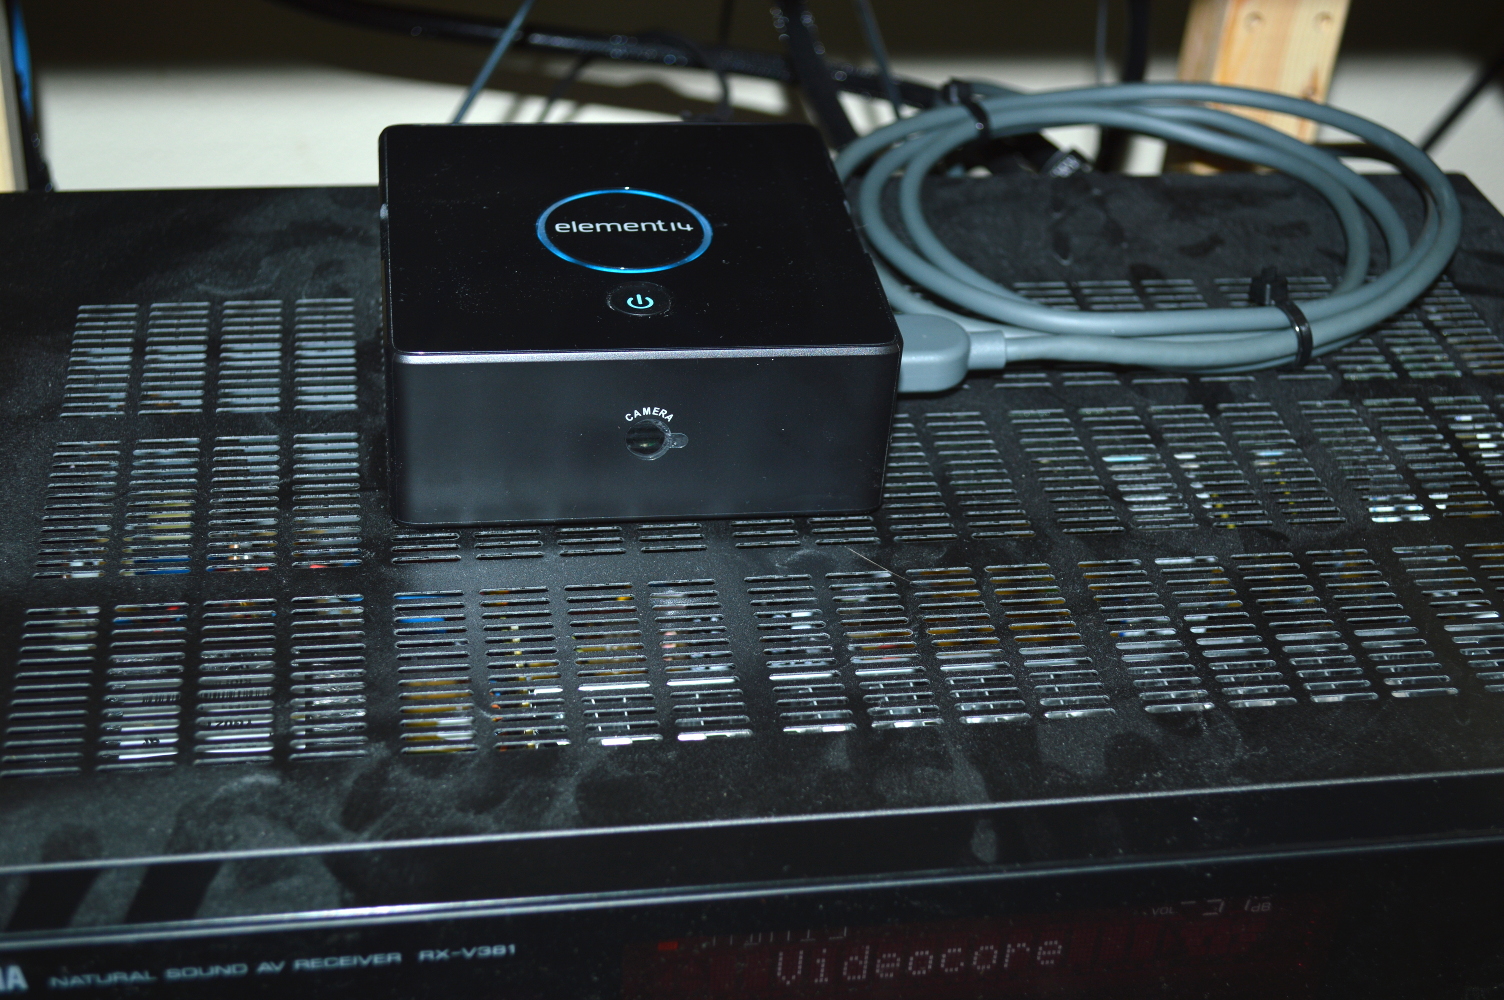
Recently the Pi Desktop was introduced as a means of turning a Raspberry Pi into a small form-factor desktop. And it appeared to be the perfect setup for making a set-top box from the Pi as well. And at 50 USD, with everything it comes with, I decided to purchase one.
It is certainly a hell of a lot easier than trying to build something custom, which I initially considered.
Now there are some issues with the design as pointed out in the comments to that video, and I have some concerns with it as well. But given that this enclosure almost fits the bill of what I want while being only 50 USD, it was still less expensive than trying to build something custom while meeting all my requirements.
Plex Media Player
You will need to create the microSD card and get it working with your Plex setup before installing the Raspberry Pi into the Pi Desktop case, so you can get everything set up while you still have easy access to the card.
As part of installing it, you’ll want to set the timezone on your system. You’ll need to SSH into it remotely — default hostname is “plexmediaplayer”, default login is root/plex. Once at the command line, you’ll want to run this command:
echo "ln -sf /usr/share/zoneinfo/[timezone] /var/run/localtime" >> /storage/.config/autostart.shwhere [timezone] is your timezone – e.g., “America/Chicago” for United States Central Time. The timezone names follow the naming conventions in the tz timezone database.
Once you have it assembled, it’s just a matter of connecting it to your television or A/V receiver. You will also need a 2.5A power adapter as the enclosure doesn’t come with one. I guess element14 presumed you’d be buying one along with the Pi.
You have a few options to control the player as well. I use a wireless keyboard and mouse. Plex mentions the Flirc USB as an option if you have a Harmony Remote or the Harmony Hub. As I have a Harmony Hub, I may switch over to using that.
Mini review – Pi Desktop
I’m glad the Pi Desktop exists as an option, despite its flaws. The add-on board included with it provides an easy way to power on and off the system without having to go for the power cord each time, or buy a power adapter with a switch. Which is a good option to have even if you plan to leave the Pi powered on all the time — given it’s insignificant power consumption, I don’t see any reason to not. While that add-on board also includes an mSATA slot, I’m not currently using it since there largely isn’t much point for this project.
I mentioned above that I do have concerns with this.
First is the lack of airflow. I would’ve preferred seeing this with an included 40mm fan, or a place to mount one, with a 3-pin or 2-pin fan header on the add-in board. Noctua makes a 40mm 5V quiet case fan that could be used to add some airflow into this to cool the Pi and SSD, provided you use the latter. While a heatsink on the Pi’s ARM core may suffice for this use case (I noted the Pi’s core reaching 60C while playing a movie), the added airflow would be beneficial for those using this chassis and a Pi as a desktop computer.
I would have also preferred seeing the board use a barrel connector for power instead of the microUSB connector, as they tend to be a little bulkier compared to microUSB. But given the proliferation of USB power adapters for the Raspberry Pi, I understand why they kept with that. With the exposed GPIO pins on the top of the add-in board, creating such a connector and drilling the needed hole in the case wouldn’t be difficult.
Same with adding a means of powering a 40mm 5V case fan. Which I’ll probably look into later.
For creating a small set-top box for the Plex Media Player, Kodi variant (e.g. OpenELEC), or even RetroPie, this is a very good, compact option. It has about the same footprint as a Roku Premiere box but taller. I hope we’ll see similar enclosures hit the market that don’t have the mSATA slot, but still have an expansion board that provides a power button and a better power connector.
The mSATA slot, though, is easily the biggest source of complaint for this, and the most useless and costly feature in the kit.
Mainly because you won’t see the SSD’s performance since it’ll be limited to USB 2.0 (~480Mbps). And USB drives are much less expensive than mSATA SSDs at similar capacities. At my local Micro Center, for example, a 64GB USB 2.0 drive is around 15 USD as of when I write this. A 64GB mSATA SSD is available on Amazon for 40 USD. And since you’re limited to USB 2.0 speeds, there’s virtually no point buying the SSD.
With one minor exception. SSDs are designed to be used as primary storage. Most USB flash drives are not. But there’s still a more cost-effective, resilient option: an external HDD.
It’s also more cost effective at larger capacities, whether you buy one pre-made like the WD Book, or buy an enclosure and an HDD of your choice. A 500GB HDD can be had for as little as 25 USD, and a 1TB HDD can be had for a little north of 40 USD. Laptop HDDs are more compact allowing for a smaller enclosure but cost a little more.
And if you use a Raspberry Pi 3, you can set it up to boot from that HDD instead of the microSD.
So while the mSATA slot allows for larger capacity internal storage with minimal power requirement, the USB 2.0 speed limitation and availability of more cost-effective USB 2.0 options makes it a questionable feature.
Final setup
I have the box set so the HDMI goes into my A/V receiver, and my Harmony Hub is configured to use only the receiver and television for the “Plex Media Player” activity. The box is on all the time and isn’t controlled by the Hub.
For the network connection I’m not using the Pi3’s built-in wireless, instead opting to have it wired into a switch. The Pi3 supports 802.11n, which provides for up to triple the bandwidth of the Pi3’s Fast Ethernet, and I have a wireless router (connected to be an access point) literally 6 feet above the box. But it was easier to just wire it in.
Plus 100Mbps is more than enough for the 1080p files I have on the server, even at full Blu-ray size (~20+GB). And if my calculations are correct, it should still be enough for 4K video files.
You must be logged in to post a comment.