- Radiator box for PC water cooling
- Mira
- Mira – II
- Mira – Finished
- Another pass by Mira
- Another pass by Mira – II
- Another pass by Mira – III
- Another pass by Mira – IV
- Another pass by Mira – V
- Some changes to the radiator box
- Back to AMD
- A more intelligent radiator box
- Upgrading the chassis
In looking at the article hits, I’m now leaning toward creating a couple project summary articles, basically TL;DR versions of the build logs I have.
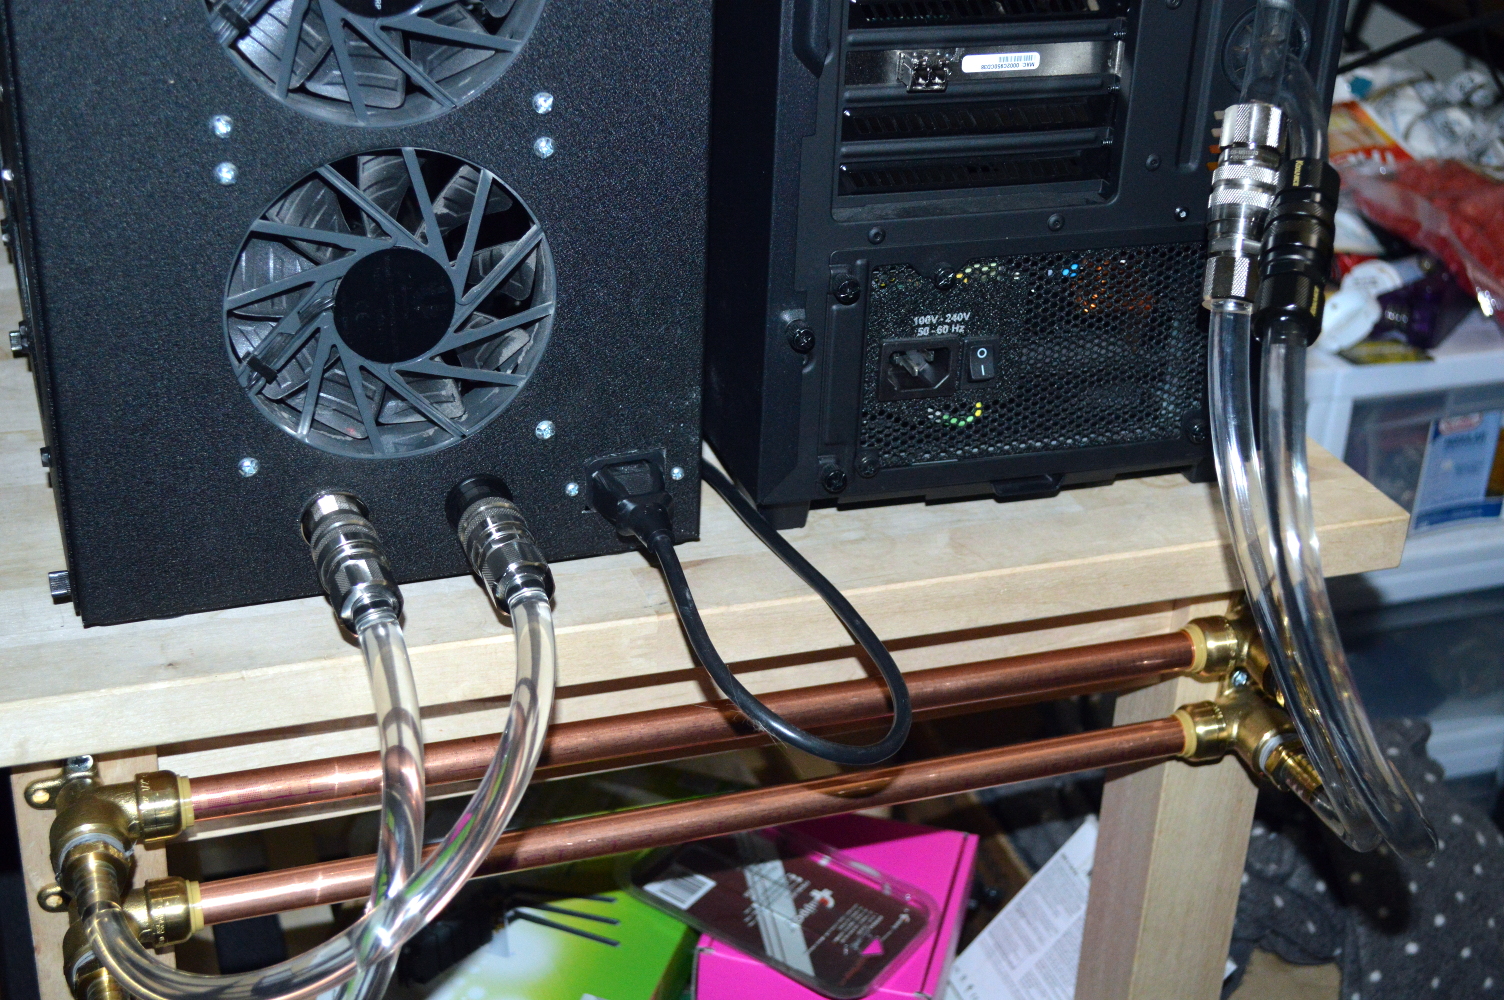
First though is a revisit of Mira and the radiator box system I have. Mainly I was concerned with creating a different method for hooking up the tubing at the same time I was replacing the tubing. I didn’t want long pieces of tubing snaking over to the radiator box, but something a little more… direct.
Recall that the inspiration for this project is AntVenom’s video regarding his basement water cooling project. In that project, he ran the coolant (just plain distilled water with copper sulfate) through two long copper pipes into his basement.
I live in an apartment, so I obviously can’t do what he did. But I can take the concepts and still apply them. First a parts layout (with Home Depot item numbers):
- 2 x ½” Type M copper pipe – 24″ (311316)
- 4 x SharkBite ½” push-to-connect to ½” FIP drop-ear elbows (300833)
- #10×1″ wood screws to secure elbow fittings
- 4 x ½” MIP to ⅜” barb (149408)
I want the external tubing out of the way of the power cables, primarily, since the previous setup had them crossing over both power cables.
So why not just use longer lengths of tubing? Where’s the fun in that? In all seriousness, this is a much more direct solution to the concern without having something else that needs to be tied away. Sure it would’ve been less expensive to use tubing and just have pipe hangers tying them down.
But it would’ve used a lot of tubing as well. As it stands, I went through about more than half a 10′ coil of PrimoChill Primoflex Advanced LRT with all the tubing in this setup. Including the tubing inside the radiator box and H440. Trying to use tubing for all of it, in place of the copper pipes andlong enough I could tie it out of the way, likely would’ve used all of a 10′ coil, if not more. And that tubing isn’t cheap — 27 USD for 10′ online, 32 USD at my local Micro Center.
Plus I kind of like showing what can be done with water cooling.
The screw mounts are one nice feature of drop-ear elbow fittings. On these fittings specifically, they’re large enough for a #10 wood or machine screw. No need for additional pipe mount brackets. Just two of those for each pipe, plus two barbs.
I could easily see this setup with longer pipes to relocate the radiator box away from the H440. Such as below it. Having the H440 sitting on top of my desk with the the radiator box sitting on a small table or apparatus below my desk. The only concern there would be whether the D5 Vario could handle that setup. And I doubt it. But stronger pumps exist: D5 Strong, and the PMP-420 or PMP-500 from Koolance.
But there’s still more to come!
In the latest iteration, I added a temperature probe to the return line on the top radiator. This probe is from an XS-PC temperature display combination, and is by coincidence in an XS-PC T-fitting I’ve had for a while. I don’t have it connected yet as I have no way of mounting it in the radiator box. Plus it runs on the 5V line on a standard 4-pin Molex, and the power brick only supplies 12V. So I need another voltage converter. And some means of connecting all of that up.
I’ll be having the plate to mount the display custom cut likely via Ponoko. I’ll have it cut for two displays, one for the return from the system and the other for the return from the radiator.
Overclocking the CPU
On the Sabertooth X99, I had the BIOS “auto-overclock” the CPU using the TPU feature. Specifically I set it to “TPU II”, which set the boost to 4.1GHz (originally 3.6GHz). For coolant in the system, I’m using distilled water treated with PrimoChill’s Liquid Utopia, which comes with the retail packaging of the PrimoChill Advanced LRT tubing.
Under load with another Handbrake encoding, the CPU topped out at 57°C on the hottest core, but typically held steady a few degrees lower. Running a combined Furmark with Handbrake, the CPU got up near 60°C during that test but didn’t touch it, while the GPU never went above 38°C.
- Unigine Valley (Extreme HD): 4326 [4239]
- Unigine Heaven (1080p, everything maxed): 2612 [2612]
- 3DMark Firestrike: 16936 [16461], Graphics: 20101 [20109]
- 3DMark Sky Diver: 40476 [38902], Graphics: 66493 [66747]
- 3DMark Cloud Gate: 36567 [33628], Graphics: 129069 [129349]
Original benchmarks in blue. The graphics scores on 3DMark were within margin of error over previous scores. The Heaven score is identical to previous, but that’s due to Heaven not being very CPU bound. I observed such when running it after upgrading to the X99 platform while retaining my GTX 770s. All other scores saw a boost.
I could probably overclock it beyond 4.1GHz. But that would also raise the temperatures, likely well into the 60sC. Which would push me to up the pump and fan speeds to compensate. Which would add noise to what I intend to be a quiet, yet high performing setup.
You must be logged in to post a comment.