- Radiator box for PC water cooling
- Mira
- Mira – II
- Mira – Finished
- Another pass by Mira
- Another pass by Mira – II
- Another pass by Mira – III
- Another pass by Mira – IV
- Another pass by Mira – V
- Some changes to the radiator box
- Back to AMD
- A more intelligent radiator box
- Upgrading the chassis
I’ve demonstrated in two projects how you can build an external water cooling solution, first with a cabinet with mounted radiators, and second with radiator panels. Time to show something a bit simpler.
Mountain Mods is a custom case and modding company based in Eugene, Oregon. I’ve gone to them before for some of their custom parts. They have a wide variety of custom chassis as well, which can be customized in multiple ways. And if you buy a custom chassis and decide to change something about it later, you can buy the panels individually to change it up however you want.
They also offer two products called “water barrels“: the Water Barrel 18, and Water Barrel 24. They are built to hold a massive amount of radiator capacity. The former is built for up to eight (8) triple-120mm radiators (24x120mm of radiator capacity), while the latter is built for up to seven (7) quad-120mm radiators (28x120mm of radiator capacity). Currently they don’t make one for 140mm radiators, likely due to inconsistencies in fan spacing on some models.
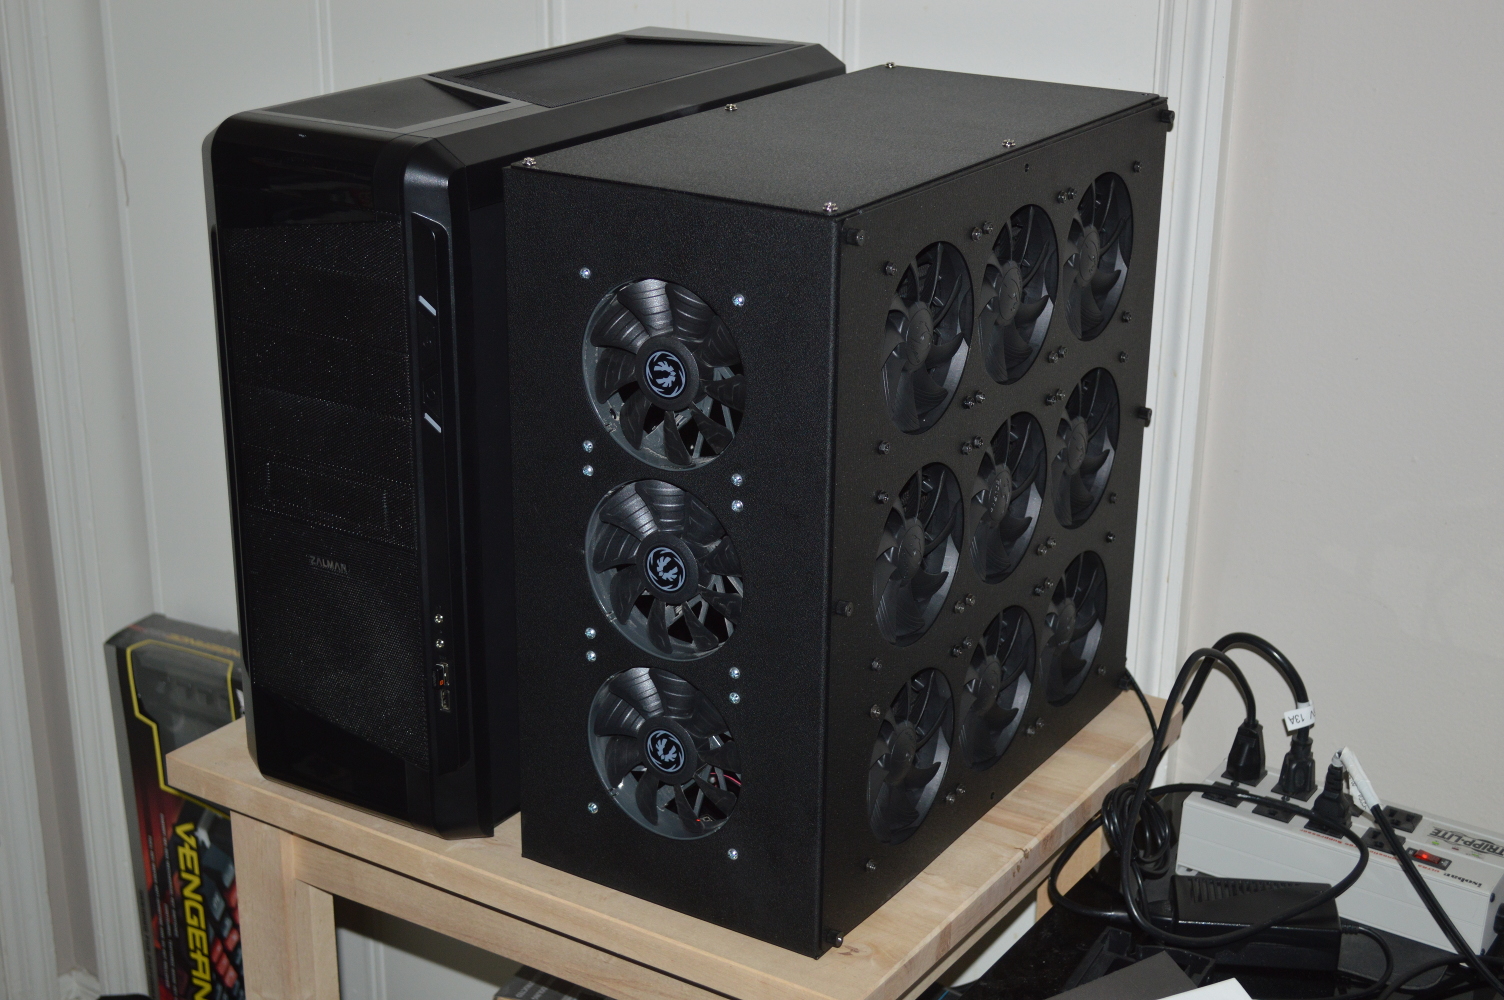
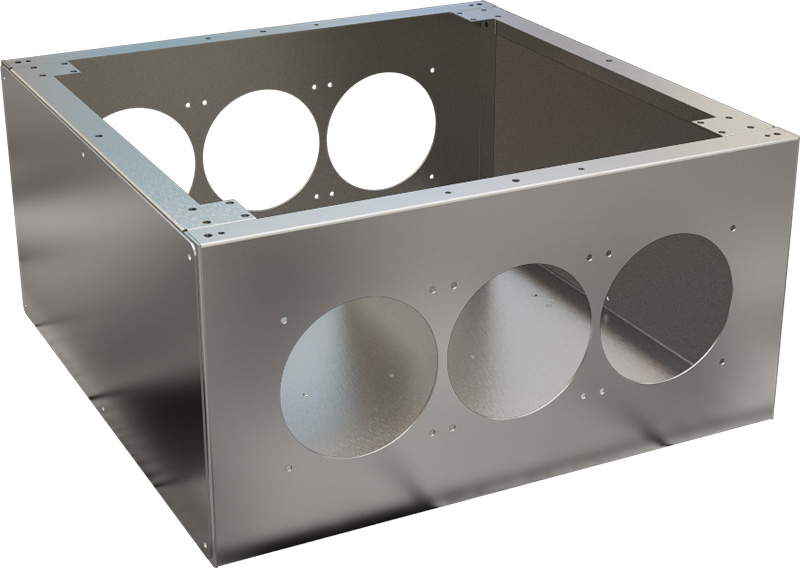
They also sell pedestals. They are 18″ wide and either 18″ or 24″ long, and 9″ tall. They also have “tower pedestals”, which are 9″x9″ and either 18″ or 24″ long. For this project, I selected the 18″x18″ pedestal. To hold the radiators, I selected a “Triple 360” panel. This panel isn’t (as of when I write this) available as an option for the 18×18 Hyper Modular panels. So I wrote in and they said to order the “Big Window” option and mention in the order comments that I want the “Triple 360”.
These two options will come to about 205 USD plus shipping, but it’ll give you almost everything you need for the radiator box. All that’s left is just some mods and the components that’ll be going into it.
If you want to use quad-120mm radiators, you will be building an 18″x24″ radiator box. For that, you’ll want the 18″x24″ pedestal option and the “Triple Quad” panel, which can be ordered without having to make a special request. Perhaps I’ll show that in a different project. Everything else will be the same.
In its default configuration, shown above, this pedestal comes with two triple-120mm side panels opposite each other (quad-120mm side panels with the 24″ long pedestal”). This is a perfect setup for creating airflow across the chassis.
Before getting into that, let’s talk about the rest of what was involved here. I’ll go over the hardware I used in this and why I selected those parts. Your selections may vary. Full parts list will be at the bottom.
Water cooling hardware
Radiators: I went with XS-PC EX360 radiators. I already had two of them, pulled from the rack water cooling setup I had previously. These radiators are one of the least expensive triple-120mm radiators available and are a great value. While they don’t perform nearly as well as Hardware Labs and AlphaCool radiators, don’t overlook them if you’re wanting to save some money. They typically go for 60 USD each, which is a great price for a triple-120mm radiator.
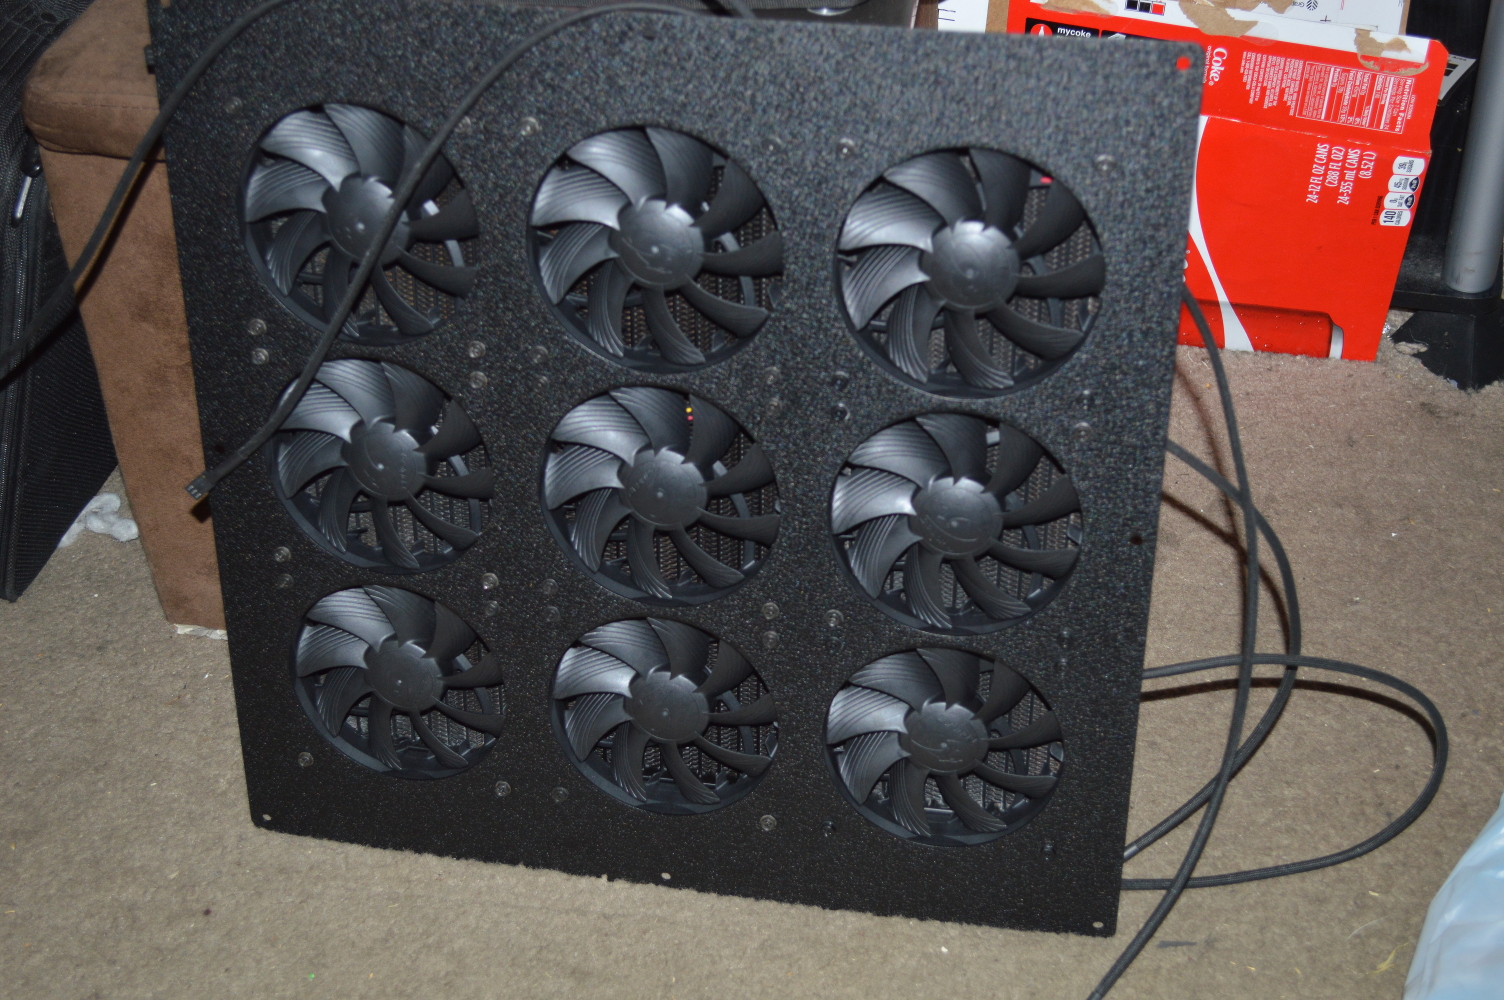
Radiator fans: I selected Cougar CF-V12HB fans for the radiators. They’re relatively quiet, virtually silent when undervolted, and inexpensive. They also compare well with Noctua fans in that they’re focus flow with about the same static pressure while costing less. Nine of them went into this build.
Case fans: Along with the radiator fans, I had three (3) Bitfenix Spectre Pro 120mm fans for airflow. Why only three? I’ll get to that in a little bit.
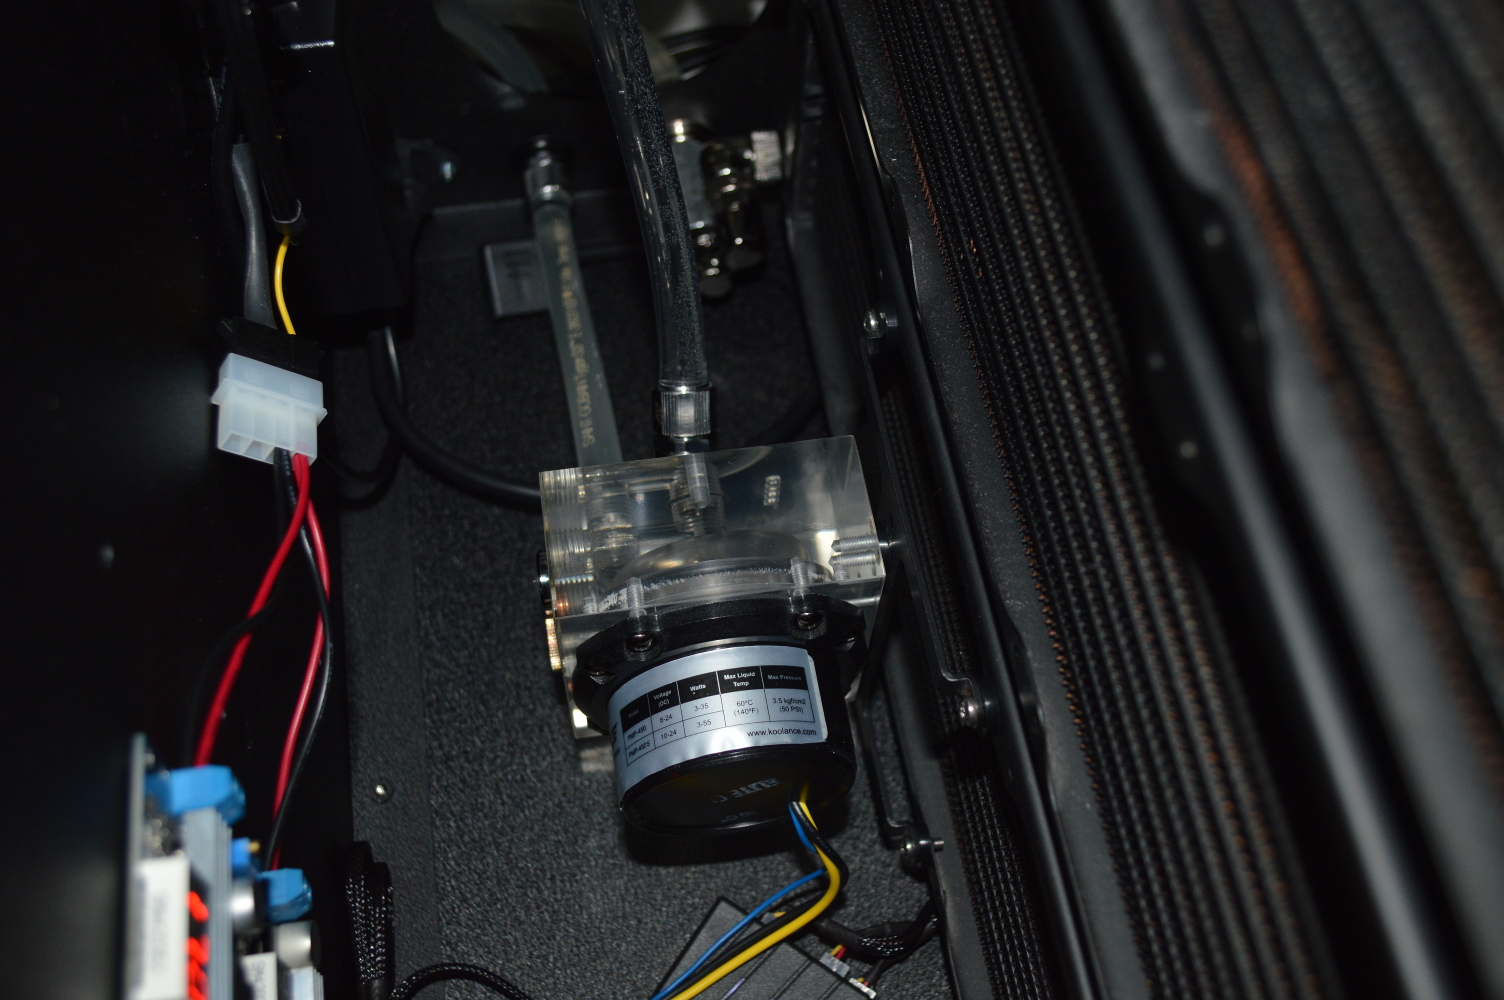
Pump/reservoir: I initially decided on a pump/reservoir combination for this: the PrimoChill CTR Phase 2, D5 enabled. And for the pump I went with the Koolance PMP-450S, which is a re-branded D5T Strong pump. But I couldn’t really mount this in any acceptable fashion, and the result was a persistent rattle that I couldn’t get rid of. So in the end I went with a separate reservoir, the Phobya Balance 150, and had the pump in an AlphaCool HF D5 pump top.
Accessorizing!
Okay so now that we’ve got those basics out of the way, let’s talk accessories!
Fittings: 90-degree fittings are necessary for connecting the radiators together. With the XS-PC radiators, I needed to use SLI fittings to connect them together due to how close the inlets and outlets are to the adjacent radiators. Even if the inlets and outlets were further apart, telescopic/SLI fittings are still a good, inexpensive option for this.
Tubing: The tubing is Tygon 3/8″x1/2″ flexible tubing. This means that I also used compression fittings, specifically Swiftech compression fittings. If you’re really up for it, you could use rigid tubing, but it’s gonna take some work if you want it to look good.
Bulkhead fittings: Because of supplier availability, I used EK bulkhead fittings on the radiator box and AlphaCool bulkhead fittings on the computer chassis. JayzTwoCents recently did a video where he discusses bulkhead fittings:
Quick Disconnects: In my opinion, there is really only one brand for this: Koolance. Specifically I used the QD3-MSG4 male fittings on the computer chassis, and QD3-FS10X13 female fittings for connecting to the tubing.
I need more power!
With all these fans comes a need to power everything. For the fans, I went with an NZXT Grid (not the Grid+ or Grid+ V2). It has ten (10) 3-pin connections and supports up to 30W (about 2.5A current at 12V). I used Phobya 3-way 3-pin fan splitters for each group of 3 fans, then plugged each of the splitters into the Grid.
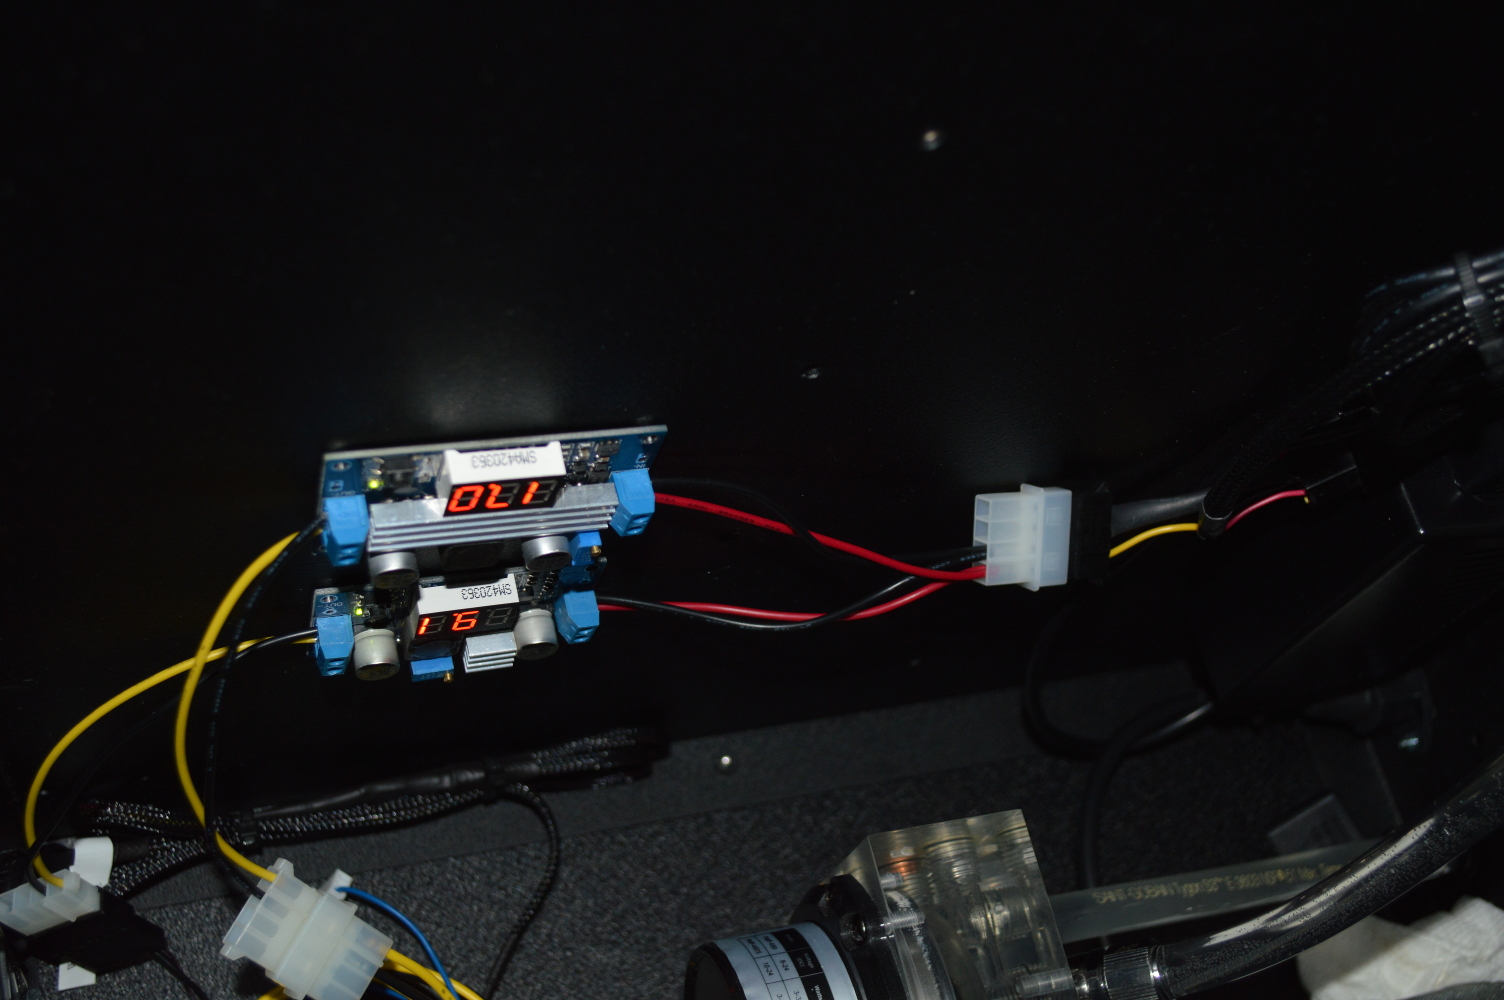
It also allowed me to set up the fans to be undervolted down to ~9V using a Drok LM2596 step down voltage regulator, making all the fans virtually inaudible while not sacrificing temperatures due to the radiator capacity. Additionally I used a Drok 090030 voltage boost adapter to get above 12V for the pump. How high did I take it? I’ll cover that detail later.
Figuring out how to power this whole thing was interesting, to say the least. I went with a 5A OKGEAR power brick with a 4-pin Molex connector. There are other options available, but this seemed the most convenient for the power requirements.
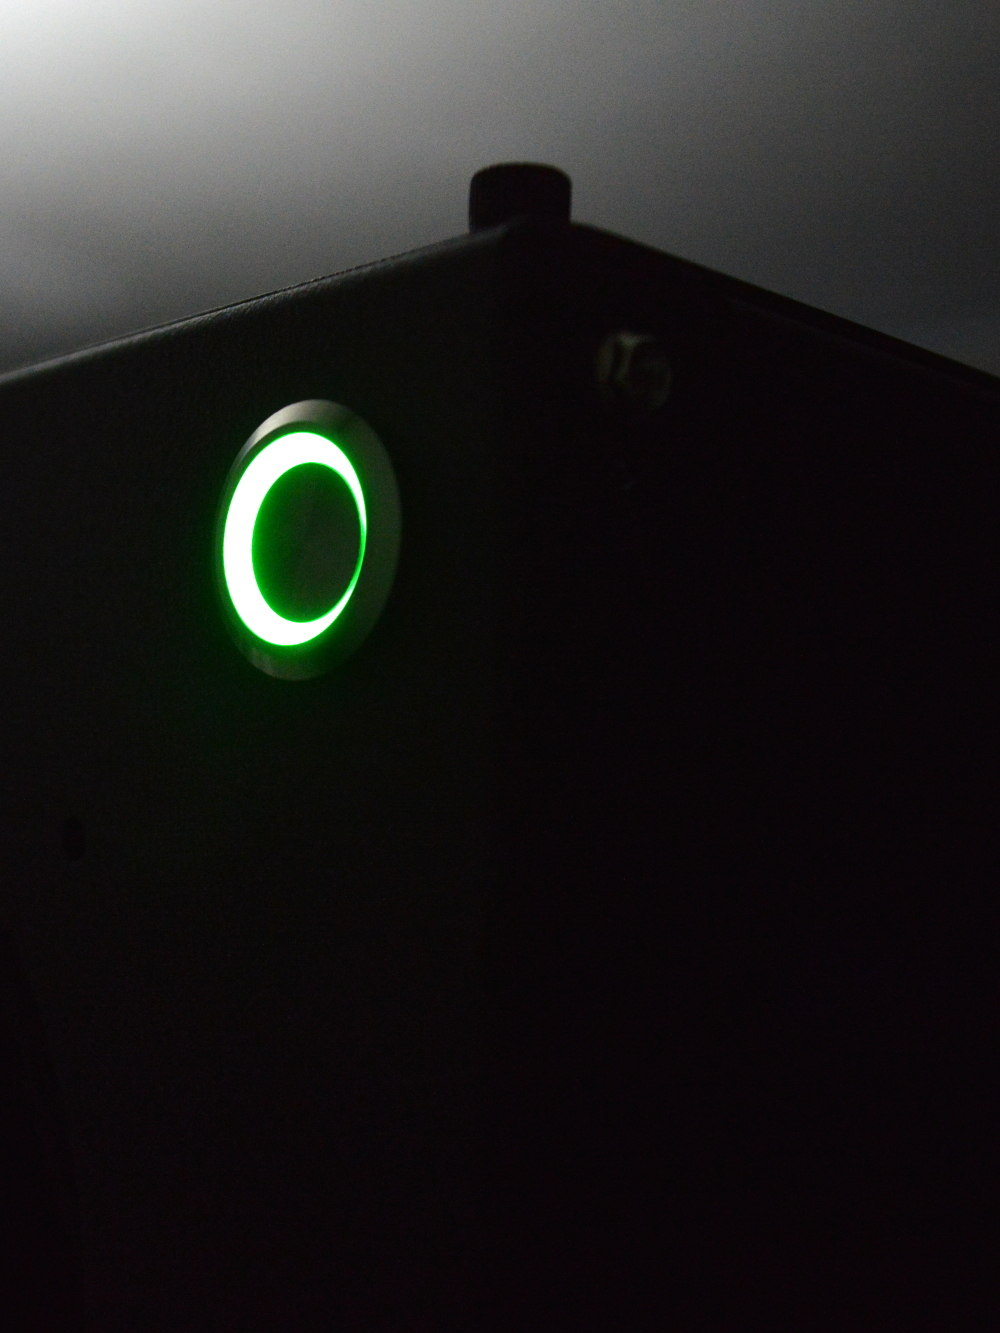
For the “on-off”, I am using a vandal-resistant switch from the EAO series 82, which is also rated at 5A. And to connect that switch up to the power brick, I’m using a switch adapter cable from Performance-PCs. If you use that combination, here’s how to wire it up since I’ve never received a wiring diagram with mine. Luckily I had a multimeter I could use to figure it out.
- cable marked + goes to NO or NC
- cable marked – goes to the – pin for the button’s LED
- one of the unmarked cables goes to the common (C) pin, and the other goes to the + pin for the LED.
Verify this with a multimeter before connecting everything just to be sure.
* * * * *
Building the chassis
Assembling the frame is pretty straightforward. I left the side panels off initially. And there’s one thing to point out about the supports: I didn’t install them in the same way shown on the product page (picture above), but instead like this:
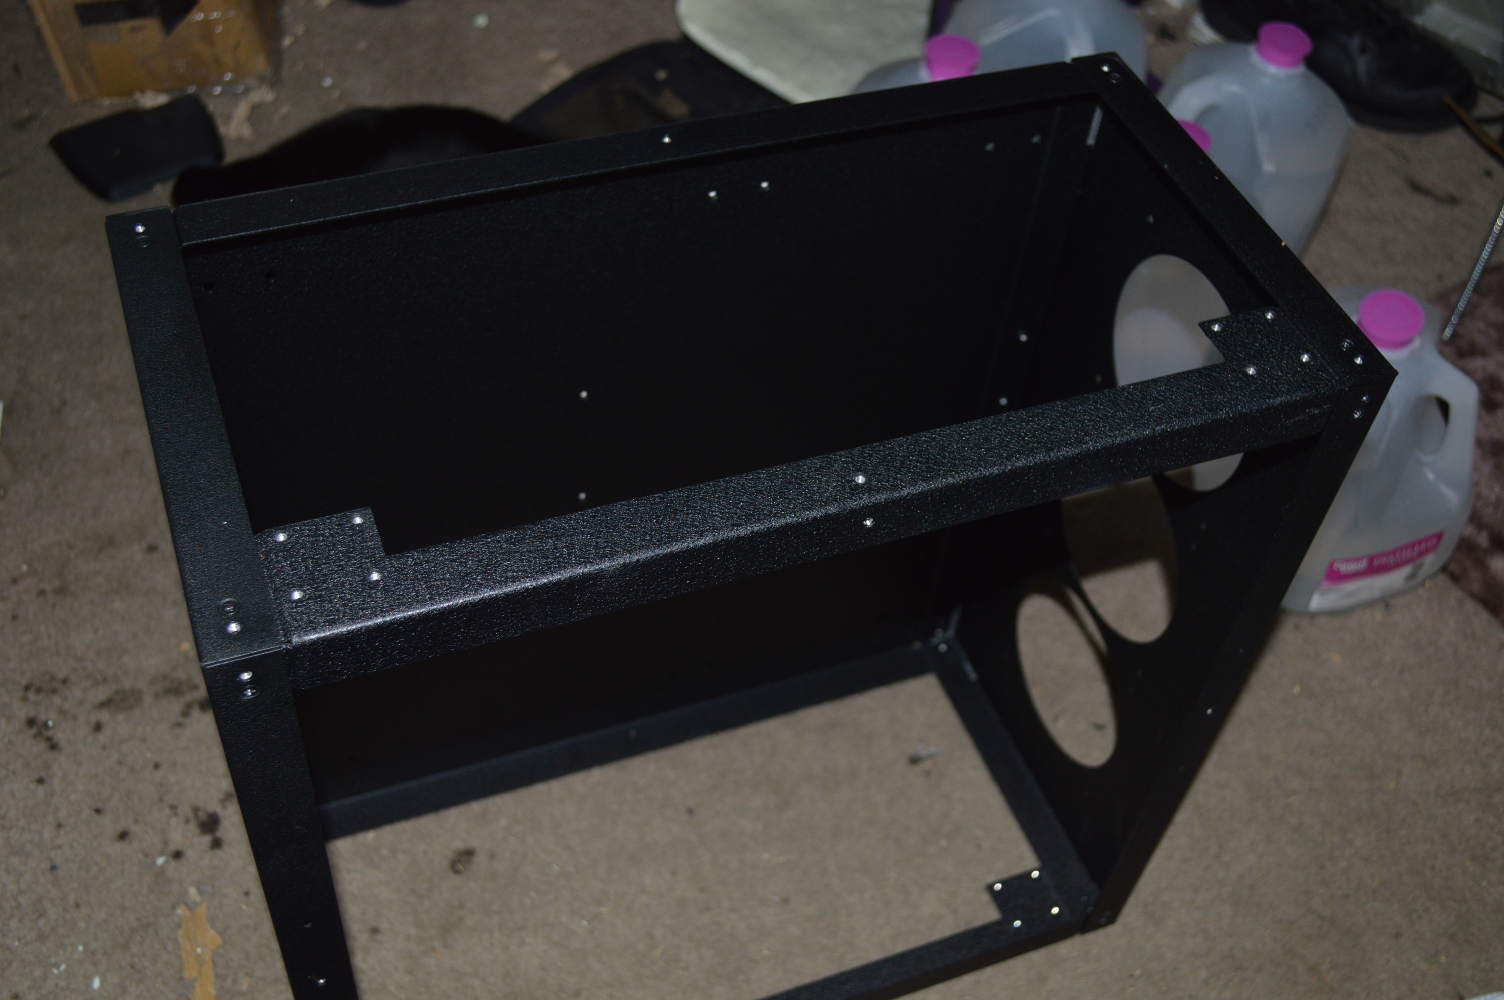
If installed like shown on the product page, it’ll interfere with the radiators and make it impossible to install the radiator panel.
Push or pull comes down to personal preference. There’s not much difference between either, especially when you’re talking low FPI radiators like the XS-PC EX360. I chose push for this build since the fans are focus flow. Initially I went without fan filters as well because I was considering several options, and as of the time I published this, I still haven’t installed any.
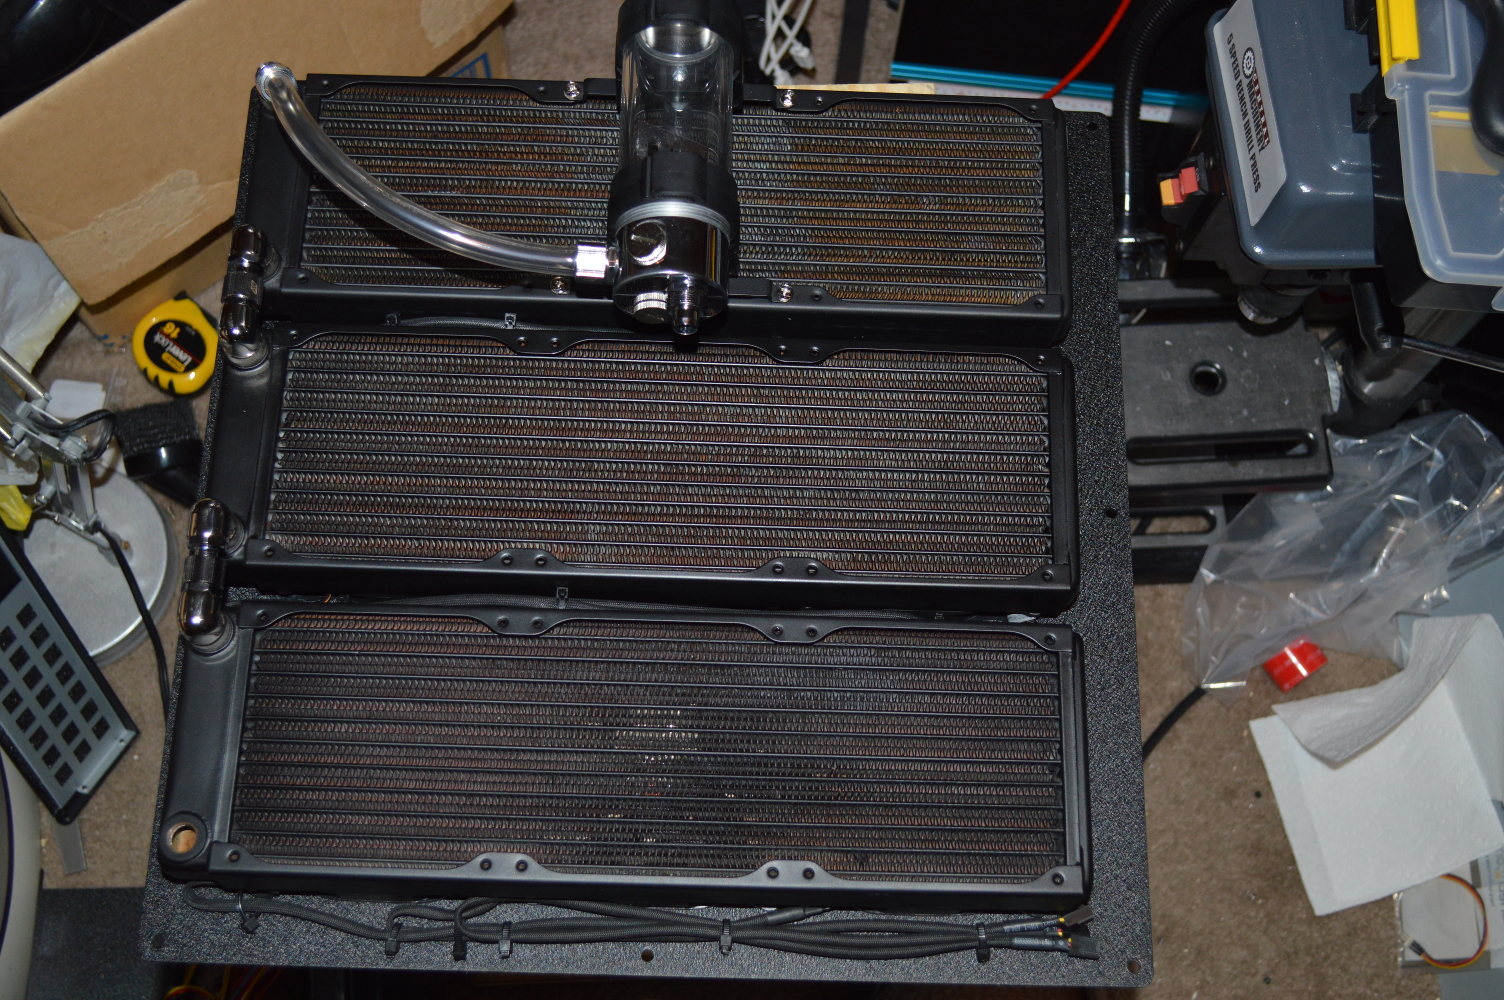
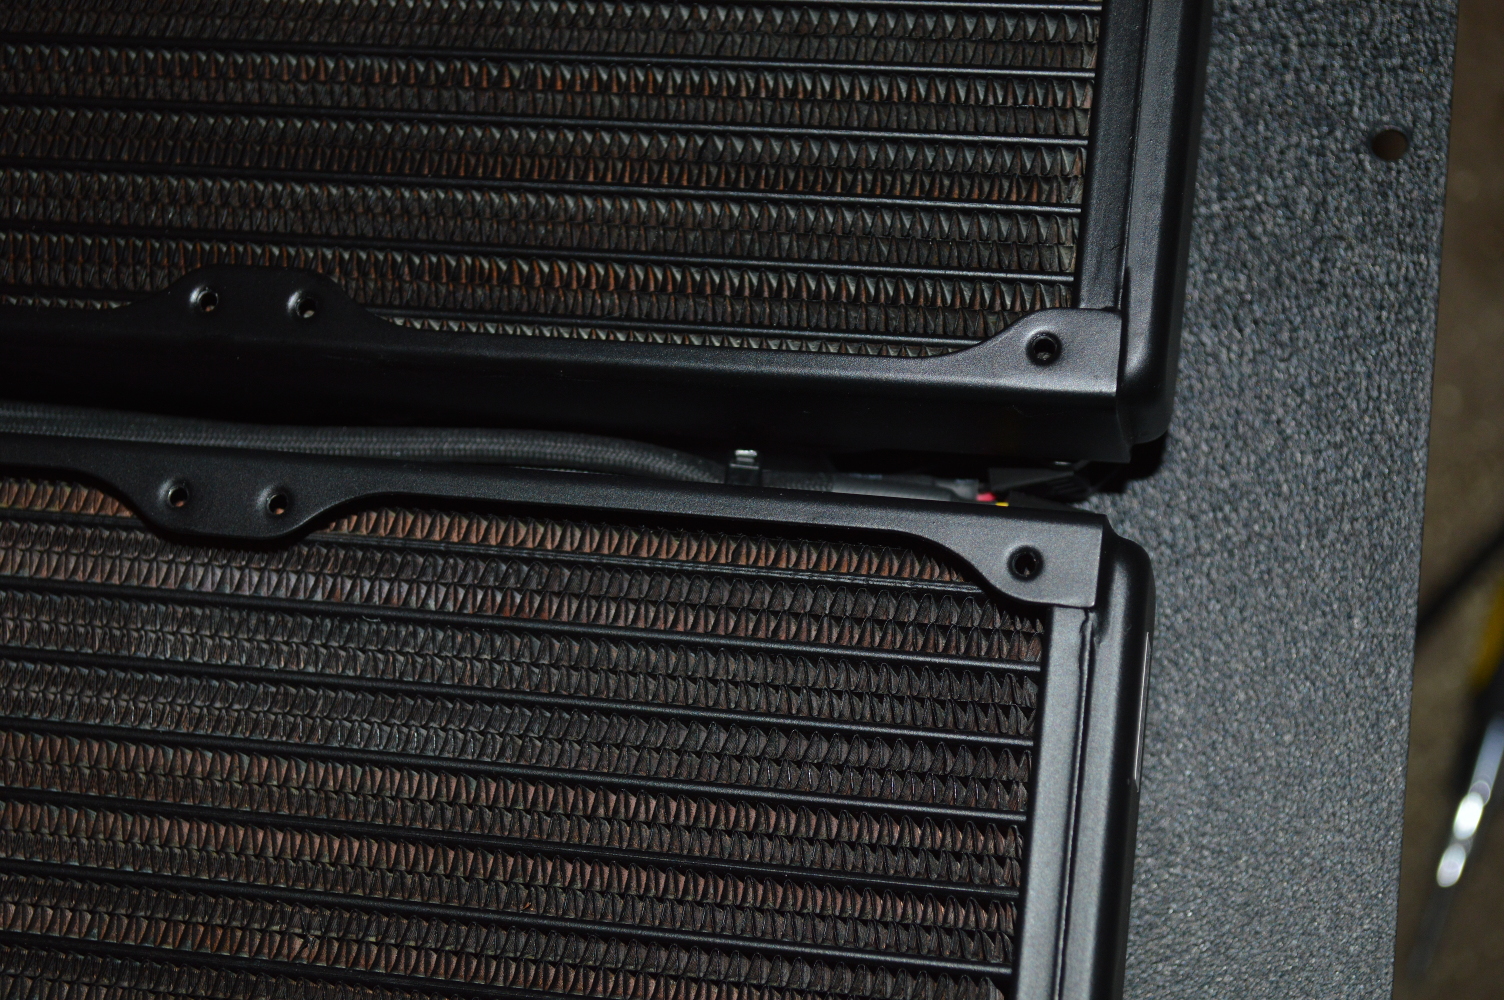
The radiators are also set to be aligned horizontal instead of vertical. This will make things a lot easier to bleed since the pump isn’t having to fight gravity to nearly the same degree, and it’ll give all the air a place to go. This means the flow through the radiators is moving from the lowest radiator to the top radiator back to the reservoir.
The fittings on the radiators will also be toward the back. Unfortunately there isn’t enough room to have case fans in the front and back, only the front or back depending on how the radiators are oriented. The front fans are more for ensuring the hot air from the radiators goes somewhere somewhat efficiently and aren’t necessary for cooling.
Here’s also where I really needed to focus on cable management. I actually made a couple passes at this, mainly because initially I wanted to cable manage the fans without having to buy anything else. Unfortunately it didn’t happen and I ended up ordering the Phobya 3-way 3-pin fan splitters I mentioned earlier.
And I believe I’ve found the best way to manage the fan cables to keep them out of the way. I lined up the power connectors on three fans and tied that with a zip tie. Then I went up the line and zip-tied the cables together until I had a small bundle I could tuck between the radiators.
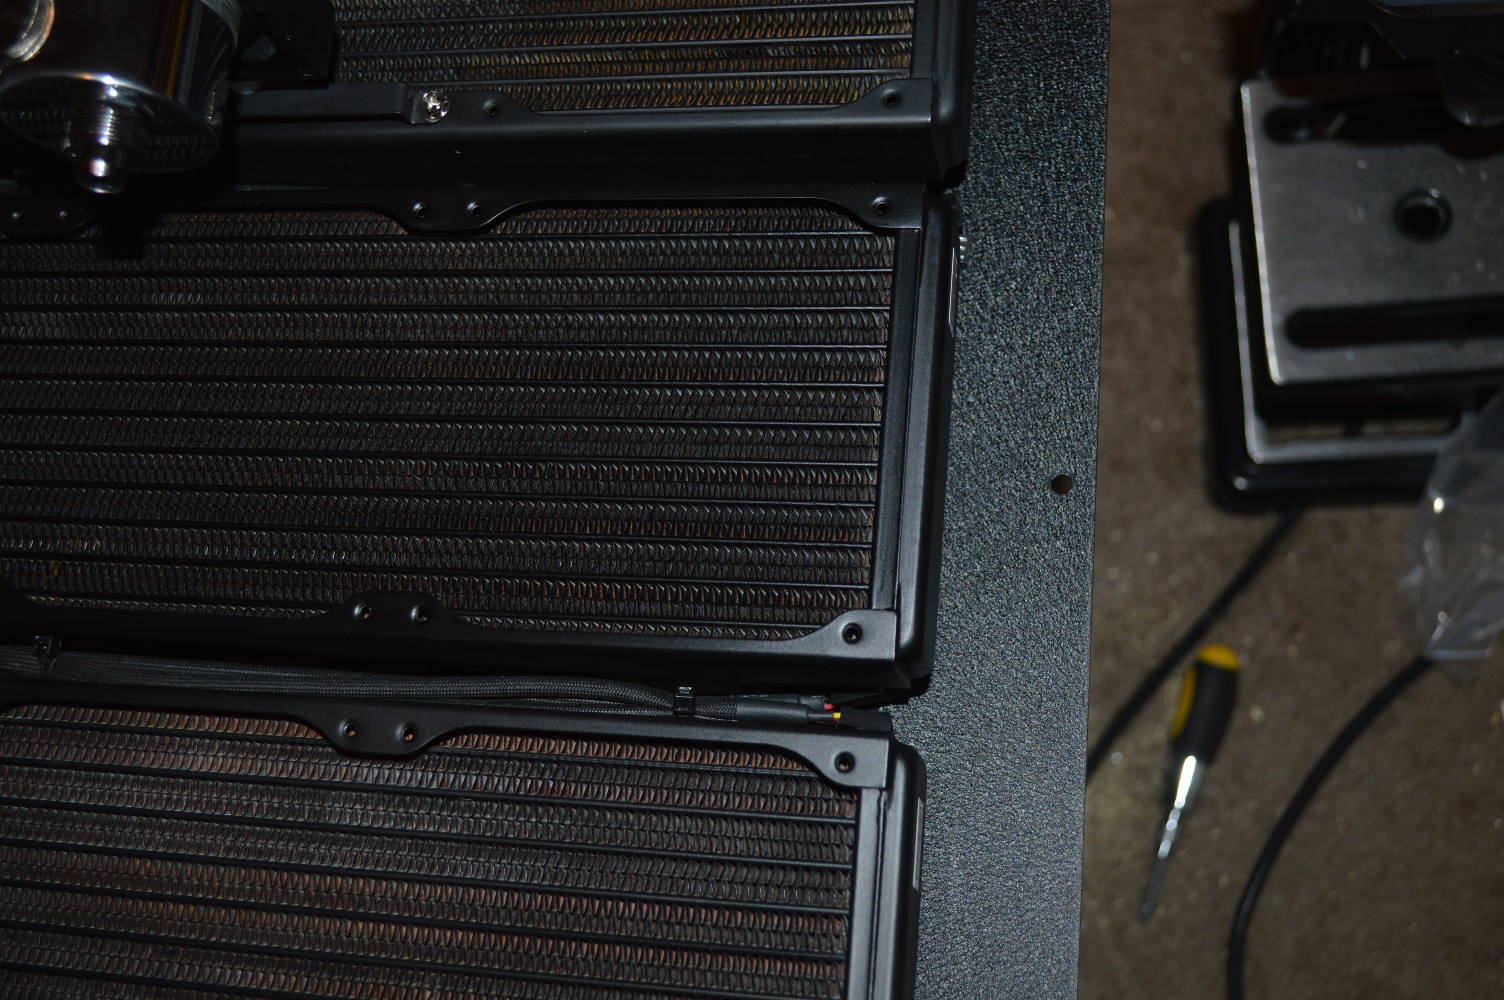
The 3-way splitters connected to the fans basically made it so it was one cable coming from each radiator. And as the cables for the fans were tucked between the radiators, they’re completely out of the way of any airflow and virtually out of sight.
Since the reservoir is bottom-fill, I needed to mount the reservoir on the top-most radiator to ensure the shortest run between the radiator and reservoir. I mounted the pump to the lowest radiator on a UN Z2 bracket with 00 (that’s double-ought) rubber washers for vibration isolation. I’ve used this isolation technique before with D5 pumps and it works very well.
The panel that would be the back panel were the only mods this chassis needed. Specifically I needed to drill two holes, 13/16″ diameter, to accommodate the bulkhead fittings. I also needed another 7/8″ hole to accommodate the vandal switch, along with a 40mmx23mm rectangular hole to accommodate a panel-mount AC power extension cable I was able to order from NCASE for about 10 USD (on their accessories category, select Power Cable and either “Left Angle or Right Angle”).
Now unfortunately the female connector on this cable is just a hair too short to remain firmly seated in the power brick I used, so I ended up having to also add a 12″ Tripp-Lite C13 to C14 extension cable.
Tubing routing and power
I would say the optimal flow direction would be from the pump to the outlet so the pump pushes the coolant to your system. On the return from the system, it should go into the bottom radiator (I have the radiators horizontal as mentioned earlier), and out the top radiator back to the reservoir.
Since I’m using an AC to 4-pin Molex power brick, I used a 4-pin Molex Y-splitter to push power to the voltage regulators, then from those to the pump and fans. Basically just snip each branch of the splitter somewhere in the middle, then strip the ends and attach to the regulators. Use a tool to remove the 5V connectors and its corresponding ground.
The regulators are attached to the side panel via 3M VHB double-sided tape. As the voltage converters have heatsinks over their regulators, I wanted these to be positioned so they’ll get airflow from the radiators. Plus it ensures the potentiometers on the regulators are easily accessible (requires a small flat-head screwdriver).
The AC power brick is also taped to the side panel with 3M VHB double-sided tape. Not because I needed airflow on it, but just so it’ll be out of the way.
Noise and Performance
The anti-vibration setup keeps the pump relatively silent despite being run at greater than 12V. The fans are barely audible sitting mere feet from the unit. The pump, I’m sure, is the only source of noise with this unit. And I don’t think there’s really anything I could’ve done differently to dampen the noise on this, and I don’t think there’s anything more I can do either, at least not without going outside the bounds of reason.
The system to which this was initially connected has these specifications:
- CPU: AMD FX-8350 at 4.0GHz with EK Supremacy EVO block
- Graphics cards: PNY GTX 770 4GB OC (x2 in SLI) with Watercool Heatkiller GTX 680 blocks
- Memory: 16GB DDR3-1600
- Mainboard: ASRock 990FX Extreme6
- Power supply: EVGA 1050 GS
- Storage: Samsung 850 EVO 500 GB M.2
- Case: Zalman Z12 Plus
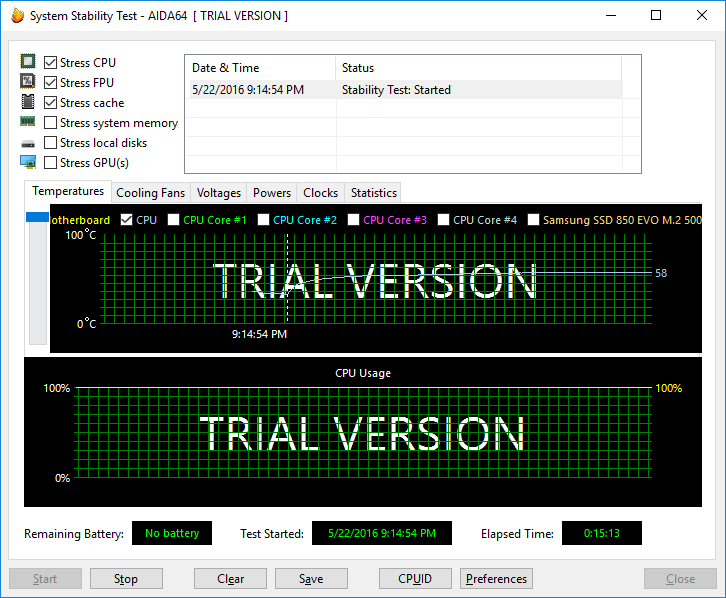
For initial testing, I used just plain distilled water to run the test. The pump was set to run at 17V and the fans were at 9V. I ran the System Stability Test in AIDA64 Extreme 5.70.3800 until the CPU temperature leveled out (about 15 minutes):
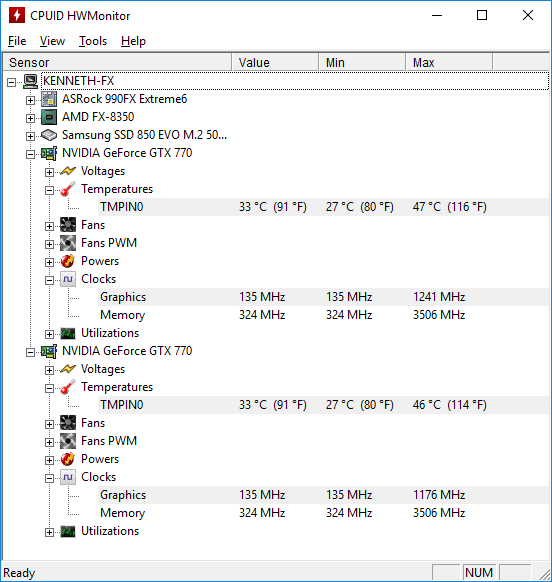
For the GPU test, I ran Heaven Benchmark with everything maxed out until the temperatures on the GPUs leveled out.
For the hell of it, I decided to take the cooling passive, just to see how well it’d work — plus I wanted to confirm that the pump was the source of noise in this setup.
Let’s just say that it’s not a good idea to leave this like that for long. After just one pass through of Heaven Benchmark’s scenes, the graphics cards topped out at 53C. I didn’t even try a CPU test. Plus the tubing, fittings, and radiators became noticeably warm to the touch.
* * * * *
Parts list:
| Chassis: | Mountain-Mods Pedestal with 18×18 “Triple 360” HyperModular side panel |
| Radiators: | XS-PC EX360 (x 3) |
| Fans: | Cougar CF-V12HB (x 9) Bitfenix Spectre Pro 120mm (x 3) |
| Pump: | Koolance PMP-450S, AlphaCool HF D5 clear acrylic top |
| Fittings: | EK 90-degree rotary fittings (x 6) EK 45-degree rotary fitting (x 1) Swiftech 3/8″x1/2″ compression fittings (x 8) Swiftech 20mm to 33mm SLI fittings (x 2) |
| Tubing: | Tygon 3/8″x1/2″ |
| Power: | OKGEAR PA-AD-UL-12V5A 4-pin Molex Y-split Phobya 3-pin to 3×3-pin fan splitter EAO series 82 vandal-resistant switch Performance-PCs pre-wired vandal switch cable assembly (with spades) NZXT Grid |
| Voltage regulators: | Drok LM2596 voltage step-down Drok 090030 voltage step-up |