- Beta Orionis
- Beta Orionis – Part II: New fans
- Beta Orionis – Part III
- Beta Orionis – Part IV
- Beta Orionis – Part V
- Beta Orionis – Part VI
- Beta Orionis – Part VII
- Beta Orionis – Part VIII: Delays
- Beta Orionis – Part IX
- Beta Orionis – Part X
- Beta Orionis – Part XI
- Beta Orionis – Part XII
- Beta Orionis – Part XIII
- Beta Orionis – Part XIV
- Beta Orionis – Part XV: Follow-up with Koolance blocks
- Beta Orionis – Part XVI: Overclocking the GPUs (or not)
- Beta Orionis – Part XVII: The AX860
- Beta Orionis – Part XVIII: New power supply and quieting things down
- Beta Orionis – Part XIX: Taking it outside
- Beta Orionis – Part XX: New loop
- Beta Orionis – Part XXI
- Beta Orionis – Part XXII
- Beta Orionis – Part XXIII
- Beta Orionis – Part XXIV
- Radiator box for PC water cooling
- Beta Orionis – Part XXV
- Corsair AX860: A retraction
- Mira
Nothing like a holiday weekend to continue a build, especially since I’ve been putting this off for a lot longer than I originally anticipated. Okay I didn’t get to it over the holiday weekend, but much, much later.
I started off with the Gigabyte mainboard as I could get the north and southbridge blocks installed to it without having to drain the loop. I also still wasn’t entirely sure how I was going to mount the pump and reservoir, so the mainboard was the best place to start.
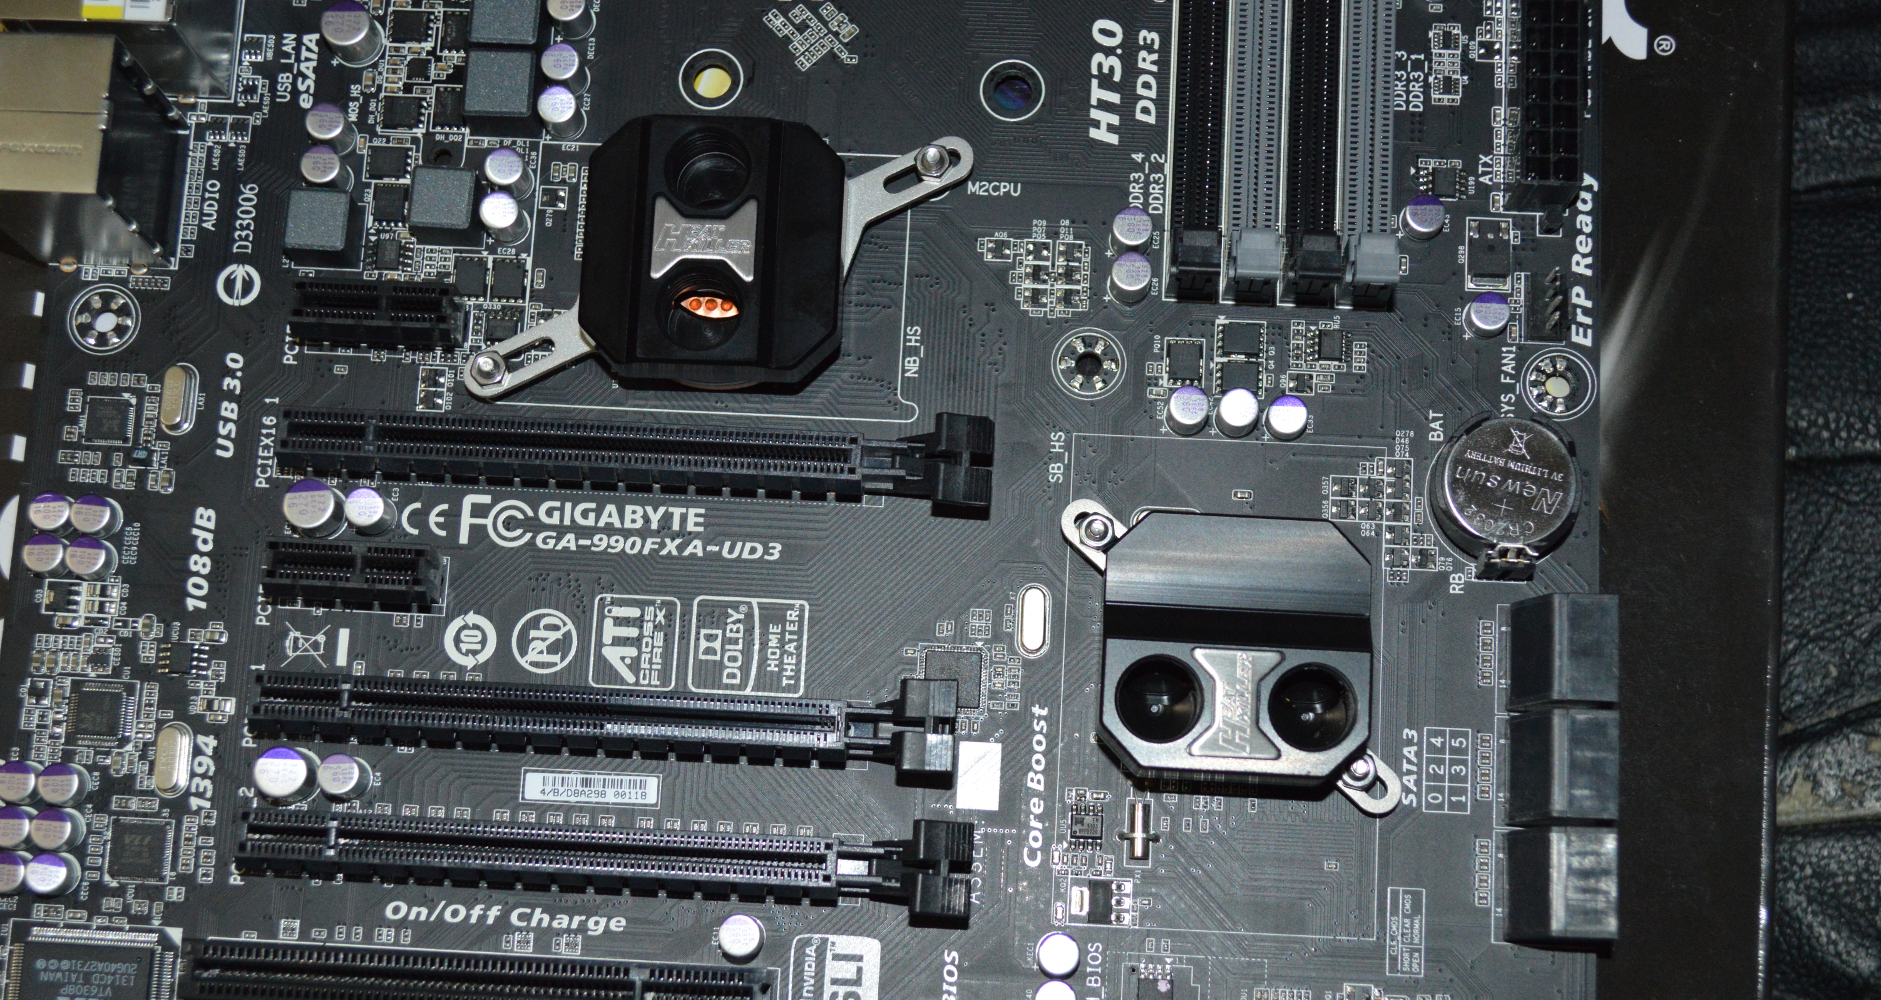
The northbridge and southbridge blocks went without difficulty. Only a couple minor adjustments to get them seated properly and attached without looking crooked. The VRM block, on the other hand, wasn’t so simple.
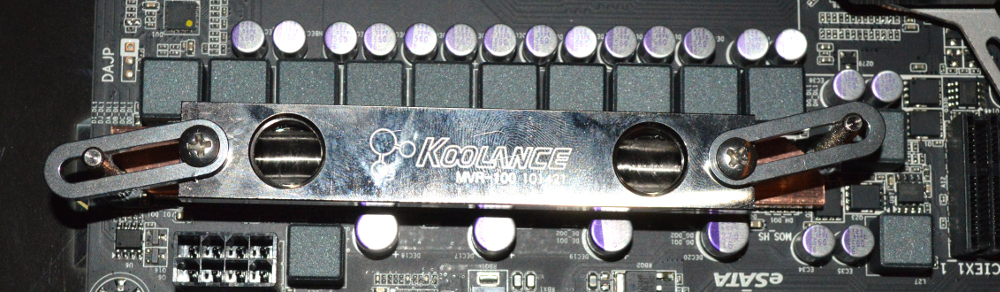
The Koolance 140mm plate is a little long for the VRMs on the board, but I was willing to modify the plate in order to get it seated. But it’s too wide. Drilling holes I was willing to do. Shaving off the side, though… But recall from a previous article that I ordered both the MVR-100 and MVR-40 VRM blocks. According to Koolance, the MVR-40 is actually 58mm long, while the MVR-100 is actually 100mm, so trying to use both together wouldn’t work.
But for the MVR-40, Koolance does sell a 67mm plate which is 13mm wide. Another MVR-40 plus two 67mm plates should net me a 134mm long VRM plate. The trouble with doing that is finding a way to keep the two blocks together and rigid in the middle. I’m hoping the gap between the blocks will be enough that I can use the included hold-down, and that said hold-down is strong enough that it’ll hold everything rigid.
Additionally I have some fittings that may assist on that matter. Some fittings are going to be relocated in the re-build of the loop, so I’ll take that into account. Basically what I have in mind is using two Koolance 90-degree fittings with a Bitspower mini D-plug (specifically item BP-WTP-C28), which is 15mm long, and another Swiftech 15mm extension fitting between them. If my math on the diagrams is correct, that should do the trick.
The Koolance order arrives
So after trying to figure all that out, I went ahead and ordered another MVR-40 and two of the 67mm plates direct from Koolance. It would be a few days before I could get to assembling them, though, due to a new arrival to the family. A kitten. A 6-week old (at the time we adopted her) kitten we call Alice. Anyway…
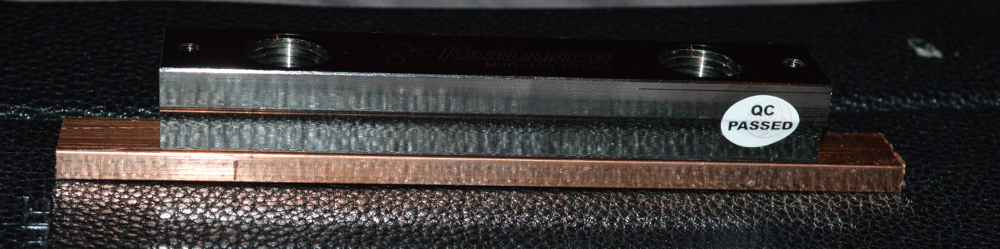
When I assembled the blocks with the expansion plates and did a test fit on the hardware, things were unfortunately not going to work as I’d hoped… because I didn’t properly measure things before placing orders.
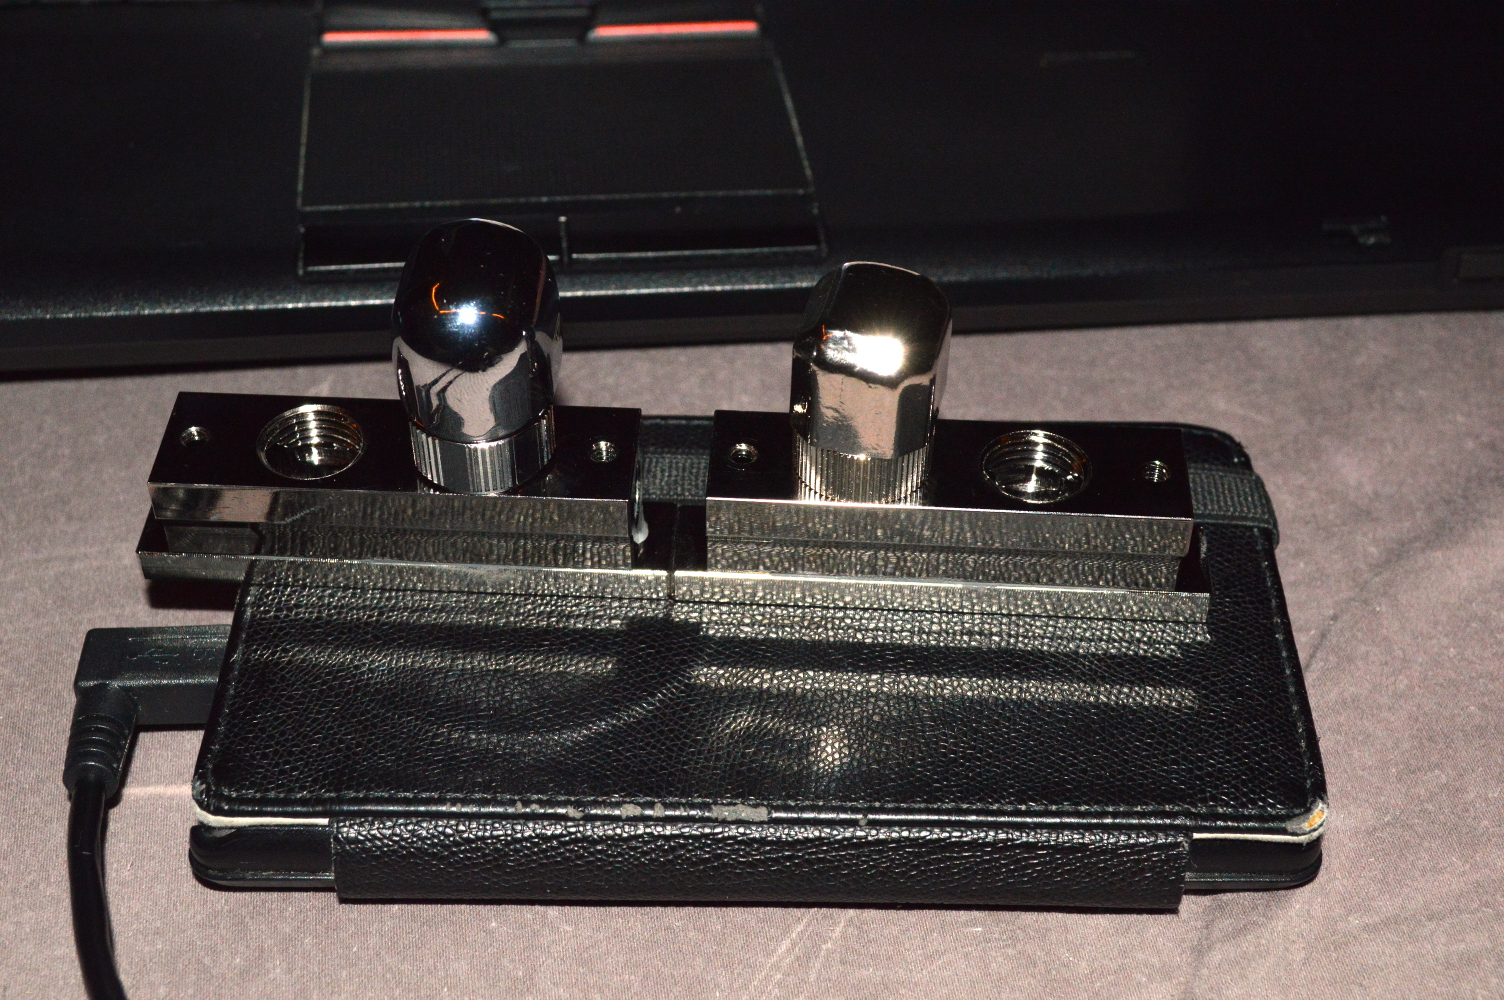
Recall from earlier that the MVR-40 is actually 58mm long. I ordered two of the 67mm extension plates for this. Well had I taken calipers to the VRMs before placing the order, I would’ve found that the span of the VRMs is about 122mm, with about 130mm between the mounting holes for the original heatsink. So two 67mm plates is too long. Two of the MVR-40s is two short by just a couple millimeters. But what’s about perfect — though it’ll look a little odd — is one MVR-40 with the 67mm plate and one without. The one without will also be about 5mm lower than the one with, so to line up fittings I’ll need a 5mm extension fitting.
There’s a secondary consideration. To keep the blocks together and rigid in the middle, I will need a way of attaching them together so it appears to be one rigid piece even though it isn’t, since I doubt the fittings will be able to do such. Rotary fittings typically have a little give to them. So there really isn’t a good option available on that front.
But I still have the MVR-100 laying around. Unfortunately it appears that Koolance never distributed a 120mm or 125mm plate for the MVR-100, so to do this and leave it looking clean, custom seems to be my only option.
Enter OnlineMetals.com, owned by ThyssenKrupp. From there I was able to purchase a few copper plates for a pretty small cost. With a shipping discount code, four plates about 3/16″ thick, 5″ long, and 1/2″ wide came to a hair over $15 (shipping by USPS Flat Rate). I’ve never purchased copper like this — it’s quite different when you’re able to pull copper tubing off the shelf at Home Depot, or buy copper fittings or other copper parts where the decision making process comes down to simply “what size?”
The main concern came down to alloy, and after doing a bit of reading online, I limited my choice to two: 101 and 110. The latter is “annealed”, meaning heat treated so it’s supposed to be easier to machine, while the former is near pure copper — read: ideal for water blocks. The concern is machining it. I only have a hand drill, but even if I had a press it may still not be ideal, simply because that’s the nature of machining metals.
From what I’ve read online, cobalt bits are supposed to provide the ideal situation. For such a thin distance — only 3/16″ thickness — a little lubricant (something like synthetic motor oil, possibly gun oil) plus the cobalt bit should allow me to cut through the 110 and possibly even the 101. I ordered two of each to allow me to try drilling one of them myself, and taking the other to a machining shop if necessary. The bit I’ll need is a 3/16″ bit to allow clearance for a #6-32 screw. I have a countersink bit to follow the original, but I’m not sure how well it’ll work on copper, and the holes will need to be countersunk.
Drilling copper
Nothing like going a little ghetto to water cool a system. Sometimes this is needed to get all of what you want. For example if you want to full water cool a non-reference graphics card, you might need to do something like this — do a universal GPU block on the processor, and MVR-40s or an MVR-100 with heat transfer plates, custom if needed, on the other heat generating components. Use barbs with thin vinyl tubing between them to keep it light while making it look a little freakish…
That gives me an idea for the future.
First order of business after getting the copper in was checking fit. 1/2″ is just under 13mm, but virtually any material you order online for industrial supply is going to have a tolerance to the measurement they quote. So it’s always a good idea to check fits before you start doing anything to it. And while the width was about spot on for what I wanted, the length was a little bit of a concern, but I knew it would be going in.
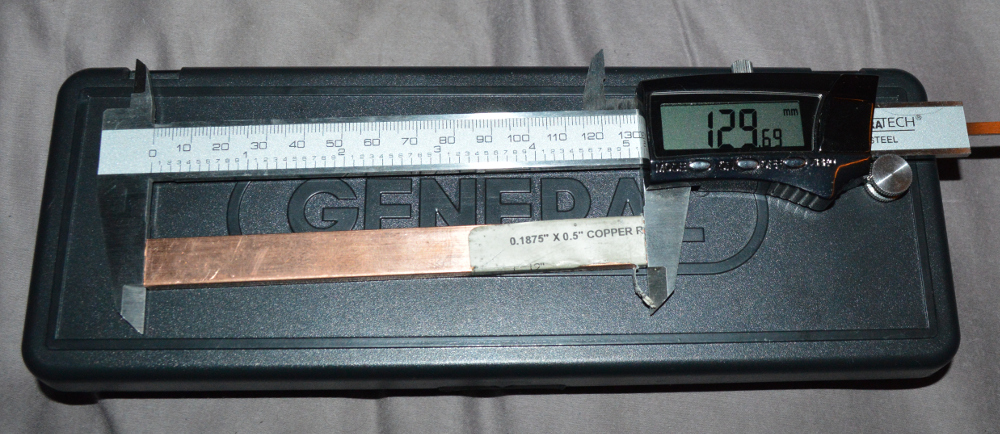
I ordered the pieces to be a 5″ long. What arrived were six copper plates, three of each kind (instead of two, but hey, more room for error), but of slightly varying lengths. Getting something that fit was going to require milling corners in some fashion. Why didn’t I set the length specifically to what I knew would fit? Because it’s a difference of under 1/10th of an inch, and they have a 1/8th tolerance on their lengths. I’d be risking getting pieces that were too short in that instance. The shortest piece was only slightly too long, it measured at shy of 130mm, so it’s either drill the corners or see if I can grind it down. If it was 127mm, or about 5″ exactly, then it likely would’ve been the perfect length. It’s a risk.
According to Koolance’s diagram for the MVR-100, the holes are to be spaced 92mm apart, or 46mm off-center for each. If push comes to shove, I can do the same thing Koolance already has with the 140mm heat transfer plate and drill a couple holes toward each edge of the copper plate and tap them for #6-32.
The cobalt bit came from Home Depot — 3/16″ cobalt bit by Ridgid. The hand drill is a Black and Decker cordless drill, and I used a standard V-Drillguide for guiding the bit and a C-clamp for holding it together. The holes on the first piece weren’t completely centered and straight down the middle, but I got close enough. To countersink the screws I just used a step bit. The bit started out at 1/4″, so the tapered end was perfect for that.
And as I forgot to charge the drill before trying this, I had only enough juice to get one hole countersunk and the second barely sunk enough.
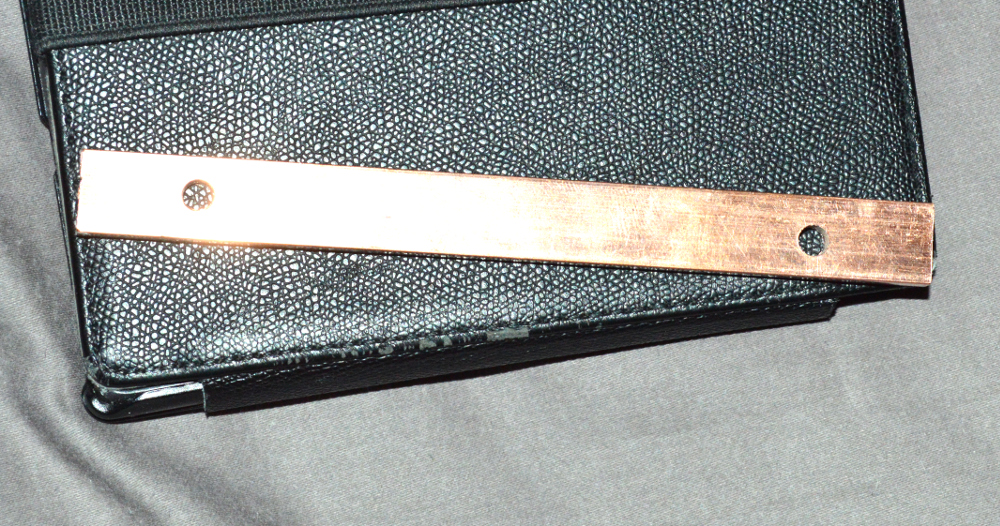
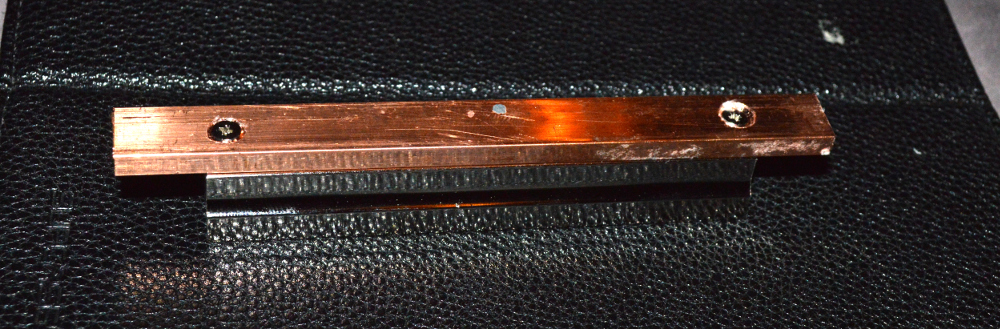
As you can see a test fit followed. The “tolerance” in the screw holes allowed the plate to still line up straight. Even though there will be thermal pads between this and the VRMs, I decided to sink the hole a little better after letting the drill charge.
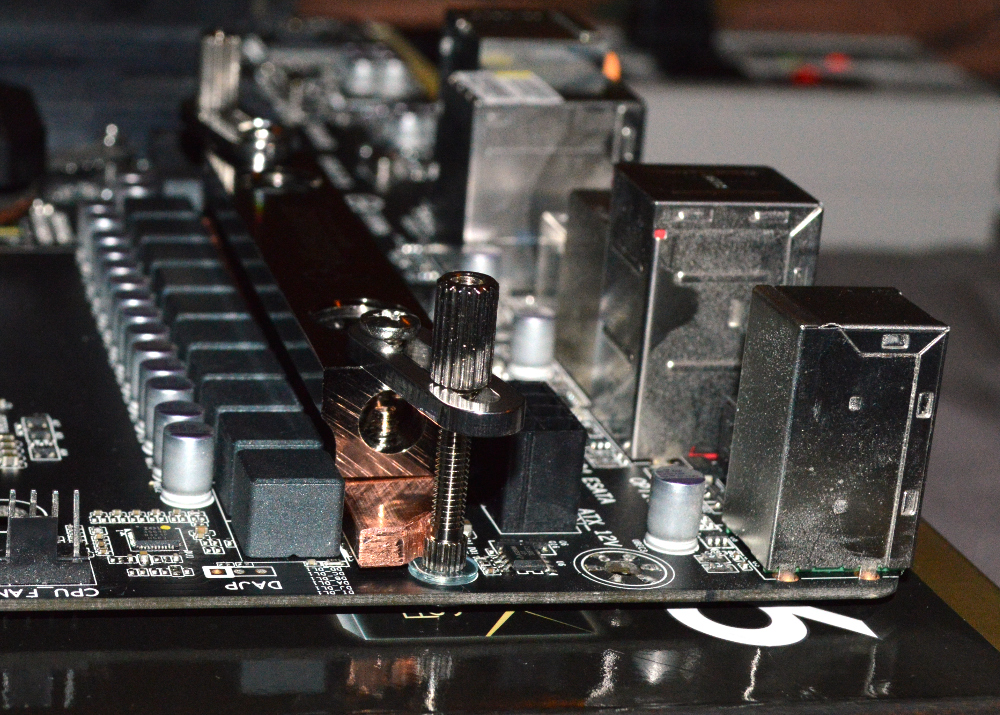
I used a rasp to shave down the corners. The drill bit didn’t want to hold still even with the guide over it, so I just took the file to it. Took a bit of time — and a sore back — but I managed to get the corners knocked down enough to get it to fit. This also preserved as much of the copper’s mass as possible, which will aid a little bit in cooling — not much, but it’ll still help.
An alternative to this would’ve been to order the plates longer — probably closer to 6″ instead of 5″ — and drill and tap holes to secure it through the mainboard. But to do that I would’ve needed a press to ensure I could drill properly without worrying about the bit slipping since the mounting hole would’ve been off to the side closer to the edge instead of centered. But then if I had a press, I could’ve drilled off the ends on this plate as well instead of using a rasp and a ton of elbow grease.
With a confirmed fit, I cleaned the copper plate, applied the thermal compound, and mounted the block to the mainboard.